System Center Data Protection Manager is a product of the System Center stack. As I discussed in the Overview of System center, System center is a product set introduced by Microsoft to manage medium to large IT infrastructures. DPM play the role of Microsoft enterprise backup solution.
DPM 2012 R2 delivers unified data protection for file server, Hyper-V, Clients, System State, SQL servers, Exchange, share point and many other systems. Also it is providing continues data protection while monitoring the changes of the workload and continually syncing with backup media. With DPM you can store your backups in Disks, Tape drives or even in Azure storage.
Features of DPM 2012 R2
- Integrate and interoperate with the System Center family.
Been a product of system center, DPM can be easily integrate with others. Using System Center Orchestrator, DPM tasks can be scripted as activities and automate them using runbooks. And with Service manager DPM alerts can turn in to service tickets and assign to backup administrators. DPM can be used with System center virtual machine manager to backup VM’s, restore them and create restore points. Also DPM work with other products like Configuration Manager, System Center Adviser and Operation manager.
- Monitor the backup jobs from Operations manager
DPM backup jobs can be monitored using SCOM. Using DPM management pack, you can monitor the backup jobs, create recovery points, stop start backup jobs, and get recommendations. It’s a one console to do monitoring as well as management.
- Linux support
With DPM 2012R2 online linux machines can be backed up when they are guests of Hyper-V hosts.
- Azure support
With DPM 2012R2, DPM on premise data can be backup to Azure backup service. This is rather easier than managing tape libraries. And on demand you can recover the data using DPM.
- Hyper-V support
DPM can backup VM’s using Host level or guest level. In host level, DPM agent is install in the Hyper-V host or cluster and can use to backup and recovery of entire VM, specific files, folder, volumes or hard disks. With guest level, DPM agent need to install in VM and it’s good to back up a specific workload like SQL database.
Design considerations
- DPM can be run on a Virtual Machine, but following key areas need to be considered. Tape drive support, Hyper-V doesn’t provide tape drive emulation. So if you are using DPM in VM Microsoft recommend to use iSCSI attached tape drive and use a dedicated physical NIC for tape drive connectivity.
- Storage pool also need to be planned if you are Virtualizing the DPM, following Disk formats can be used.VHD disk that meet the configuration requirements listed in Installing DPM in a virtual environment.
Passthrough disk with host direct attached storage (DAS)
Pass-through iSCSI LUN attached to a host.
Passthrough Fibre Channel LUN attached to a host.
iSCSI target LUN connected directly to the DPM virtual machine.
Fibre Channel LUN connected to the DPM virtual machine using a Windows Server 2012 Virtual Fiber Channel (VFC) controller.ed.
- For DPM storage pool, Microsoft recommend to have minimum of 1.5 times the size of the protected data. And 2 to 3 size of storage for best practices.
https://technet.microsoft.com/en-us/library/hh758176.aspx
- Storage calculator for DPM
https://www.microsoft.com/en-us/download/details.aspx?id=24375
- Compatible tape libraries for DPM
https://technet.microsoft.com/en-us/library/hh916523.aspx
For this installation, I’m coexisting the SQL server and DPM server in the same VM. Windows server 2012R2 is installed. Database engine service, Reporting service and management tools need to be installed with SQL. Go to the following link for the supported configurations.
https://technet.microsoft.com/en-us/library/jj651645.aspx
Prerequisites
Installing SQL for DPM
- Login to the DPM server using DPMAdmin, make sure both SQLAdmin and DPMAdmin accounts are added to the Local administrator group
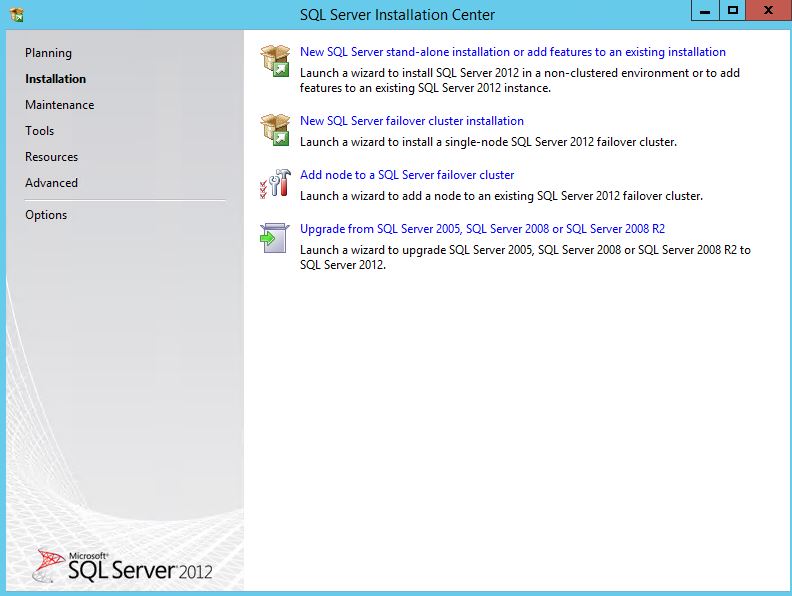
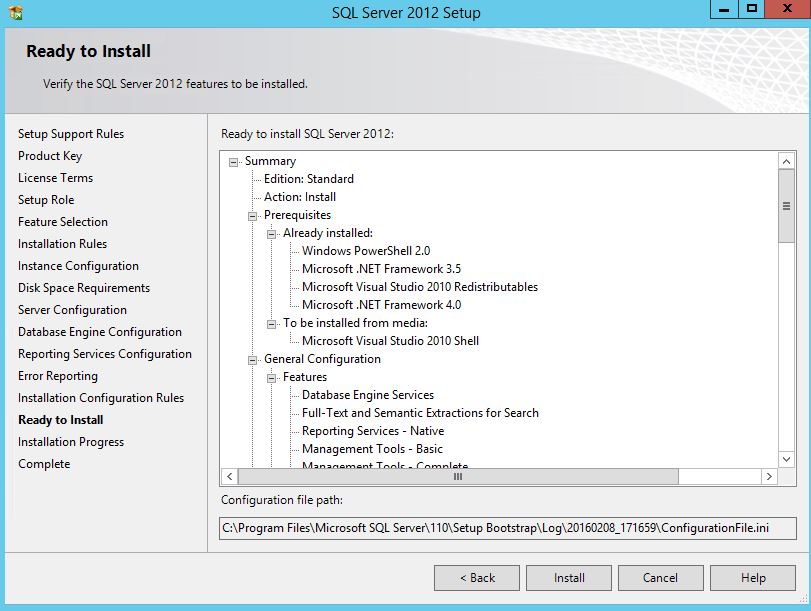
- Load the installation media of SQL 2012 SP1 and run the setup
- Go to installation and select Stand-alone Installation
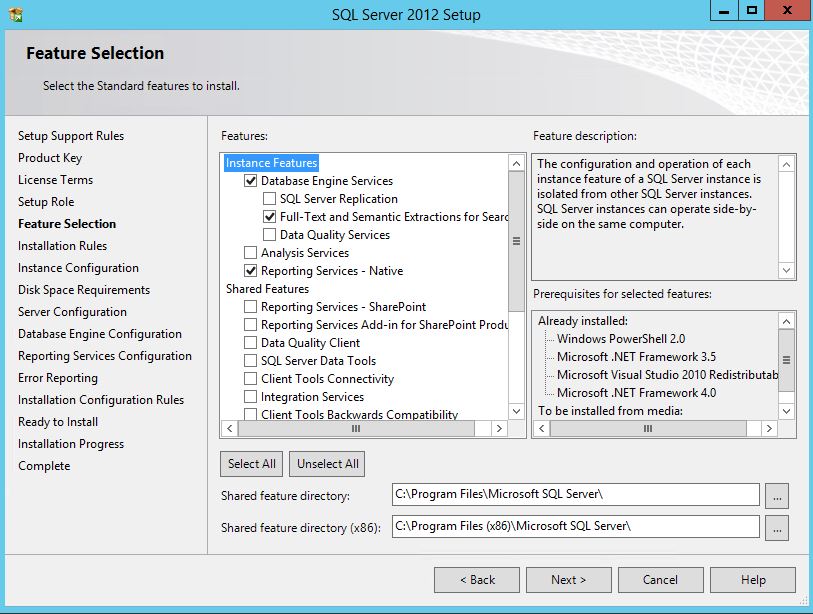
- Continue the setup until the SQL feature selection, in the feature selection select Database Engine services, Full-Text and Semantic, Reporting Services and Management tools
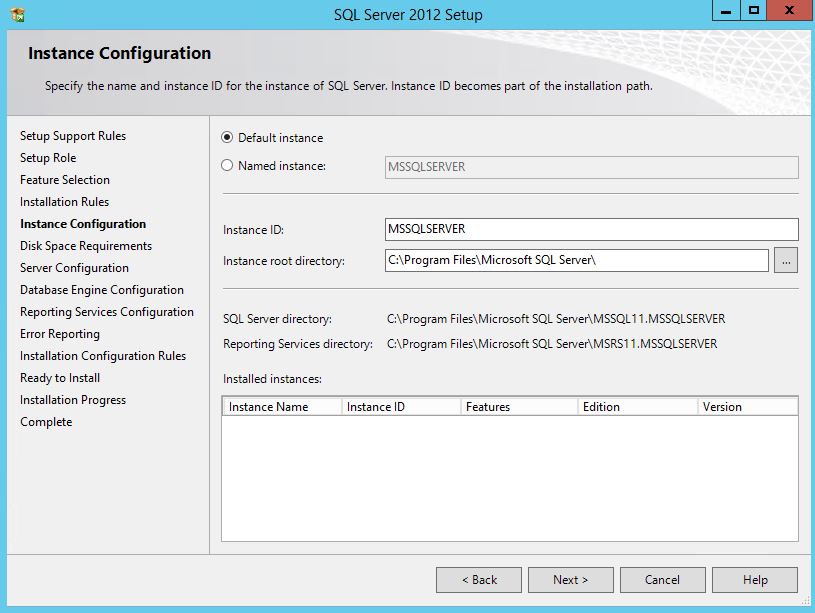
- Click next and use the default instance
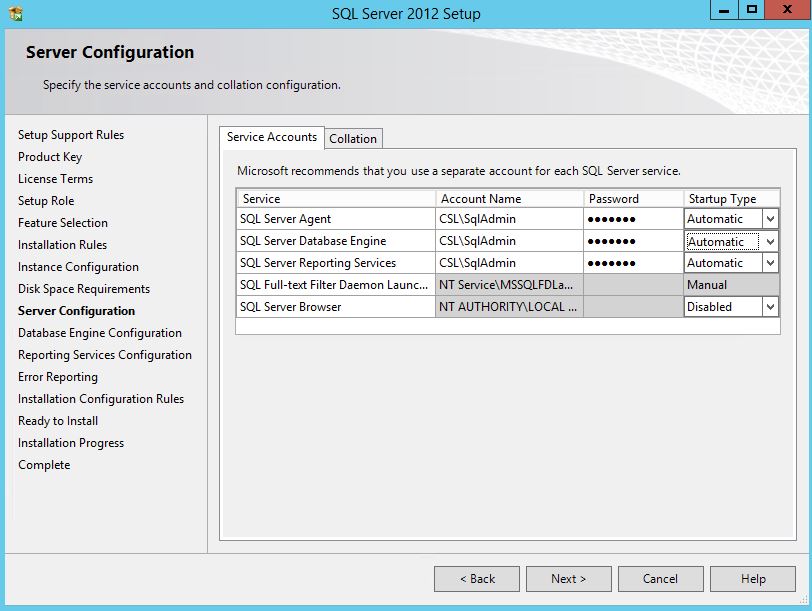
- In the SQL Service accounts page, set the SQLAdmin account to SQL Server Agent, SQL Server Database Engine, and SQL Server Reporting Services and set the startup type as Automatic.
- In authentication configurations add DPMAdmin Group, Current User and SQLAdmin

- Select all default configurations and Install.

Installing DPM 2012R2
Follow the below steps to install DPM 2012R2, setup wizard will install all the prerequisites as part of the Installation process.
- Login to the DPM server as the DPMAdmin and load the installation media.
- Run Setup and select Install Data Protection Manager
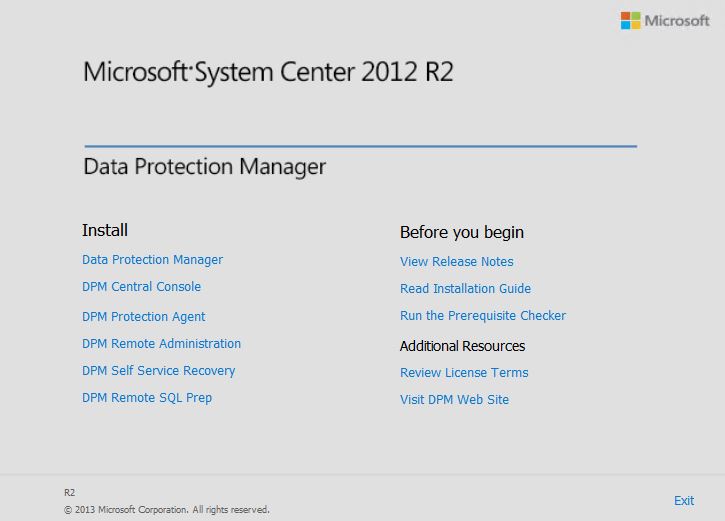
- Accept the license agreement
- On the setup wizard click next in the Welcome page
- In the prerequisites page, fill the SQL Database information. For this lab I’m using a SQL server collocated with the DPM. So the server name will be enough. Click Check and Install
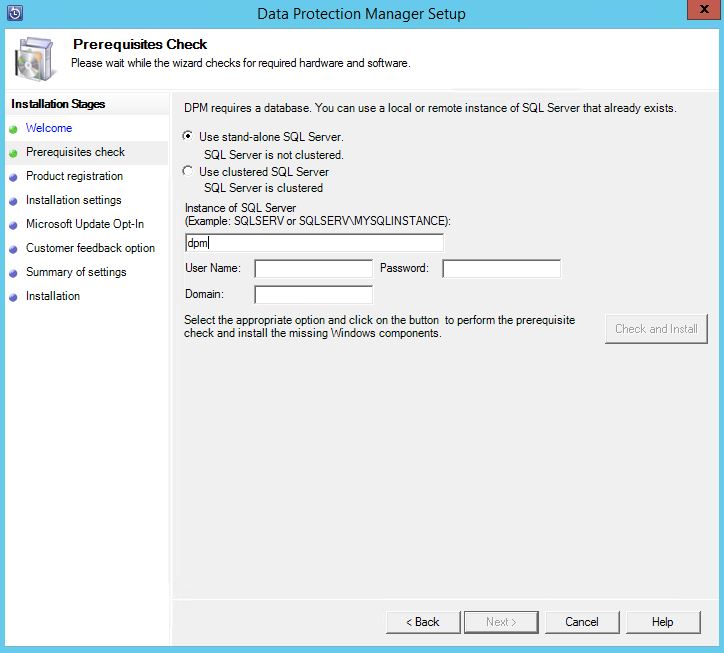
- Sometimes Wizard may ask for a restart and start over, this may due to installing some prerequisites.
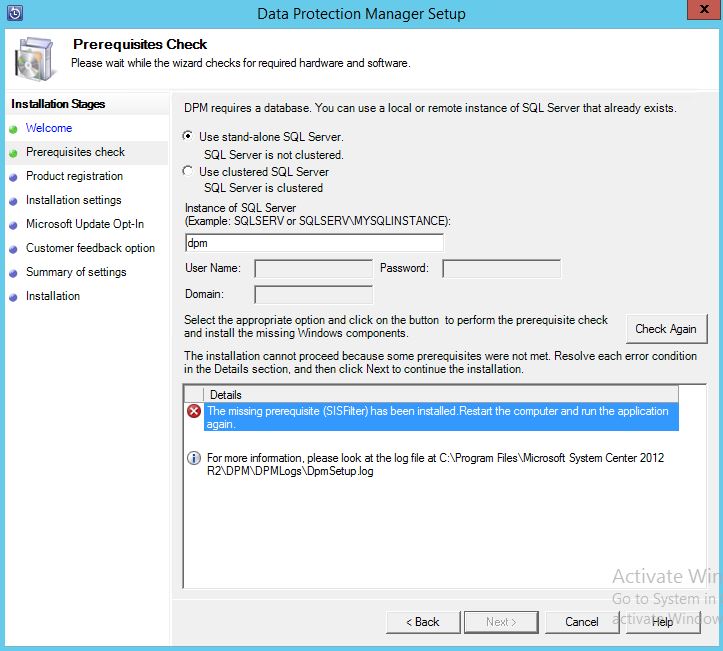
- Click next after Prerequisites completed.
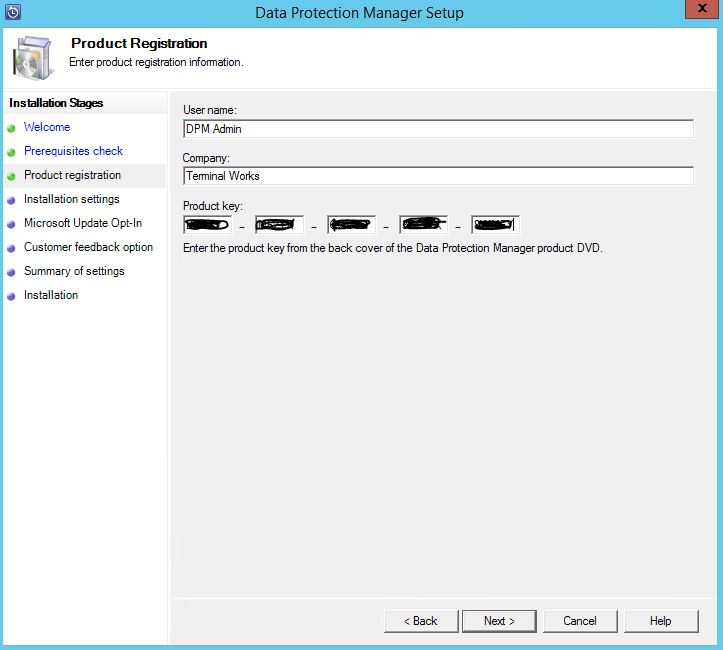
- Provide the license information and installation location
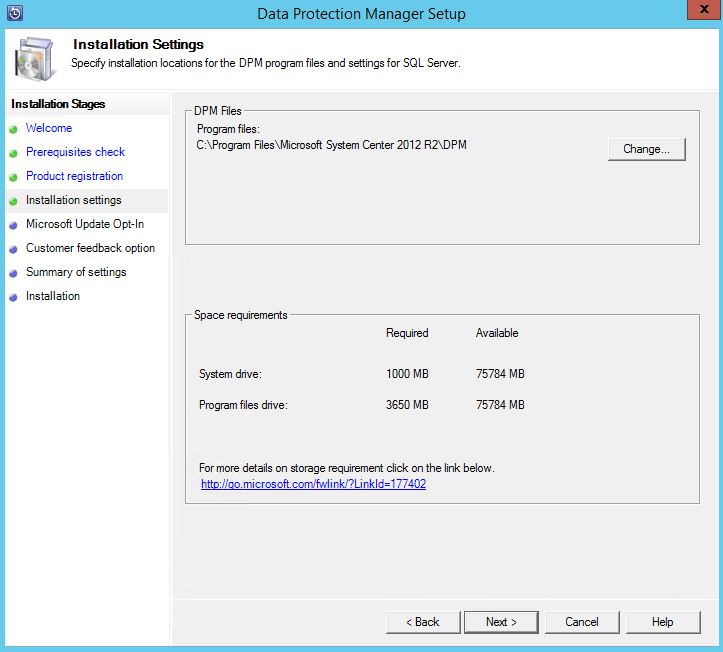
- Click next until the installation and run the Install
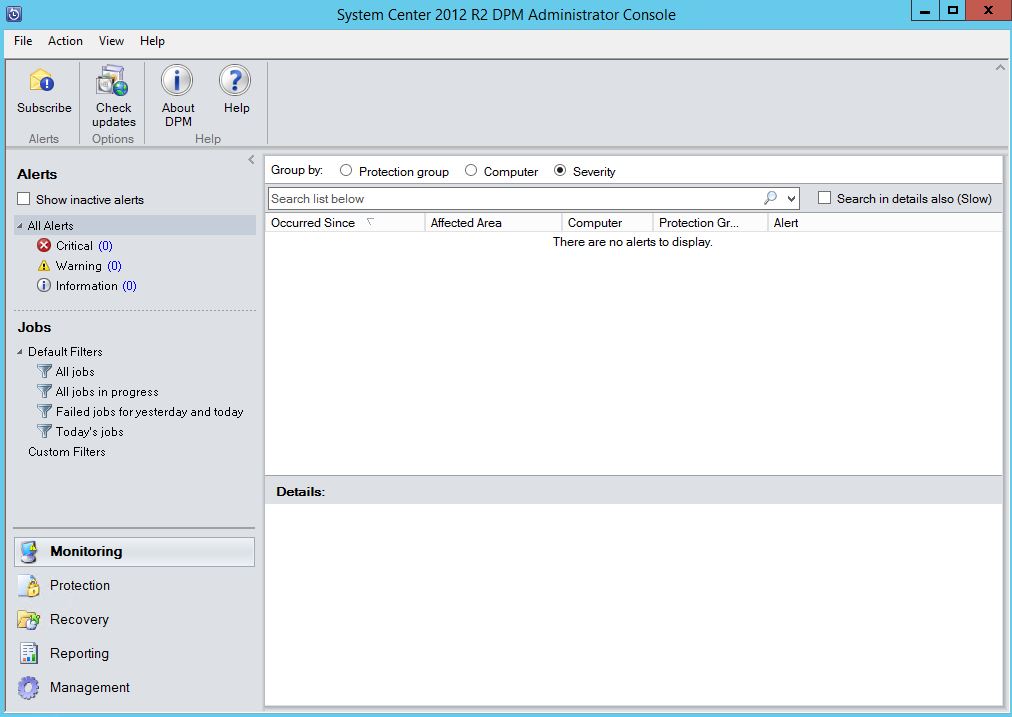
- After finish the installation you can open the DPM Console,
From next posts I will cover, how to add disks, configure tape drives and create protection groups for DPM.
Hope this is useful
Asitha De Silva
