From one of my previous post’s I have discussed the Overview of Hyper-V 2012R2 and how to install the Hyper-V role on a windows server 2012 R2 Host. From this article I’m going to describe how to do some basic operations using Hyper-V console. Following are key areas.
- Creating virtual networks
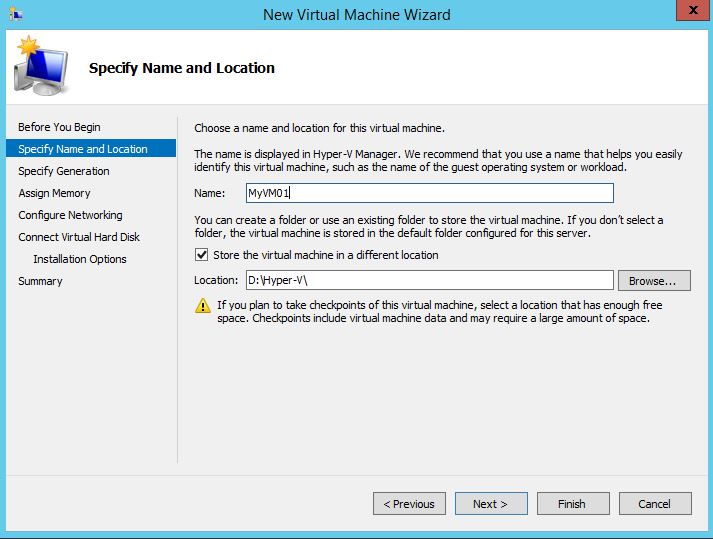
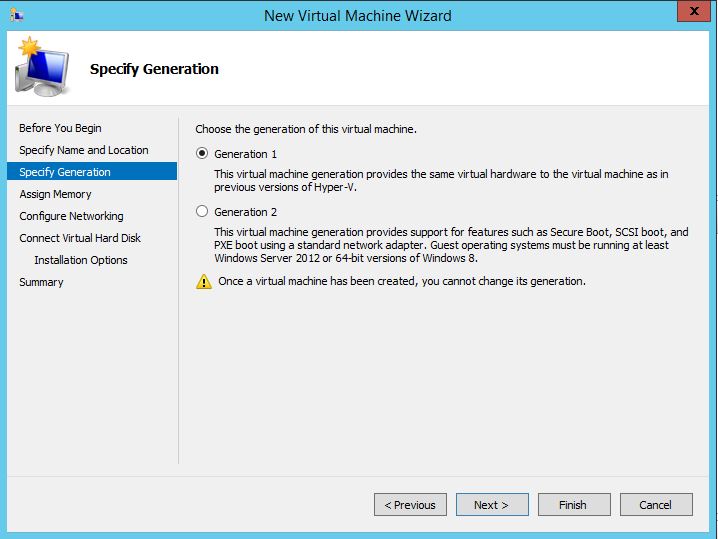
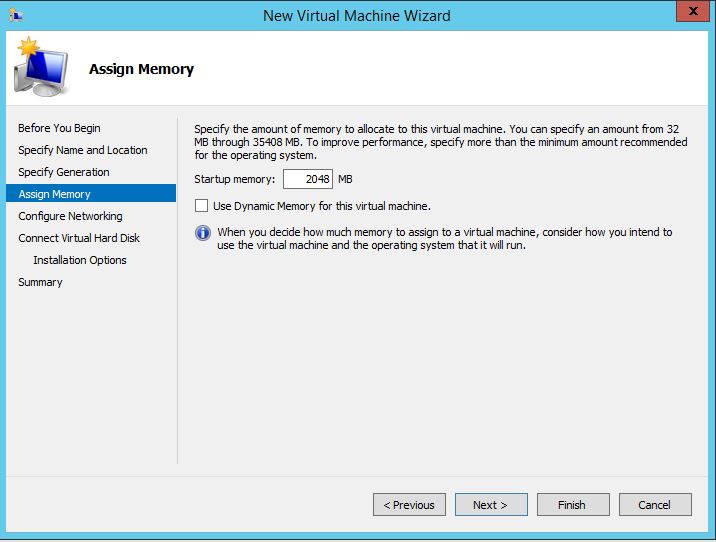
- Creating virtual machines
- VM Settings
- Creating VM Checkpoints
Creating Virtual Networks (Virtual Switches)
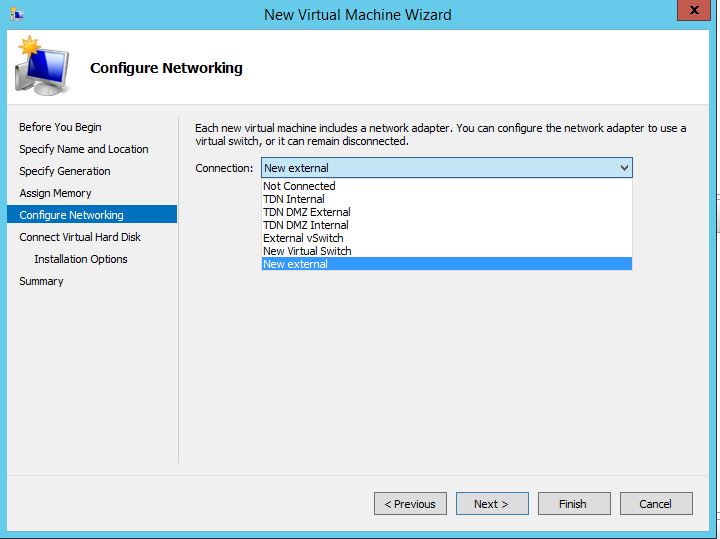
Before creating the virtual machines, Virtual Network should be configured. There are 3 types of Virtual networks, External, Internal and Private.
- External – Connect VM’s virtual adapter to the external network, it allow VM to communicate through the physical adapter of the Host.
- Internal – allow to communicate with the Hyper-V hosts and other VM’s in the host.
- Private – allow to communicate the with the virtual machines which share the Private switch
Follow the steps to create an external virtual network.
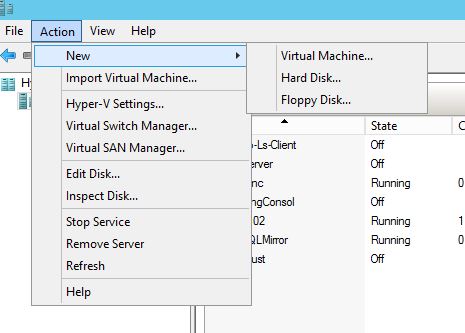
- Start the Hyper-V console
- Click actions , Virtual Switch manager
- Select External and create virtual switch.
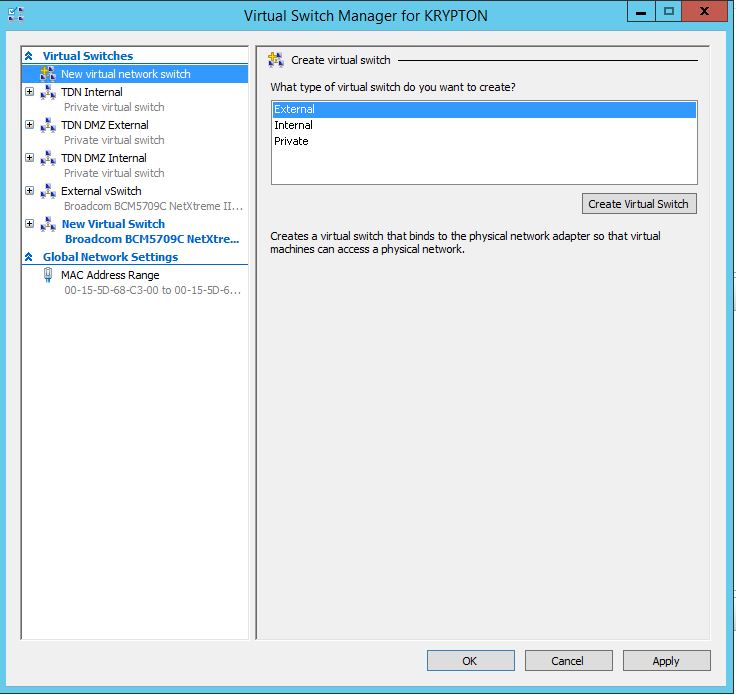
- Type the Switch name, and select the Physical network adapter which is connected to the external network.
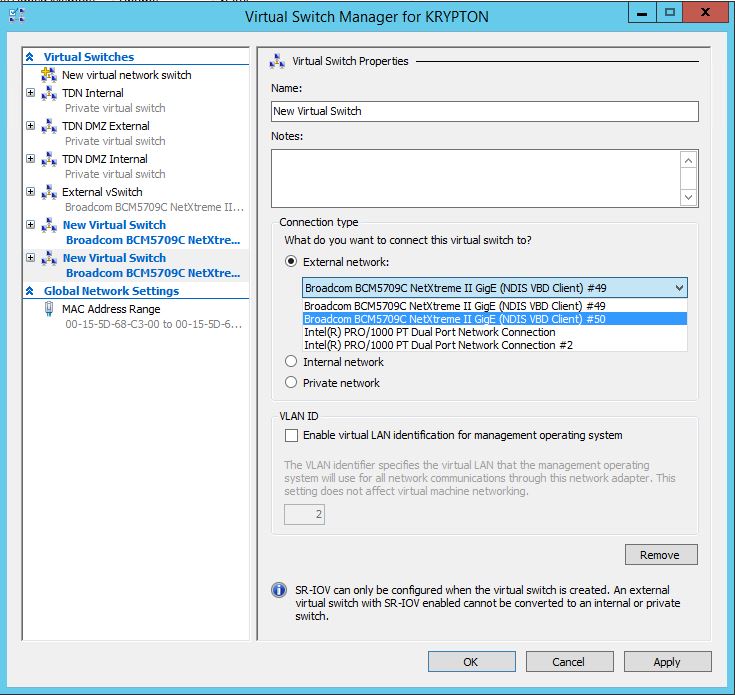
Note- if you un-tick the Allow management operating system to share this network adapter, then Host server OS will not use this network adapter to its communications or other VM’s. It will increase the performance but also you will not be able to connect to the server using this network.
- Apply OK, this will create an external network which can be used for VM’s
Configuring Settings for VM
You can change the configuration of the VM using VM settings. Add new hardware, Increase memory or processor, adding more disks and changing Hyper-V integration changes can be done using settings. Following are few common settings.
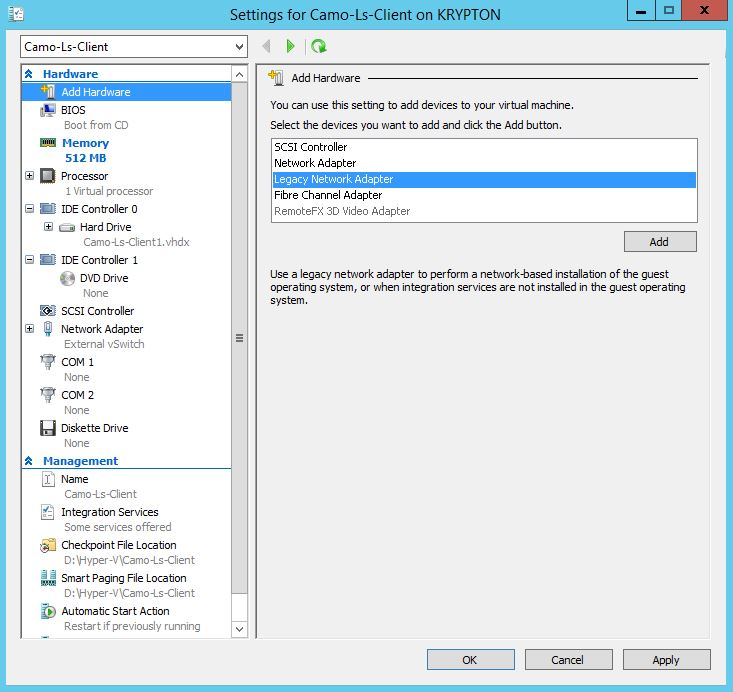
- Add hardware – to add network adapters, fiber channel adapters and SCSI controllers
- BIOS – to change the startup order of the BIOS of VM.
- Memory – to change the startup memory, Dynamic memory
- Processor – to add more virtual processors
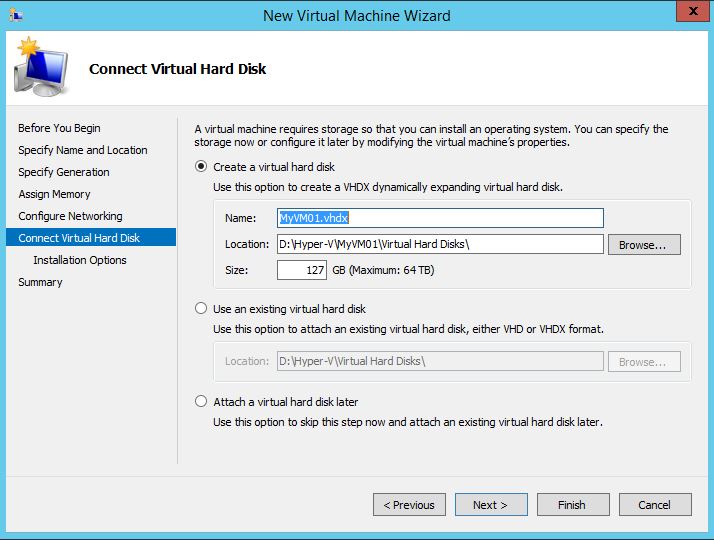
- IDE Controller – to add more virtual hard disks, DVD disks, ISO files and existing hard disks.
- Network adapter – Add new networks switches to different network adapters
- Integration services – these are tools which is going to install in the guest operating system to enable more control and manageability to the Hyper-V services. ex- if you enable Time synchronization, it will sync the Host time to the VM client.
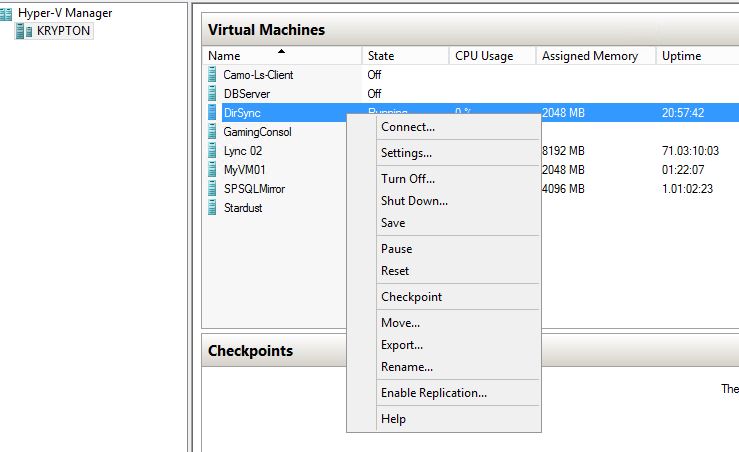
Hyper-V Check Points, Snapshots
Virtual machine check points can be used when you are going to do a risky change to the Virtual machine, such as registry change, service pack upgrade or AD schema update. After the change VM failed or you need to undo the change, you can revert the VM back to the state where check point created. Check points are important administration feature that comes up with Windows server 2012R2 Hyper-V to roll back Virtual machine to its previous state.
How to create checkpoints.
- Before doing the VM change, go to the Hyper-V manager, select the VM right click and click checkpoint. Check point will be created.
- Once the checkpoint is created, it will list in the check point window. And you can rename it so in future you will remember why you have created the check point.
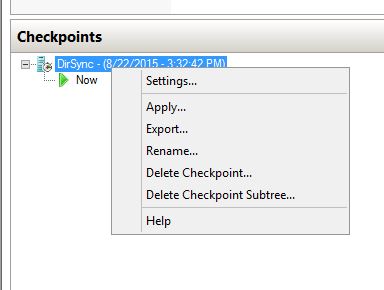
- Now you can perform the change in the VM. If the change is successful delete the checkpoint.
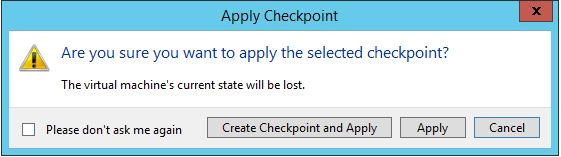
- If the change is unsuccessful and you need to revert back to the original configuration, right click the checkpoint and select apply. If you want create another checkpoint before doing this.
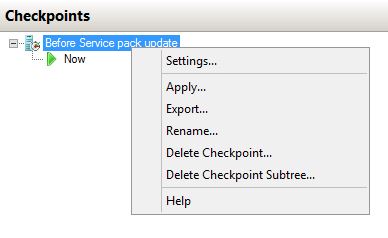
- After completing the VM revert back, delete the check point.
Check points are different from backups. It can never refer as a backup because it only create another VM disk (differencing) with all the newer changes. And original VM disk act as a read only. So when you create a checkpoint, after completing the change, the checkpoint should be deleted. Otherwise it will take more disk space and degrade the VM performance. Also there are some applications that should not use checkpoints, such as Exchange server.
These are some basic but impotent operations with Hyper-V. if you are new to Hyper-V these steps will be relevant. from future posts i'm planning to describe on Hyper-V VM replication and Hyper-V clustering.
cheers
Asitha