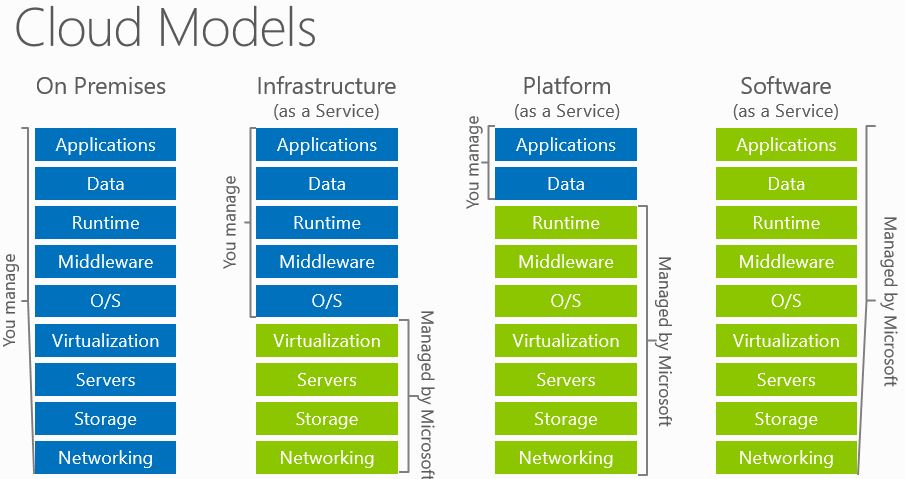
Microsoft Azure is the Microsoft Public Cloud platform, it’s the simple definition. But it is a combination of 3 services. Infrastructure as a Service (IAAS), Platform as a service (PAAS) and Software as a Service (SAAS). Microsoft Azure is growing everyday so in near future you don’t have to have a local datacenter or any IT service locally, all can be hosted and accessed from anywhere.
From this post I’m going to give an introduction to Azure IAAS services. Basic descriptions to some important terms and create a Virtual Machine and a Virtual Network in Azure.
Introduction
Azure IAAS means you can manage everything that’s runs in the VM and Microsoft will manage the Virtualization environment, Servers, Storage and Networking. You don’t need to worry about the physical environment like servers, hardware, power, physical security etc. Those all are provided, you only need to provision the VM and install your software environment and configurations. This is complete datacenter is in cloud. Also you can connect your on premise datacenter to azure. And no need to consider buying licensing, its included in VM and you can use the VM’s as pay as you go.
Virtual Machine configurations
Resource Group
Resource is a container that holds related resources for an application, such as VM’s, IP address, Storage accounts. Using resource groups you can manage resources, view, monitor, track usage, cost and billing for each application. Resource manager only available in new portal.
Storage account
Azure storage account is where VM’s, Data and other workloads are stored, it’s a unique namespace to store azure storage data. Storage in azure is build according to the Capacity, read and write operations, replication in different sites and data transferred out from azure.
Virtual Machine Image
These are predefined Operating system images that you can use to create VM’s. All the images are sys-prep and ready to use. License costs are built in to Image. There are many number of Images available with different Operating systems and installed software’s.
Virtual Network
Azure Virtual Network is a logical isolation of Virtual machines to a network that enable the communication with each other. You can control the IP address blocks, DNS. Also VM Network can be connected to on-premise and this will extend the on premise network to azure, this is called Site to Site VPN.
Availability Set
When you want to run multiple instances of the same VM, you can place it in an availability set, then it will enable followings
End points
Endpoints in Azure is how you communicate to VM from outside. Its ports and protocols such as FTP, RDP, 443, 80. By default RDP and PowerShell are open.
VM Sizing
There are many different VM sizings are available to select. Different in Ram, Processor and Disk performances.
- A Series – General purpose VM’s,
- D-series -VMs provide faster processors, a higher memory-to-core ratio, and a solid-state drive (SSD) for the OS disk
- Dv2-series – Same as D Series but much more powerful in CPU.
- G-series – VM’s offer higher memory and run on hosts that have Intel Xeon E5 V3 family processors.
- DS-series and GS-series –VMs can use Premium Storage, which provides high-performance, low-latency storage for I/O intensive workloads, use SSD to host VM and Cache.
https://azure.microsoft.com/en-us/documentation/articles/virtual-machines-size-specs/
Prerequisites
- Azure subscription
If you don’t have an azure subscription, you can sign up for free azure trial which is free for one month and 200$ to spend on all azure services. Use the following link for sign up for Azure.
https://azure.microsoft.com/en-us/pricing/free-trial/
Create a Virtual Machine
- Login to the Azure portal. - portal.azure.com
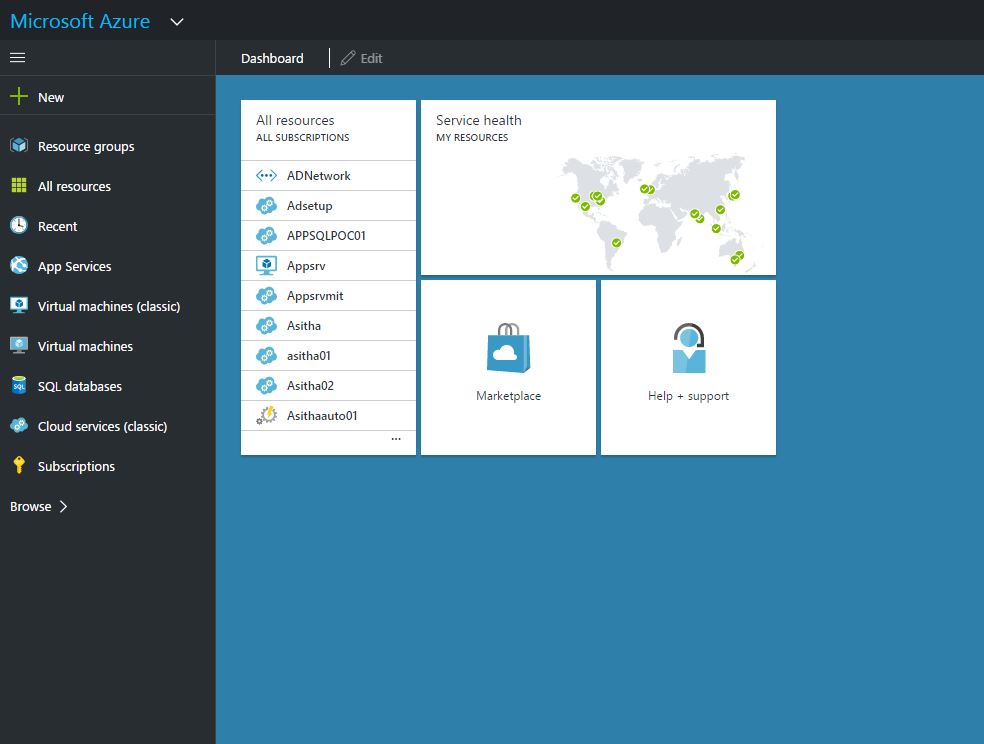
- Click New – Compute, and select the VM Image (Select Window server 2012R2 Image)

- In the deployment model select the defaults, Resource Manager
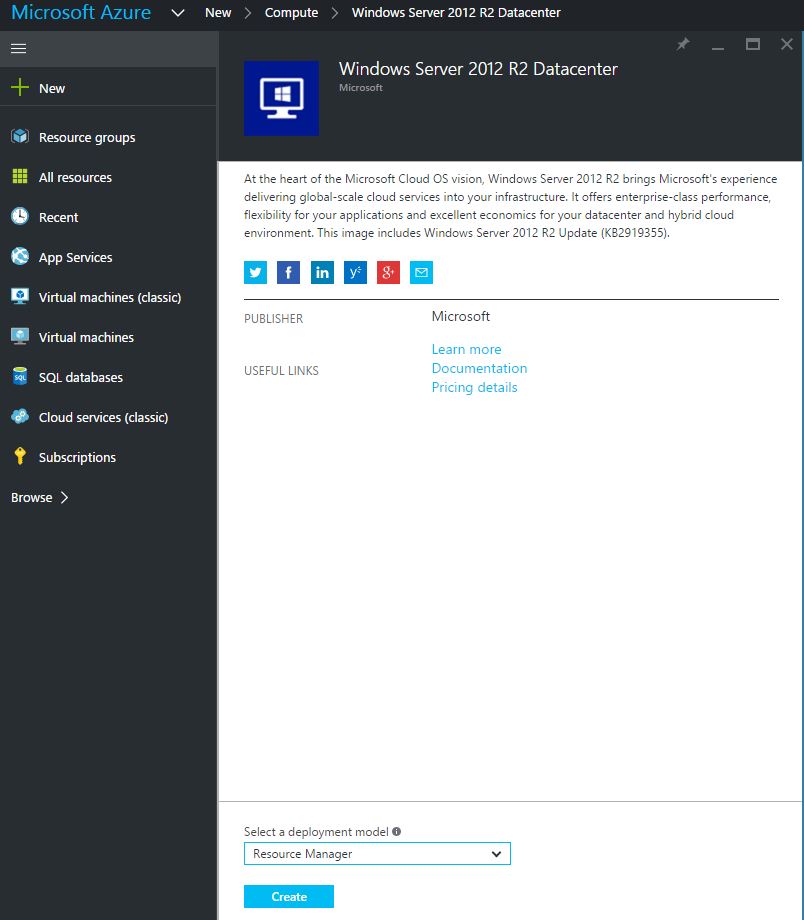
Note- If you are already having VM’s or Virtual Networks created from Old azure portal which is manage.windowsazure.com, and you need new VM to connect to those. Then you have to select the classic deployment model.
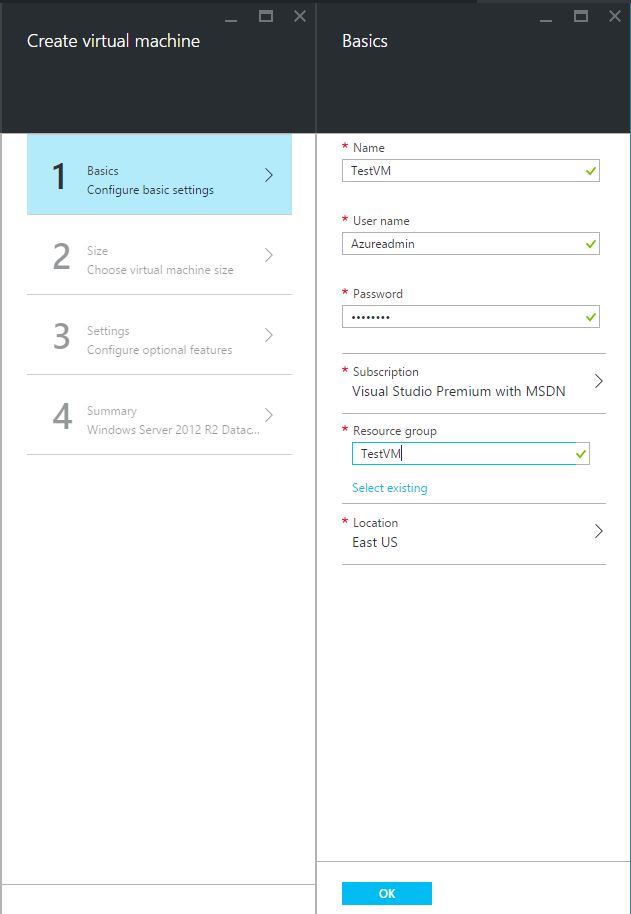
- In Create VM tab, Under the Basics fill the VM Name, User name, Password and Resource group
- In the Size window, select the required VM Sizing, you can click view all to get all the pre-configured templates.
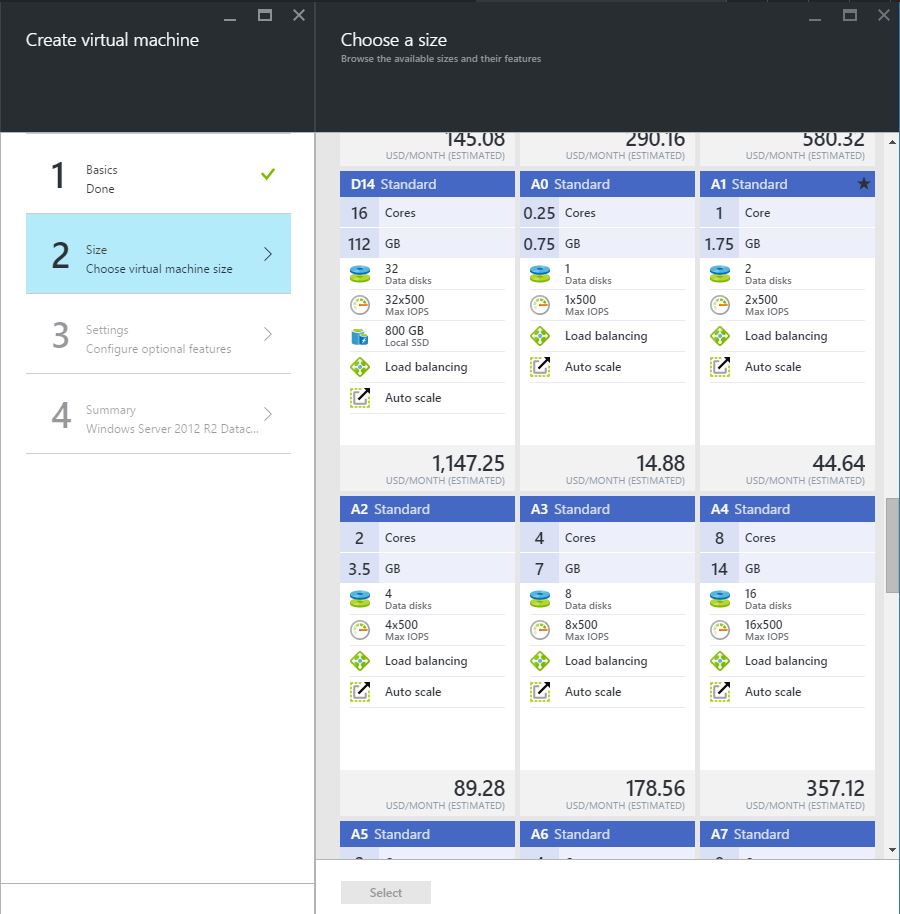
- Select A2 Standard and go to Settings tab
- Create a new Storage account, account name should be unique
- Select the Virtual Network, if you have previously created virtual network, select it or create a new virtual network. Change the IP addresses for your need. And if you want other VM’s in azure to connect each other, all VM’s should have to reside in same Virtual Network.
- If required create an Availability set or select None.

- Click OK in the summery
- Creating the VM take some time, you can check the progress from the portal dashboard.
Connecting to the Virtual Machine
- Login to the Portal.azure.com
- In the VM Tab select the Virtual machine that was provisioned.
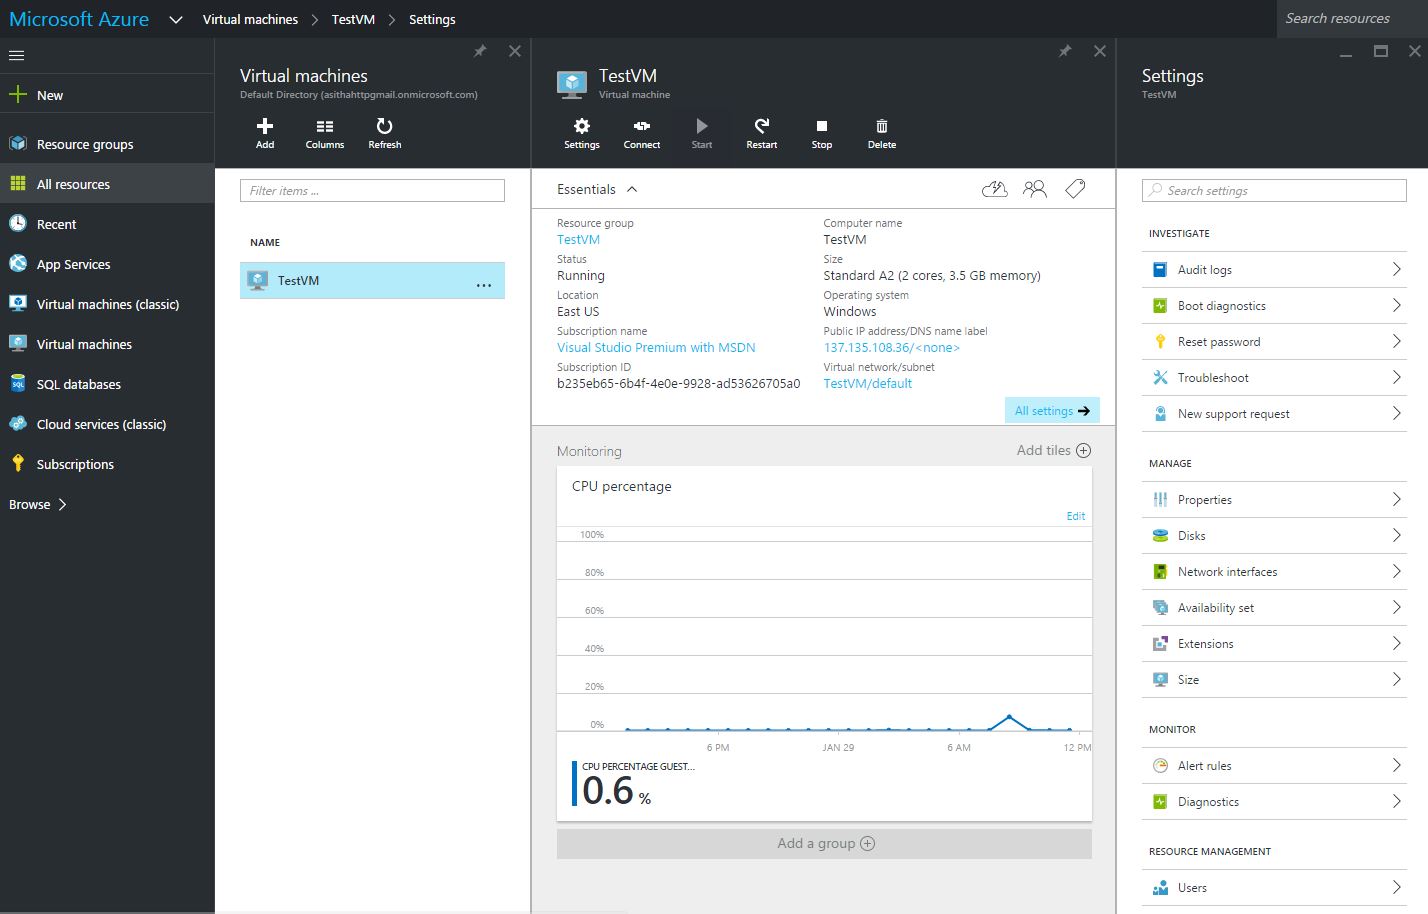
- Click Connect from top menu of the VM Window, it will download the RDP file. You can use previous defined Username and Password to connect to the VM.
- Also from this dashboard you can monitor the VM utilization, Audit logs and some diagnostics.
Hope this post is useful
