From my previous blog post, I have discussed on how to implement File Server Resource Manager on windows server 2016 (here). Also we have discussed how to create and configure quota, configuring file screening and generating reports. After implementing file server, many people face the problem of how to map the file server resource (share folder) to the users. From this post let’s discuss on implementing share folders and mapping them to individual users or groups of users with shared access.
Continuing with previous post I’m using the Windows Server 2016 File Server Resource Manager in a domain environment to configure share folders.
Map Users Personal Drive with FSRM
Most IT departments are willing to provide a centralized location to save users valuable data in order to minimize the risks of saving them in users computers. Local saving locations such as PC’s or Laptops can be compromised by a third party or user might accidently delete them and there might be no backups taken to recover. While managing these data in centrally, organizations can make sure data is available with regular backups and secured from a third party. But when managing data centrally, data should be secured and should not be able to access by users other than the owner. Also these data should be in a place that easily access to the user without much hassle.
In Active directory environments, there is an option called Home Folders. Home folder is a folder created with the user’s SamAccount name and only accessible to the particular user other than the domain admin. First you have to create the share location in the file server with the relevant permissions.
Following step by step approach can take to create the share folders and publish them using Home Folder option in Active Directory.
- Login to the server where you have installed File Server Resource Manager
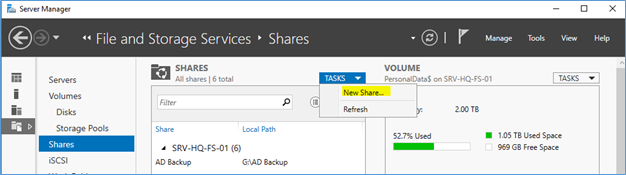
- Open Server Manager – File and Storage Services – Shares – New Share
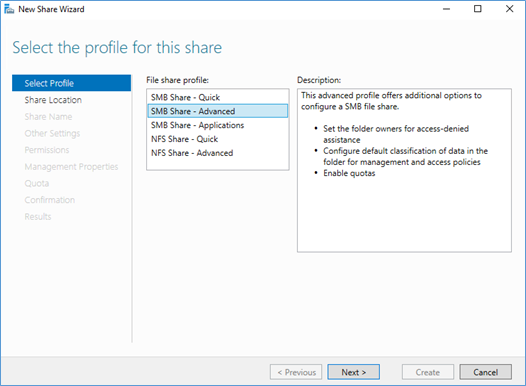
- Select SMB Share – Advanced
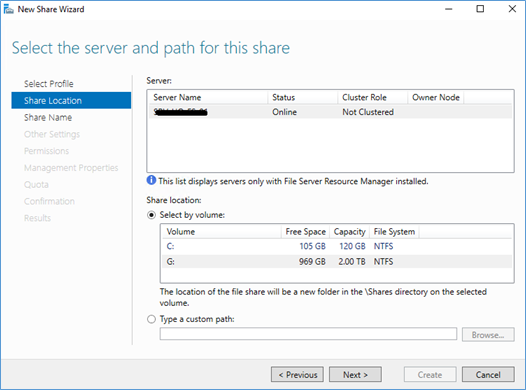
- Select the server path for the share
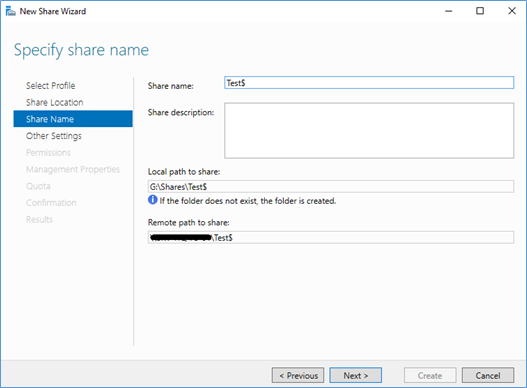
- Type the Share name followed by $ sign
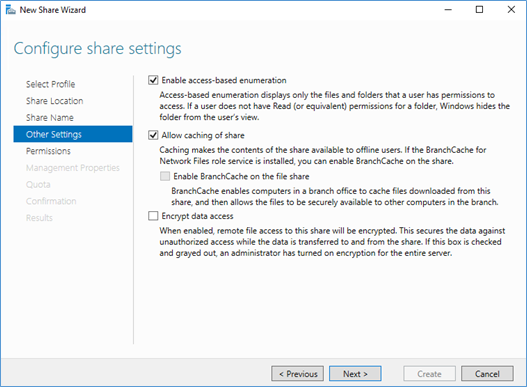
- Enable access-based emulation and caching
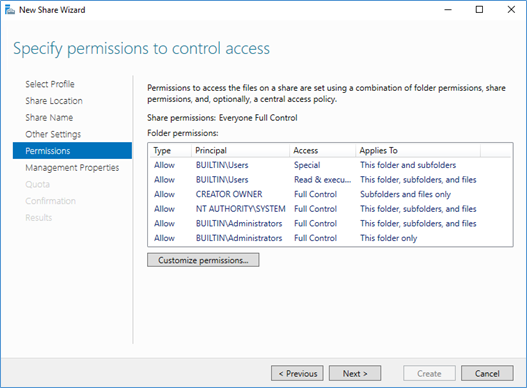
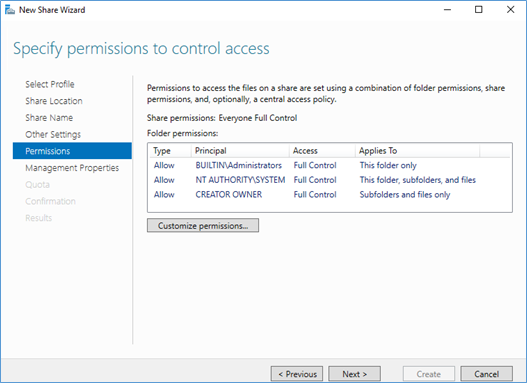
- In the permissions page, you have to set the correct permissions to ovoid only the relevant user can access the folder. To add the permissions click customize permissions
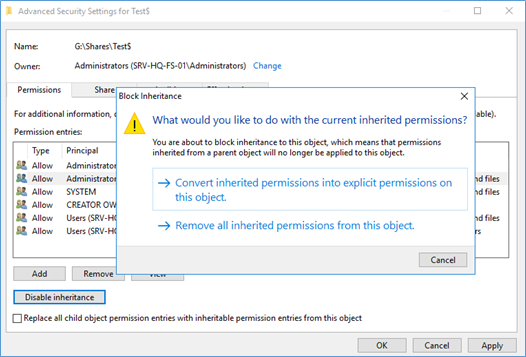
- On the permissions tab, Disable the inheritance and then click convert inherited permissions into explicit permissions on this object
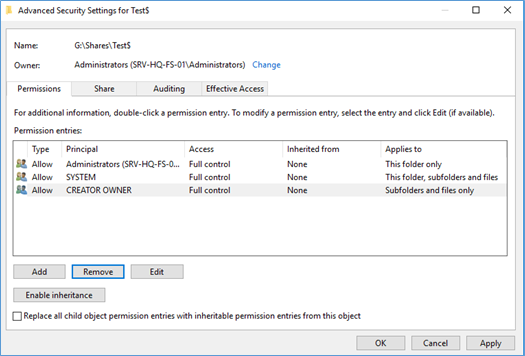
- Make sure permissions are according to the following image, if not change accordingly
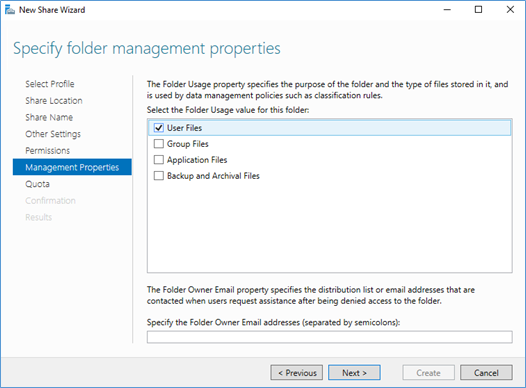
- Select User Files on Management properties
- You can put the quota from the next window or using FSRM, I prefer to do it in the FSRM, make sure you have select the Auto apply template and create quota so all users will have a personal quota in their folders.
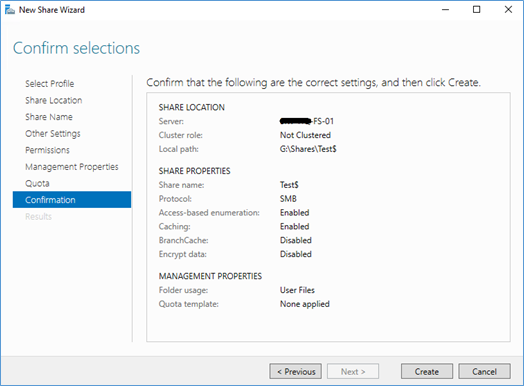
- Confirm the details and create the share
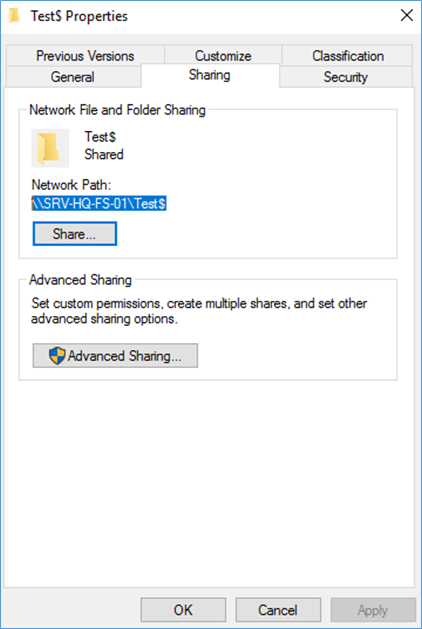
- Next you need to copy the exact share name
- Login to the domain controller, select the users (you can select multiple users) right click – properties – Profile, put the copied share folder followed by “%UserName%”, this tag will add the correct user name and useful when adding for multiple users.
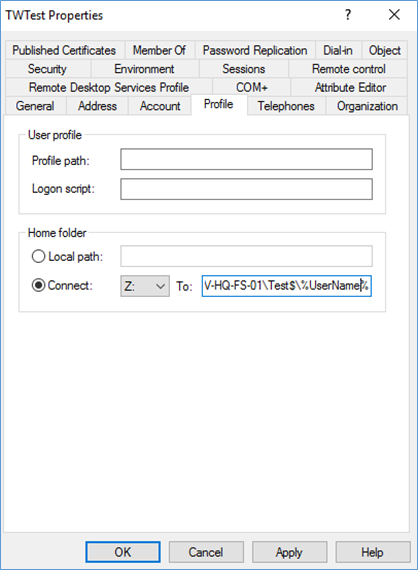
- Click apply and OK, if there is anything wrong with the permissions, there will be an error saying folder cannot create.
- Login to a machine with the user and you can see the folder is created and mapped to the user.
Map Share Using Group Policy
There are situations you have to map multiple drives to users other than the home folder. In old days, you have to place a logon script on each machine to archive this. But with Windows Server 2008R2 and above you can do this by Group Policies. Also this share or drive can be mapped to a security group with item targeting.
Before creating the GPO, create the share folder according to the above steps. Then
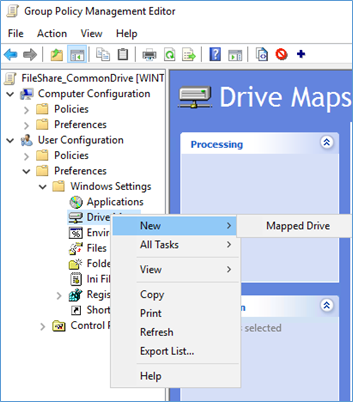
- Create a new GPO, Edit – User Configurations – Windows Settings – Drive Maps

- Click New- Mapped Drive
- New drive properties, select Update as the action, Share location, Reconnect and the Drive letter.
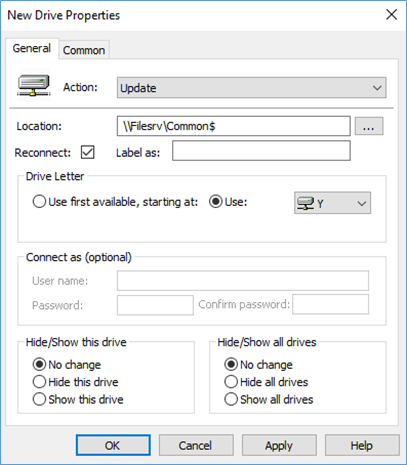
- This will Map the share folder to the OU which it’s targeted.
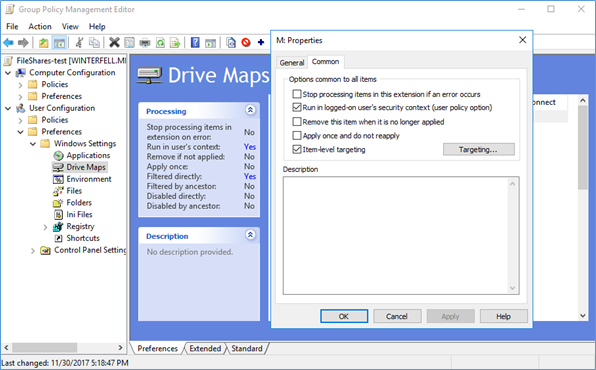
Note – Sometimes you may need to target the Drive to a security group without considering the OU. This is called item level targeting, follow the steps from point 5
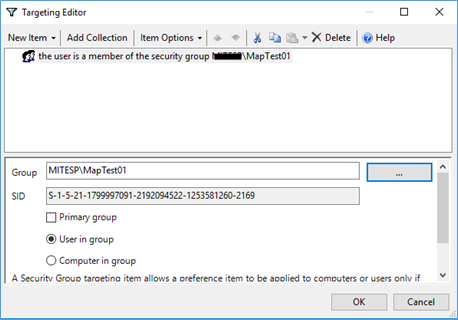
- Go to the common tab and tick Item Level Targeting
- Click New Item and select Security Group
- Select the security group in the group space
- Click OK and Apply the policy, make sure you run a GP Update in the domain controller. User have to re-login to the system to take the effect.
Hope this post is useful
Cheers
Asitha De Silva
