From my previous post of Azure Stack is out to the market, I have discussed on the overview of Azure stack including what is Azure stack and which type of organization its best suited. Also I have talked about little bit of Azure architecture and how it’s better than Azure pack.
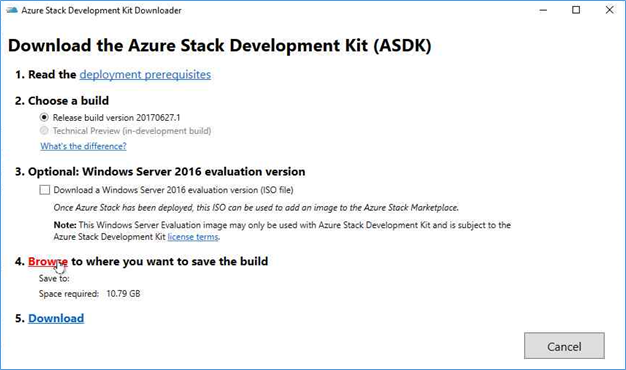
Azure stack comes as an appliance model with hardware partners like Dell EMC, HPE and Lenovo. But still you can test it by installing it in a physical box. As I mentioned in my previous post, Azure stack require minimum of 16 cores of processor and 128GB ram and sometimes finding that kind of a hardware is difficult just for a POC. But there is a solution, with few tweaks to the deployment script we can deploy it on an Azure VM. Azure Stack blog has a great article which I followed and made some corrections plus missing steps to come up with a much complete article including step by step screenshots.
Prerequisites for Deploying Azure Stack in Azure VM
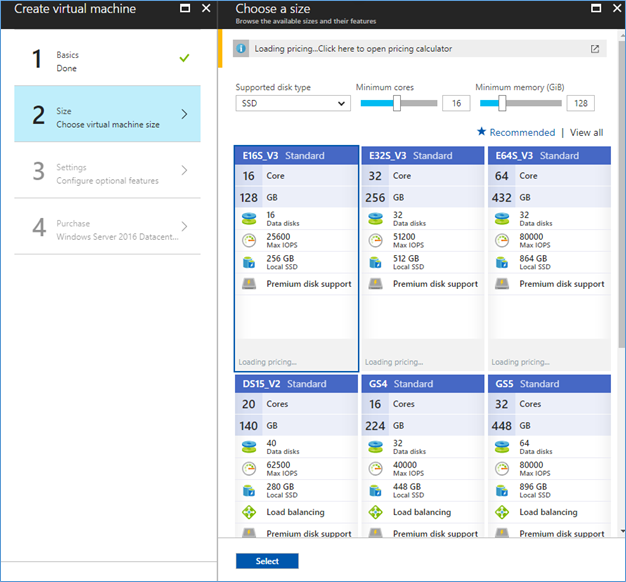
- Azure VM required with these configurations Standard E16s v3 (16 cores, 128 GB memory)
- Azure AD Account with Global Admin access, New azure directory would be ideal
- Additional Storage for the VM (4 disks)
- Downloaded the Azure Stack Development Kit
Deploying and Configuring the Virtual Machine
- Login to the Azure Portal using global admin and create a new Virtual Machine
- Select the OS as Windows Server 2016 Datacenter and Resource manager deployment
- Add the Name, Username password, Disk – SSD, New resource group
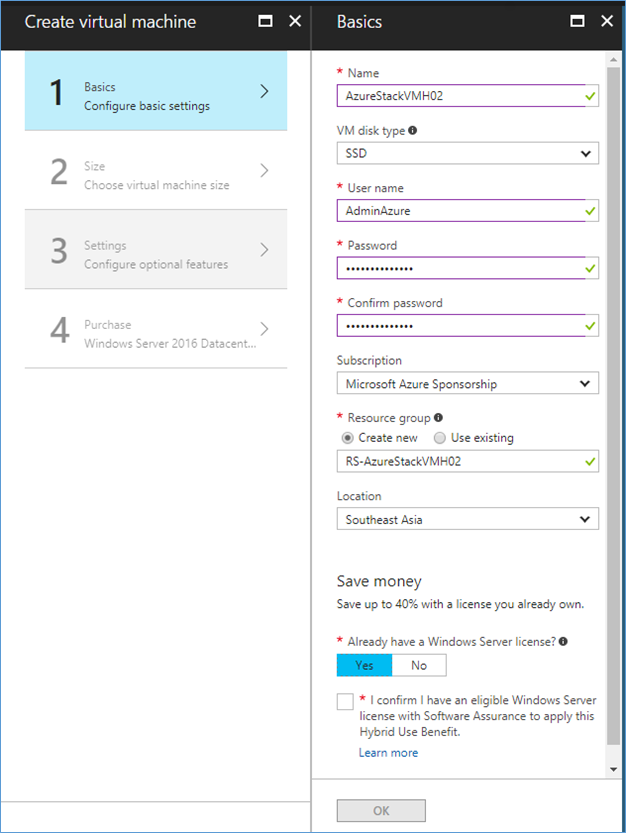
- Select the Size - E16s v3
- Select the public IP as static and deploy the machine
- After VM deployed login to the Virtual machine, set the Time Zone and turn off IE Enhanced Security Configurations
- Next you have to rename the local admin user name to Administrator or else script need to be modified. Run the following PowerShell command
Rename-LocalUser -Name AdminAzure -NewName Administrator
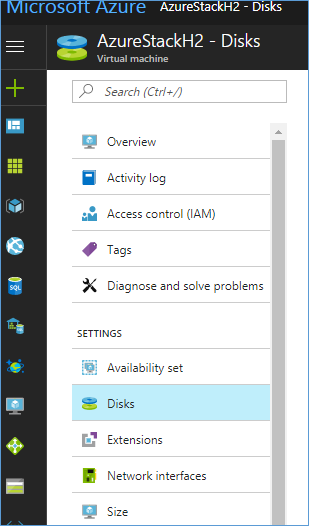
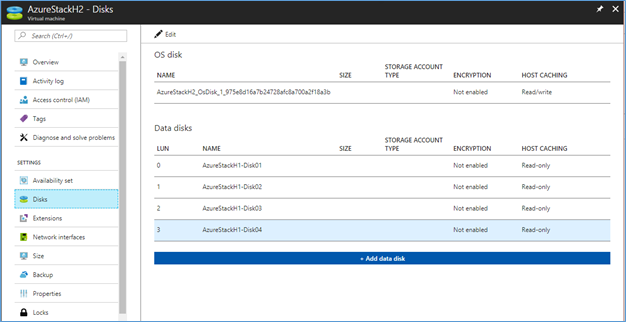
Stop the VM from the Portal to add additional disks and change the OS disk size
After VM has stopped, go to the VM settings Disks
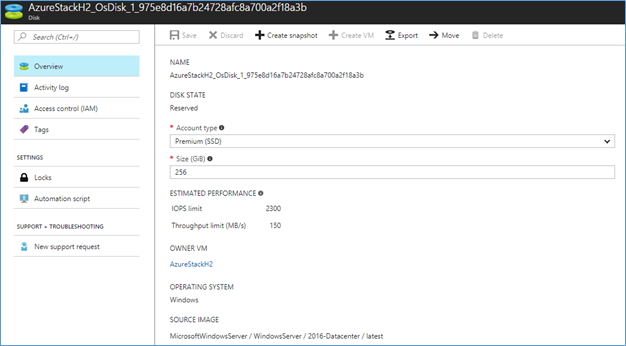
Click Add Disk, and select Create Disk, in the Create manage disk page, add the name and select the existing resource group of the VM and for the disk size, add 256 GB or more. Here I have added 1 TB

Create four disks using the same procedure
Select the OS Disk and increase the disk space to 256 GB’s, Save
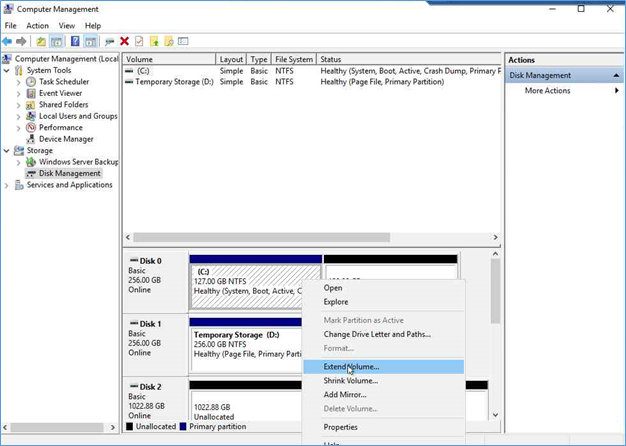
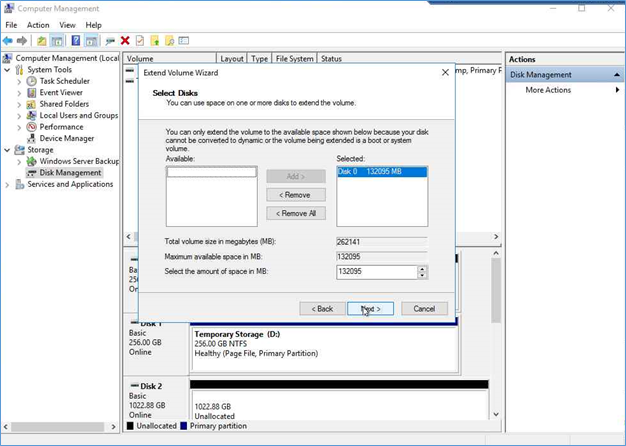
Start the VM and login to the VM using Administrator
Open Device Manager – Disk Manager, you will be prompted to initialize the newly added disks. Add them as GPT (don’t create drives). Next you have to extend the C: drive. Right click the C: drive and click Extend. Create a drive of 256GB.
Installing Azure Stack
- Login to the VM and navigate to following URL to register and download the Azure Stack content.
https://azure.microsoft.com/en-us/overview/azure-stack/development-kit/
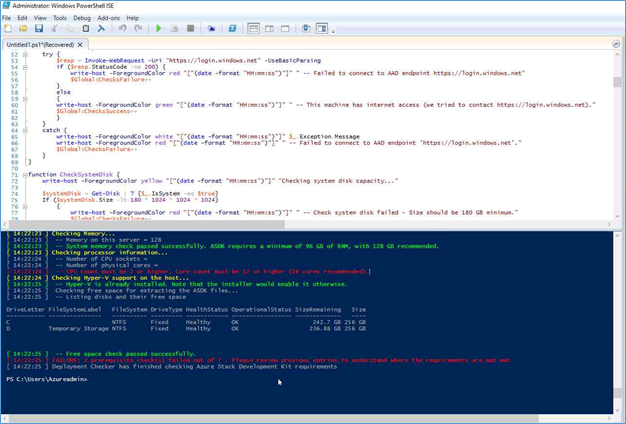
- There is a prerequisites check script is available. If you want you can run it but it will failed with an error of the CPU count because we are running on a VM
- Download the content
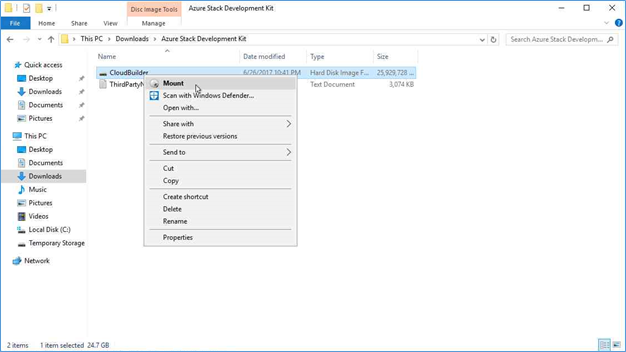
- After download content extracted, locate the Cloudbuilder.VHDX and mount it
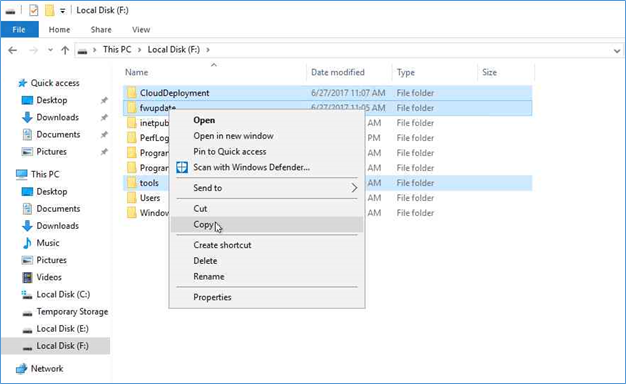
- Next copy folders CloudDeployment, fwupdate and tools in the root of your C drive. Eject the VHDX
- Open PowerShell as run as admin and run the following command in C:\Clouddeployment\Setup
.\InstallAzureStackPOC.ps1 -InfraAzureDirectoryTenantName yourdirectory.onmicrosoft.com -NATIPv4Subnet 172.16.0.0/24 -NATIPv4Address 172.16.0.2 -NATIPv4DefaultGateway 172.16.0.1 -Verbose
- IPAddress subnet should be an address which is not used in Azure, Onpreme or Azure Vnet
- Tanent name is the Azure Active directory which you have created in the prerequisites. In example onmicrosoft.com
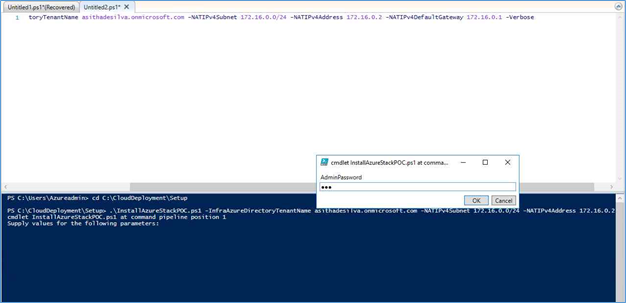
When requested provide the local admin password of the server
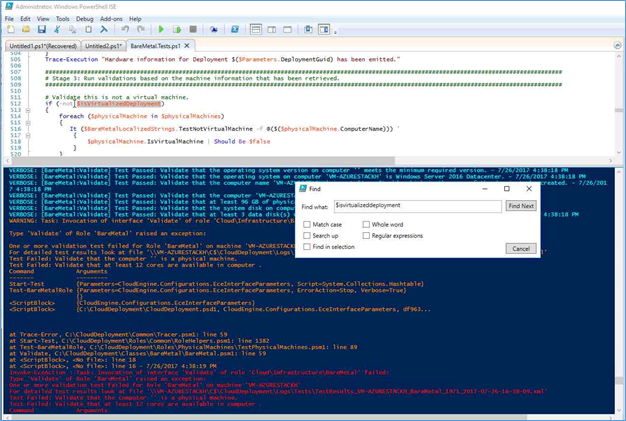
- After while Script will be failed while giving an error stating running machine is not a physical server.
- Locate C:\CloudDeployment\Roles\PhysicalMachines\Tests\BareMetal.Tests.ps1. this folder created when you run the command in step 6.
- Open the BareMetal.Test and find $isVirtualizedDeployment. Remove the -not before each variable. This will present in 3 times.
- Next you have to re run the script, use the following command to rerun it
.\InstallAzureStackPOC.ps1 -Rerun –Verbose
- After while script will fail again while giving error with If so proceed with the below steps or jump to step 17
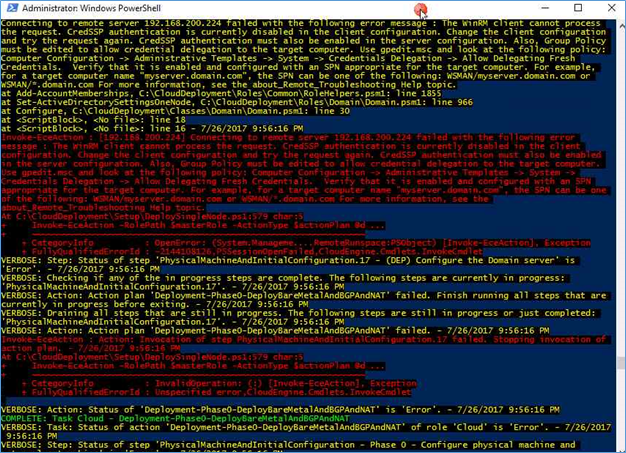
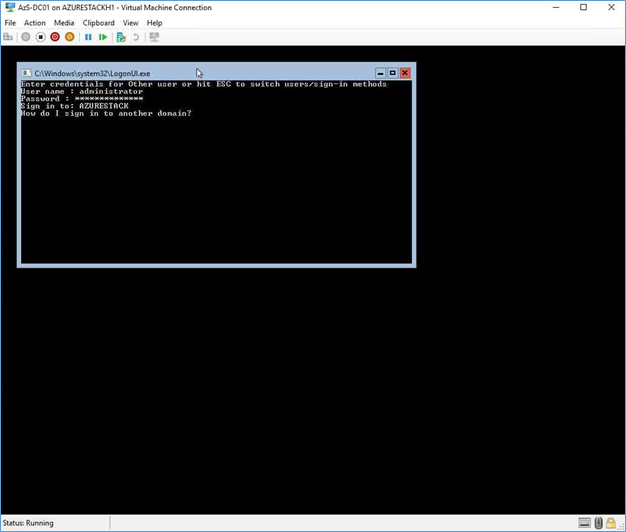
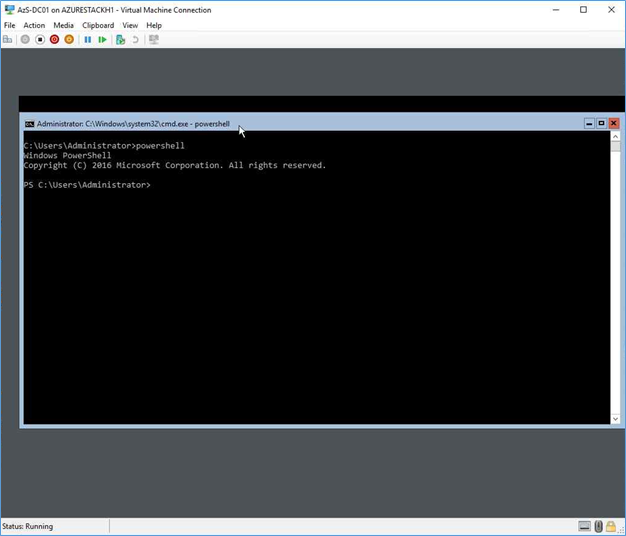
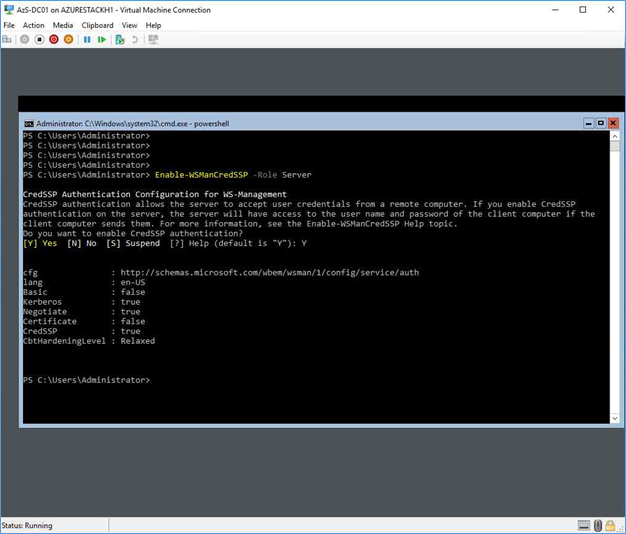
- To fix this, Open Hyper-V console, connect to the DC (VM should be created by now). Use username as Administrator and the password your local admin password,
- Type PowerShell, Enter. Then run the following Command on the VM
Enable-WSManCredSSP -Role Server
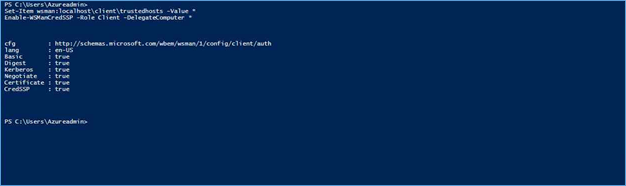
- Next run the following PowerShell command from the Host Machine, (AzureVM)
Set-Item wsman:localhost\client\trustedhosts -Value *
Enable-WSManCredSSP -Role Client -DelegateComputer *
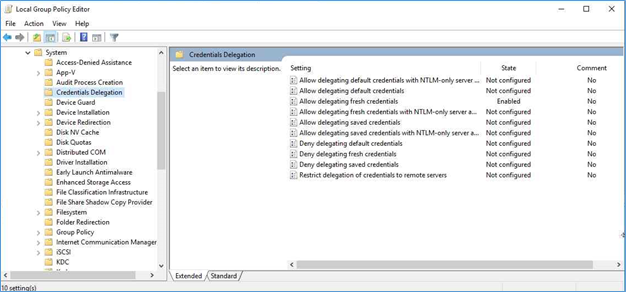
- Next Open Group policy editor using msc in AzureVM. navigate to Local Computer Policy > Computer Configuration > Administrative Templates > System > Credential Delegation
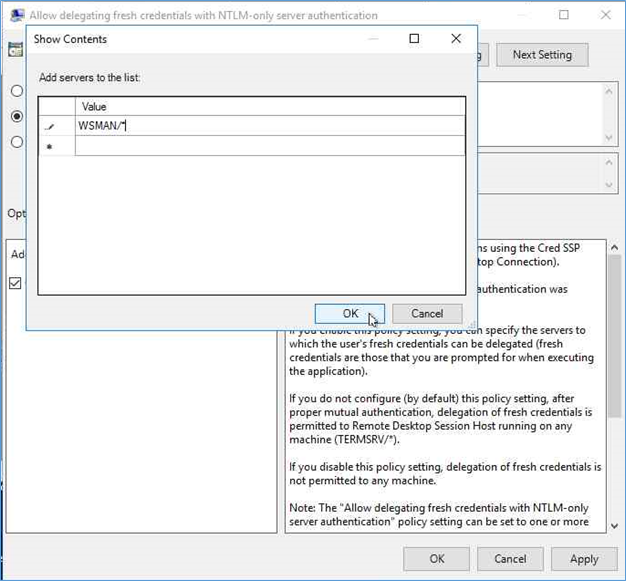
Enable - Allow Delegating Fresh Credentials with NTLM-only Server Authentication, Add the Value as WSMAN/*
Run – Gpupdate /force
Run the command again
.\InstallAzureStackPOC.ps1 -Rerun –Verbose
When Script is running VM will be rebooted. Then you shouldn’t login using the Administrator account you have logged before. It will not show the progress of the PowerShell Script. Login using the AzureStack\AzureStackAdmin account. Use the same password used before
Open Hyper-V console to see the VM’s are generating. When few VM’s are created, find the VM called Azs-BGPNAT01. Login to that VM and try to ping 8.8.8.8 to identify VM have internet access. If you cannot ping, which means VM don’t have internet and you have to create a Network switch to the VM. Use following steps to do that
Get the PowerShell as run as admin from the host (Azure VM). Run the following command to create a new Network switch
New-VMSwitch -Name "NATSwitch" -SwitchType Internal -Verbose
$NIC=Get-NetAdapter|Out-GridView -PassThru
New-NetIPAddress -IPAddress 172.16.0.1 -PrefixLength 24 -InterfaceIndex $NIC.ifIndex
New-NetNat -Name "NATSwitch" -InternalIPInterfaceAddressPrefix "172.16.0.0/24" –Verbose
From the Hyper-V console select the BGPNAT01 and settings. Click the NAT, Select NATSwtich as the Virtual switch
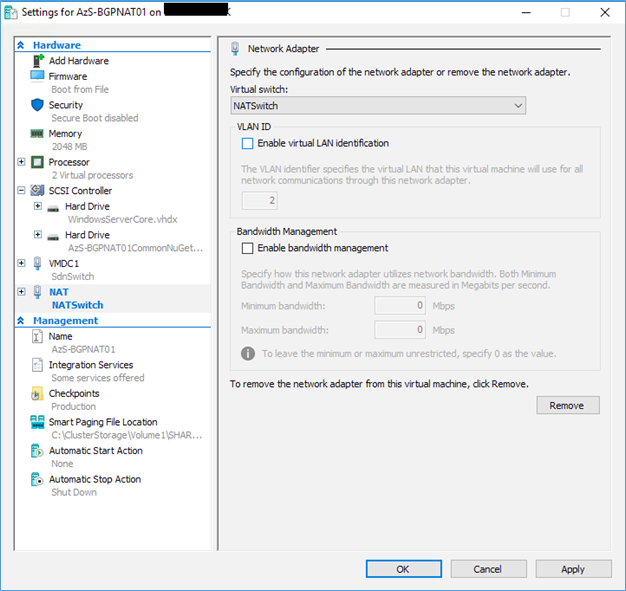
Check for whether the VM can access internet and let the script run.
In my deployment Script was failed again in a Step of 60.160. so I have read few blogs on re running with the following command and it worked. If your script also failed, don’t restart the server. run the following command with the step number.
Invoke-EceAction -RolePath Cloud -ActionType Deployment -Start 60.160 –Verbose
After few hours script will be completed while stating successful. Then you can test two portals from following links
Admin Portal - https://adminportal.local.azurestack.external
User Portal - https://portal.local.azurestack.external
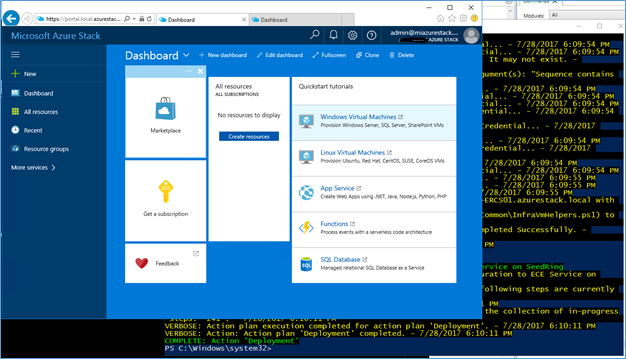
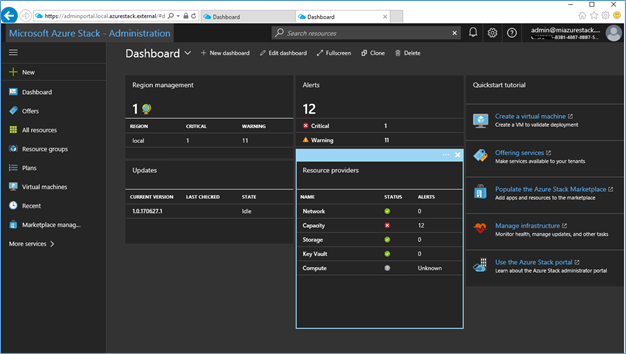
Enjoy the Azure Stack :)
Cheers
Asitha De Silva
References – Technet, blog.technet, Ignite content, azurestack.blog
