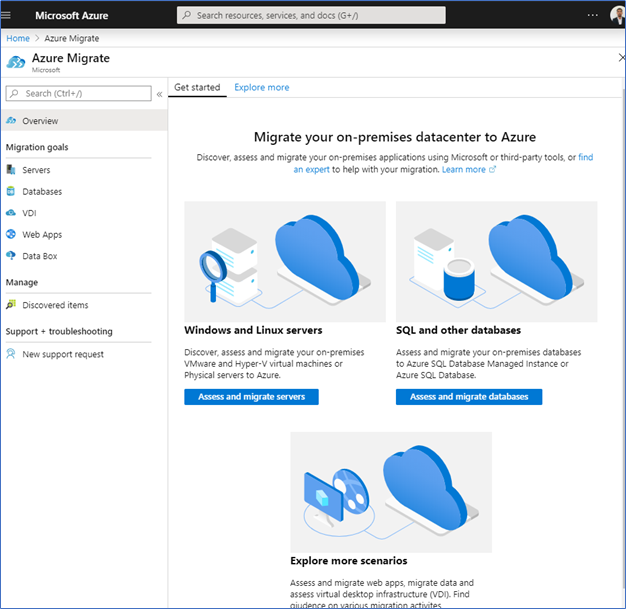
Azure Migrate is a Central hub for all the cloud migration activities. It's helping you to discover, assess, and migrate on-premises servers, apps, and data to the Microsoft Azure cloud. To support the discovery and assessment of servers you can use the Server Assessment tool of Azure Migrate. From this post lets discuss step by step on installing and configuring the Server Assessment tool. Please read my previous blog post of Azure Migrate | Hub for all thing’s migration for detail introduction and architecture of Azure Migrate.
Azure Migrate Server Assessment tool is a lightweight appliance where you need to implement on your on-premise datacenter. it comes as VMware, Hyper-V and Physical appliances, you can download OVA file for VMware, VHD file for Hyper-V and Zipped folder with PowerShell scripts for Physical implementations. For this post, I’m doing the VMware implementation.
Prerequisites – VMware Appliance
Virtual appliance prerequisites
- vCenter server/host- The appliance VM must be deployed on an ESXi host running version 5.5 or later. vCenter Server running 5.5, 6.0, 6.5, or 6.7.
- Allocate a VM with 32-GB RAM, 8 vCPUs, around 80 GB of disk storage, and an external virtual switch.
- The appliance requires internet access, either directly or through a proxy
- The downloaded appliance template comes with a Windows Server 2016 evaluation license, which is valid for 180 days. If this is expired or close to expiry download and redeploy a new appliance.
Download the OVA template
- To download the appliance, first, you need to create a new migration, please refer to the create new migration section below the article.
- Then click Discover and make sure Discover using appliance is selected.
- Next select virtualization technology from the drop-down list, here I’m using VMware appliance, so I’ve selected “Yes, with VMware vSphere Hypervisor”
- Click Download.OVA file
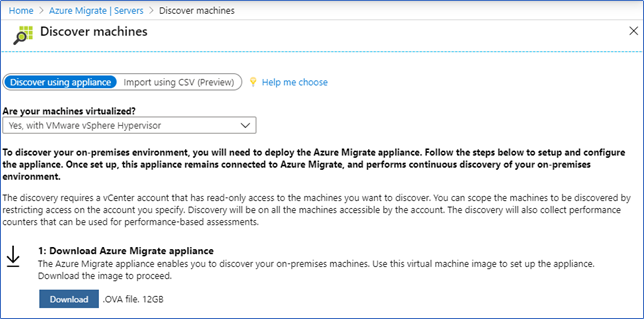
- Or the simple and easiest way to download from this URL 😊
https://aka.ms/migrate/appliance/vmware
Deploy the VM
Open the vSphere console and Deploy the downloaded OVA file.

Provide the other configurations such as Network connectivity
Create the Migration Assessment
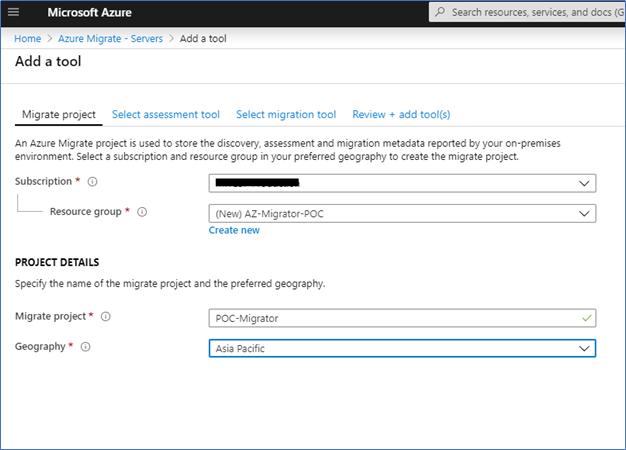
- Login to Azure Portal – Azure Migrator – Asses and Migrate Servers
- In Add tool windows, provide Subscription, resource group and Migrate project name to create a new migration.
- Select Azure Migrate: Server Assessment tool

- If you want to add the migration tool (Azure Migrate: Server Migration) select and next or tick Skip adding migration tool now and Next
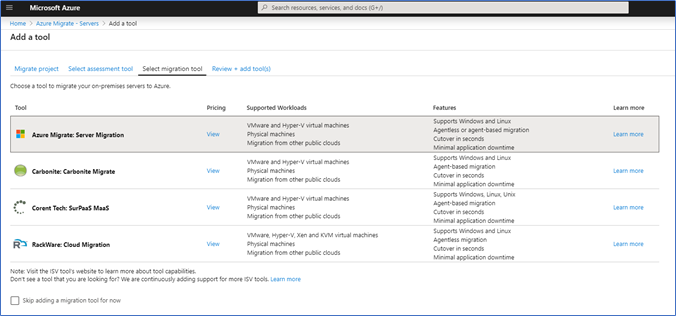
- In the Review page click Add Tools

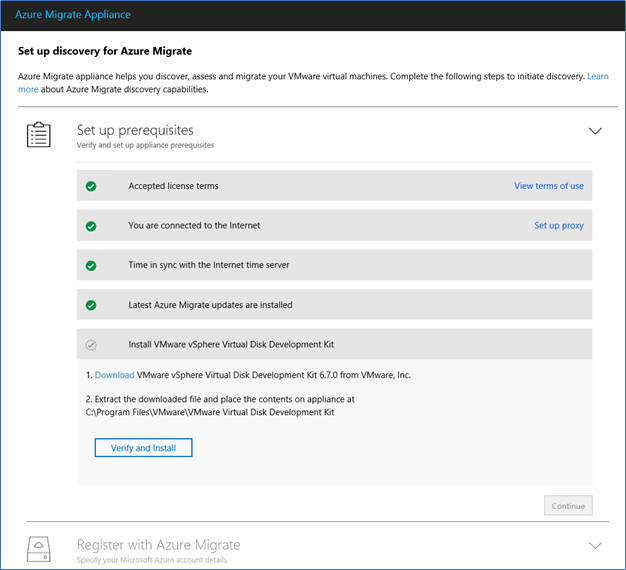
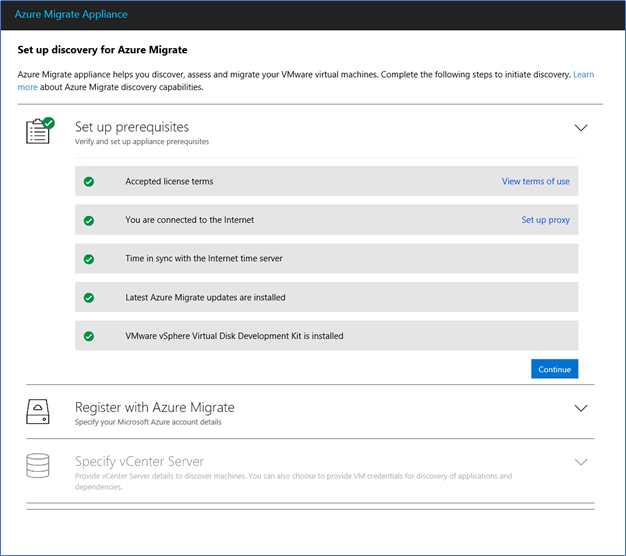
Configure the Azure migrate appliance – Set up Prerequisites
- Login to the appliance and double click the Microsoft Azure Appliance configurations manager shortcut.
- Next, Accept the Terms and conditions
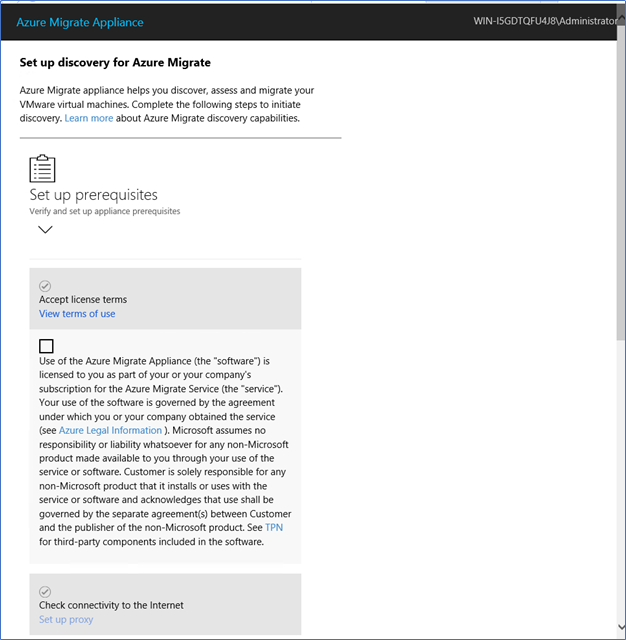
- If you don’t have direct internet, provide the proxy configurations. The appliance requires internet connectivity to Microsoft URL’s

- Configure the Time sync and let appliance to install any required updates.
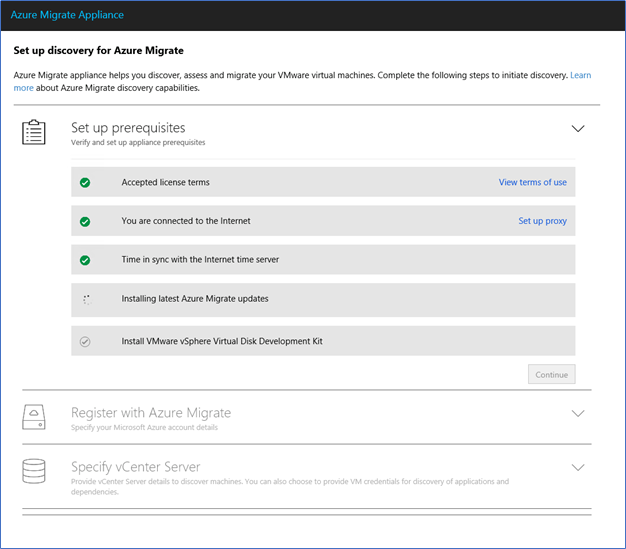
- Click Verify and Install on VMware vSphere Virtual Disk Development Kit
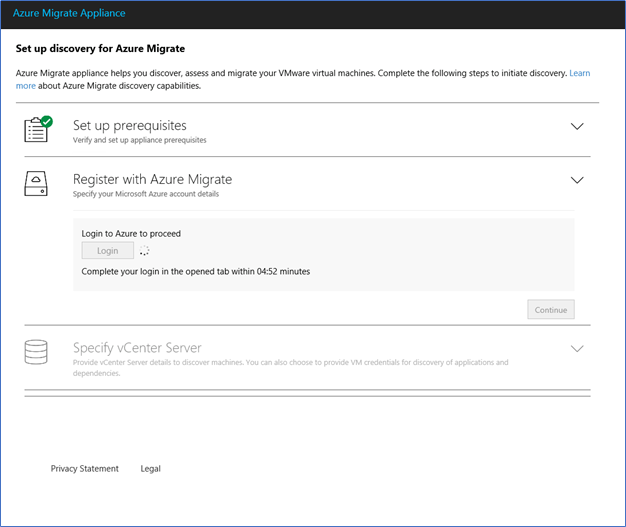
Configure the Azure migrate appliance – Register with Azure Migrate
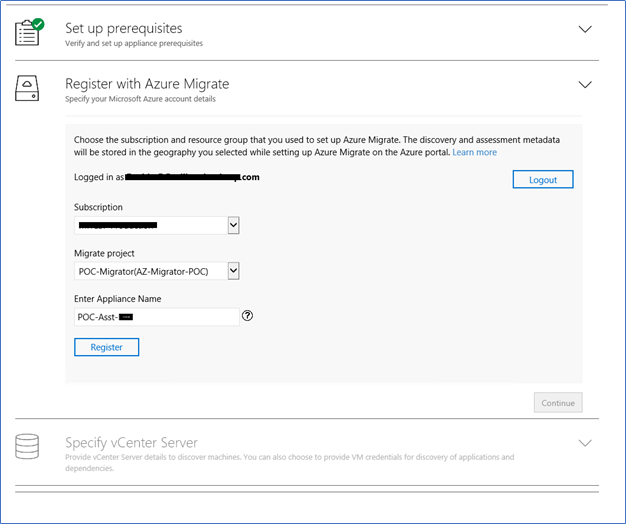
- Next you need to register the appliance with Azure Migrate account you created earlier. Click login and provide the Azure access credentials.
- Select the subscription and the migration project where you create earlier. And click Register
Configure the Azure migrate appliance – Register with Azure Migrate
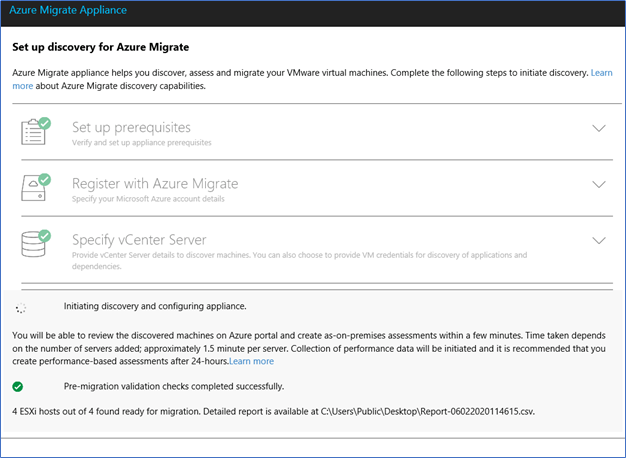
The next step is to register the server assessment appliance with your vCenter to discover the servers. Provide the vCenter IP, Port and Credentials to add the hosts. Read-only credentials should work fine. Make sure to validate the connection. Also, you can provide credentials to the VM’s itself, this will enable discovery of applications, roles and features and visualizing dependencies of the VMs. You can add one credential for Windows VMs and one credential for Linux VMs.
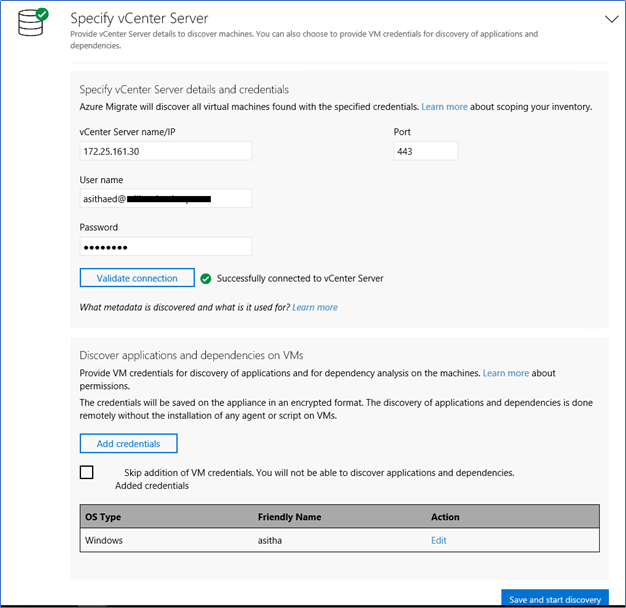
Once you have specified the vCenter Server and VM credentials (optional), click Save and start discovery to start the discovery of the on-premises environment.
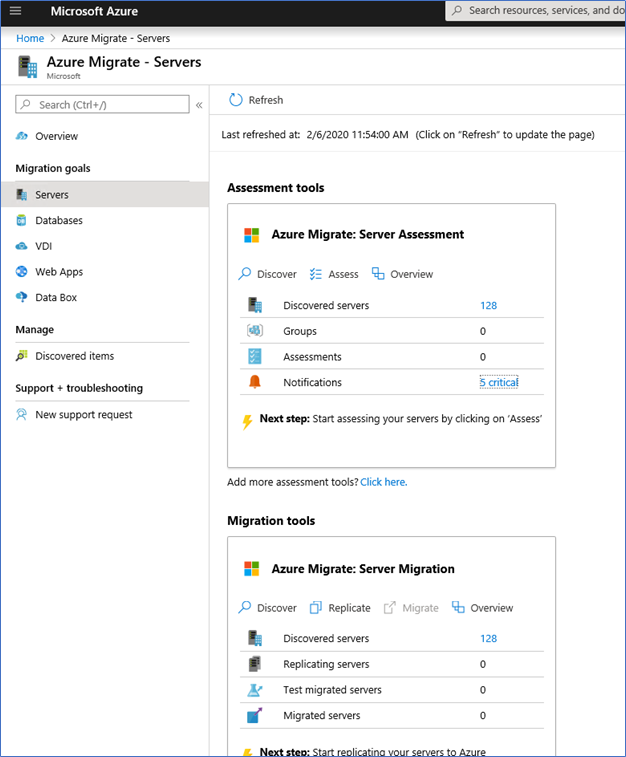
View Discovery in Azure Portal
You can see the discovery data is populating in Azure Portal under Azure Migrate - Servers
This post we mainly discussed implementing and configuring the Azure Migrate Server Assessment tool to discover VMware vCenter VM’s. from the next post, I will discuss creating assessments to identify Azure readiness and costs which are the key deciding facts when moving your workloads to Azure.
Hope this post is useful
Cheers
Asitha De Silva
