From my previous article of Windows Virtual Desktop | Configuring Prerequisites and WVD Tenant Creation, I have discussed step by step on Implementing prerequisites, configuring Azure tenant and creating WVD tenant. From this article, I’m continuing where I left to implement the WVD host pool and test the connectivity from Web, Desktop client app and mobile devices such as Android and iOS. Please refer to the previous posts if you miss any configurations.
01 – Working remotely and efficiently with Microsoft technologies
02 - Windows Virtual Desktop | Configuring Prerequisites and WVD Tenant Creation
To continue creating a host pool, you should have an Azure subscription with WVD tenant created.
Creating a Host Pool – Windows 10 multi-session image
Host pools are a collection of one or more identical virtual machines within Windows Virtual Desktop tenant environments. Each host pool can contain an app group that users can interact with as they would on a physical desktop. Here I’m providing step by step instructions on creating a Host pool using a Windows 10 multi-session image from Azure Marketplace.
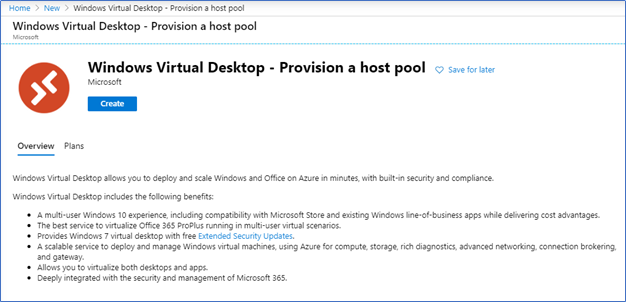
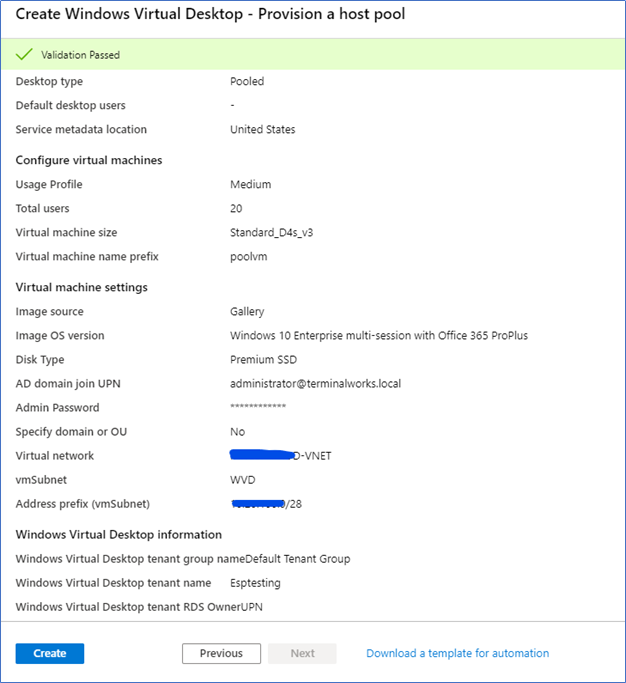
- Login to Azure Portal – Create Resource and type Windows Virtual Desktop. Select Windows Virtual Desktop - Provision a host pool and Create
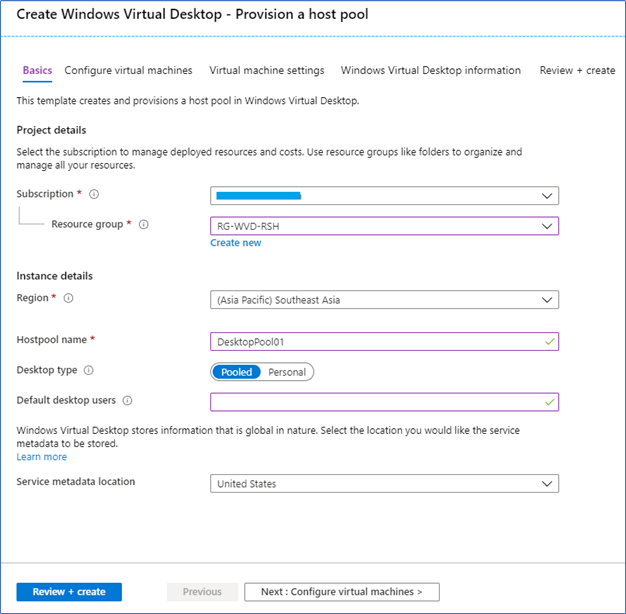
- Select the Subscription, Resource group, Region and Name the host pool. Desktop-type can be pooled or personal, also provide the default pool users UPN’s
Pooled means utilizing a multi-session virtual image and directing the best available session to the user
Personal means each user have their own dedicated personal virtual machine.
- Provide the number of users and workload sizing, if you want you can change the VM sizing.

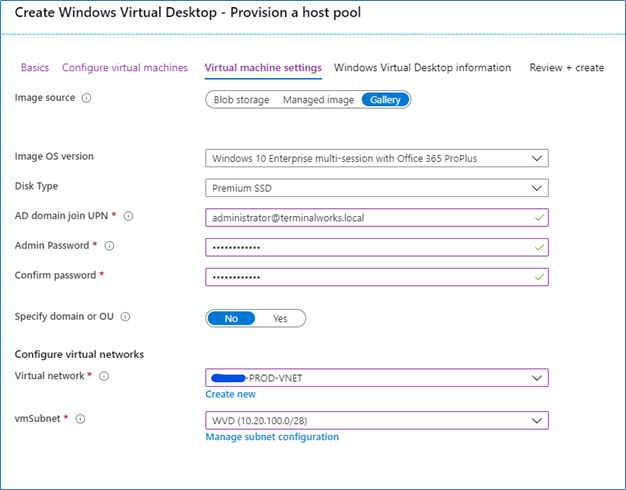
- In the virtual machine settings tab, you need to specify the local Active Directory details with other information. Specify the local AD domain admin UPN with a password, this is to domain join the VM pool. Make sure the virtual network you are specifying has access to the on-premise active directory.
Note – Configure the DNS of the on-premise active directory on Virtual Network
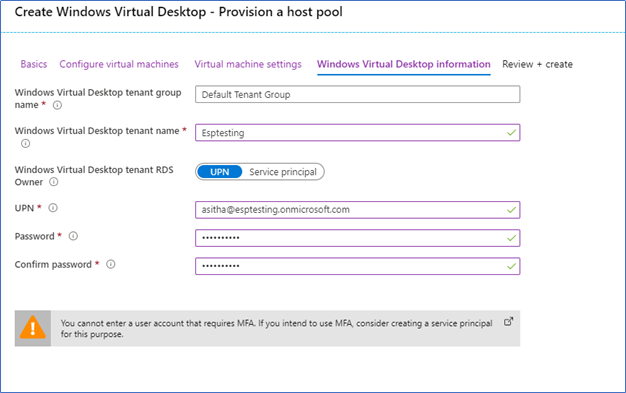
- In Windows virtual desktop tab, give a name to your virtual desktop tenant group, WVD tenant name of the previously created WVD tenant and the UPN of the RDS Owner account. You can use the service principles if you are not using the UPN.
Note – If you are using Service principles, it should be configured first – refer the article (here)
- After validation passed, Create the pool
Connect to the Desktop Host Pool
After the host pool successfully created you can connect to the pool using the browser web client or WVD desktop client. Before that, you should assign users to the desktop host pool.
Assign users to the desktop application group
- Sign in to the Windows Virtual Desktop environment
Add-RdsAccount -DeploymentUrl https://rdbroker.wvd.microsoft.com
- Users can be added to the desktop application group by running the following command.
Add-RdsAppGroupUser <tenantname> <hostpoolname> "Desktop Application Group" -UserPrincipalName <userupn>
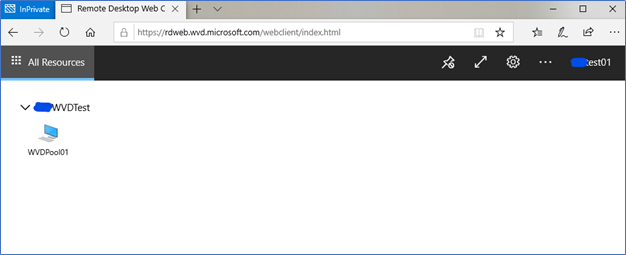
Connecting through Web client (browser)
Open a browser and browse the following URL, Microsoft Edge, IE, Chrome, Safari, and Firefox are supported browsers.
ttps://rdweb.wvd.microsoft.com/webclient
you will be prompted with Azure AD Authentication

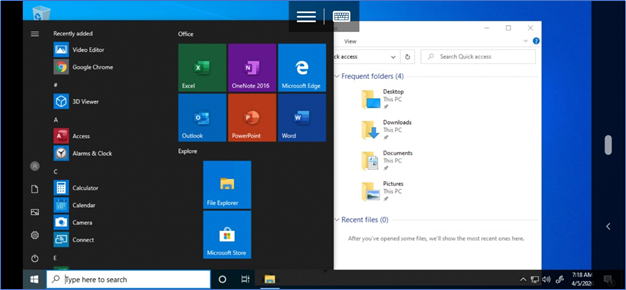
After validating the authentication, the created host pool will be displayed.
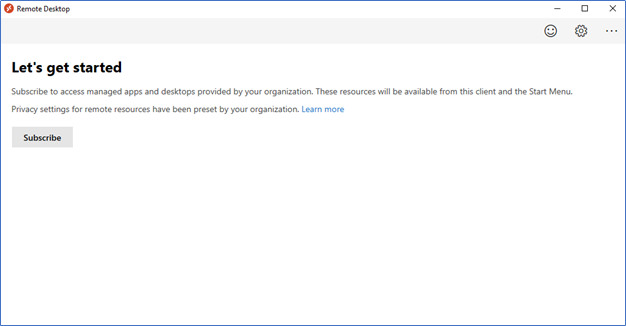
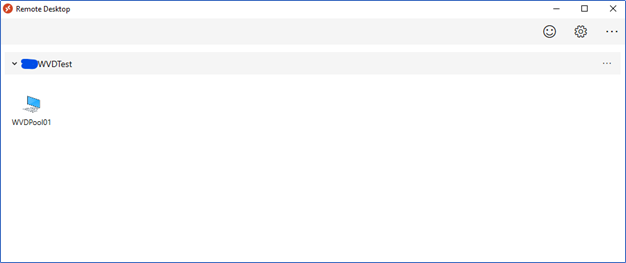
Connecting through Windows Desktop Client
WVD Desktop client supported on Windows 7, Windows 10, and Windows 10 IoT Enterprise, you can download it from
Windows 64-bit
Windows 32-bit
Windows ARM64
Install the client, click Subscribe, Provide the Azure AD credentials to the host pool
Connecting through Android and iOS devices
In Android, open the play store and find the RD Client App and install it in your android device.
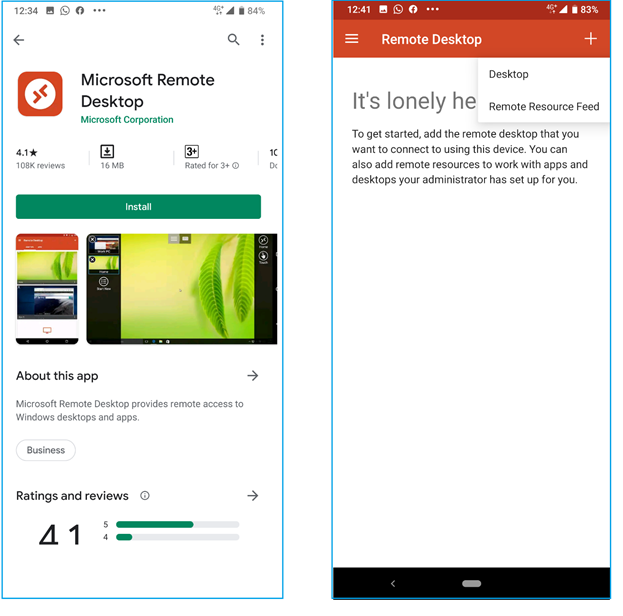
Click the plus sign and click Remote Resource Feed, provide the WVD URL,
https://rdweb.wvd.microsoft.com and click next. You will be prompted with your available resources. Select the resource to connect.
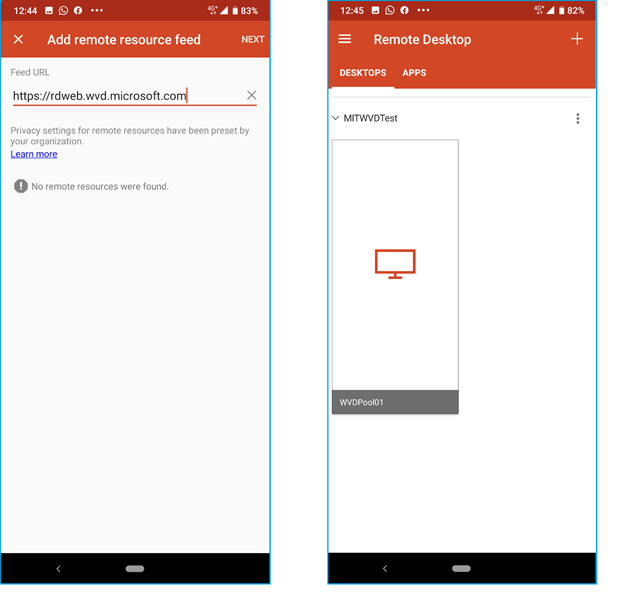
On the next page if required, you will be promoted for the local active directory authentication. After successful authentication, your VM session will load on the android screen. You can turn the phone into a widescreen and turn on the touch input. With this, you will have experiences such as using a Tab or Surface device.

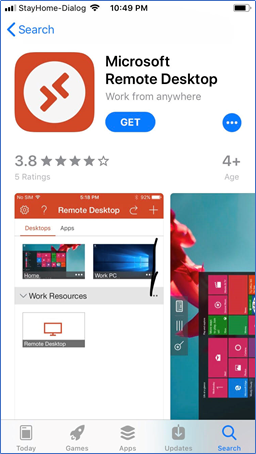
If you are using iPhone, RD Client app is available in App Store, download it and use the above steps to configure it.
From my next post, I will cover creating app group and publish apps to users through Windows Virtual Desktop. Stay tuned.
Hope this post is useful
Cheers
Asitha De Silva
