Image management in Windows Virtual Desktop deployment is one of the important and critical functions of WVD Administration. There are many ways and tools available for this, and here I am sticking to native azure tools for image deployment, management, and rollback tasks. Image standardizations ensure organizations to run their workloads in a consistent UpToDate virtualization environment. It will ensure VM images to include predefined security settings, configurations settings, applications, and necessary software with the latest windows and other updates.
Image management relies on three main steps; first, you should have a Source image. In WVD, this is the multi-session image reside in the Azure image gallery. Next, the image should be Customized according to your requirement. To do so, you should bring a VM up from the image and deploy all the software, security, and other configurations. From the last step, you should SysPrep and capture the image from the VM and Distribute it to the relevant image stores such as blob storages, shared image gallery, and managed image
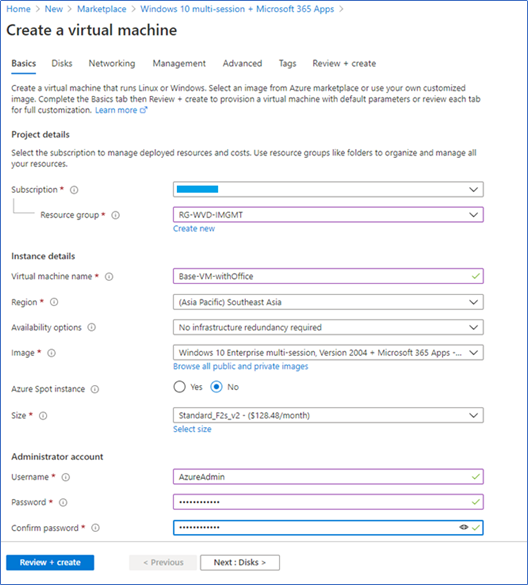
Creating the first VM (Golden Image)
- Log in to the Azure portal where your WVD resides.
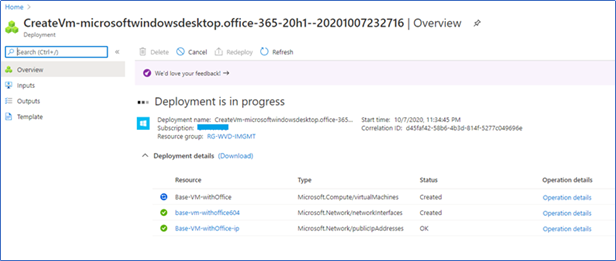
- Go to the Virtual machine's blade and Add to create a new Virtual Machine.
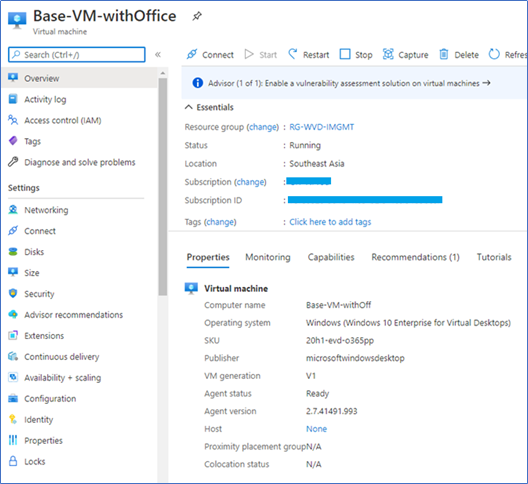
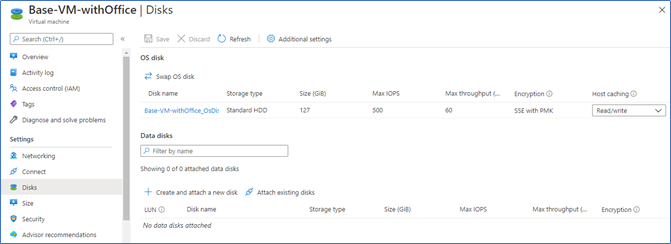
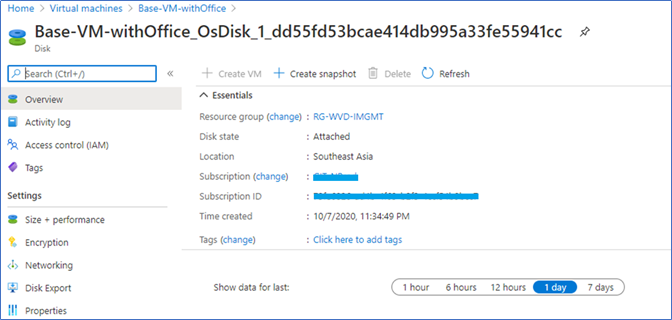
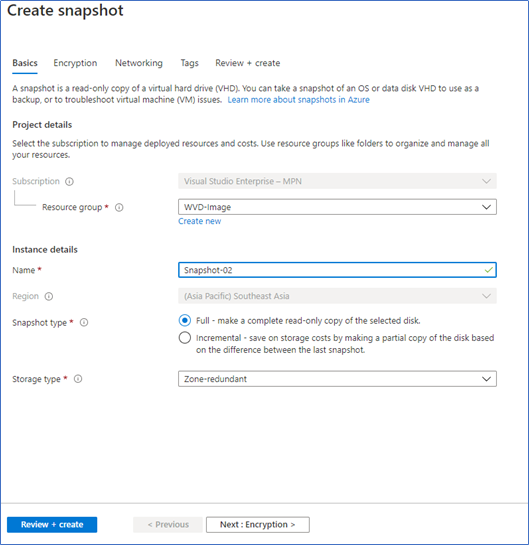
- After the VM creation, before adding applications and customization, you can take a snapshot. So, if something goes wrong, you can always revert to the original condition. To take a snapshot, go to the VM settings and select Disks.
- Click to open the OS disk settings.
- Click Create Snapshot
- Name the Snapshot and click Full as the type.
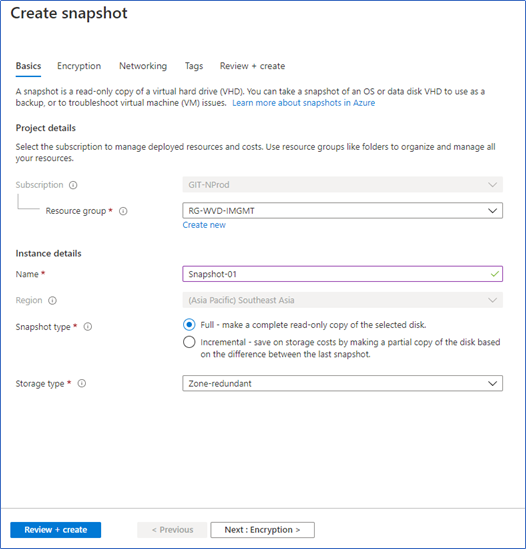
Image customization
Now you can start customizing the image according to your organization's needs. I have highlighted the below customizations.
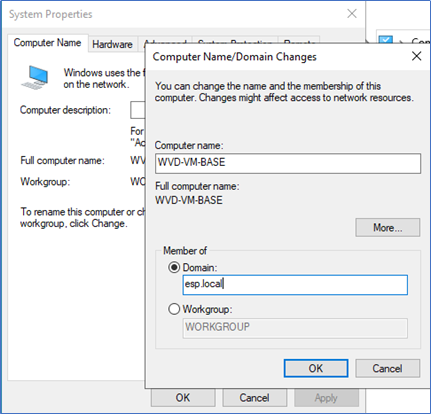
Domain joins to access relevant applications and accessing resources. However, after the SysPrep generalization domain, the join will be removed.
Install Applications and Software’s
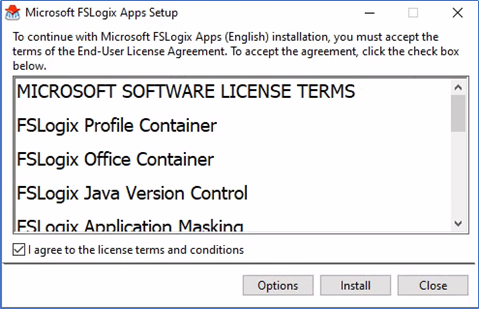
You can install all the relevant applications to your organization, Browsers, Office apps, Virus guards, security apps, document readers, and corporate apps. Also, you can install FSLogix client and log analytics agents, which are required for WVD configurations.

Deploying Configurations and settings.
You can push the configurations settings to the windows 10 VM so those will be replicated to all the VM’s. however, these settings can be pushed through group policies later with the support of the Active directory. The followings are a few changes you can add through Microsoft Management Console (MMC)
- Internet proxy configurations
- Host file changes
- Firewall configurations
- Local user, local admin changes
- Certificate configurations
- RDS restrictions and configurations.
- Windows updates
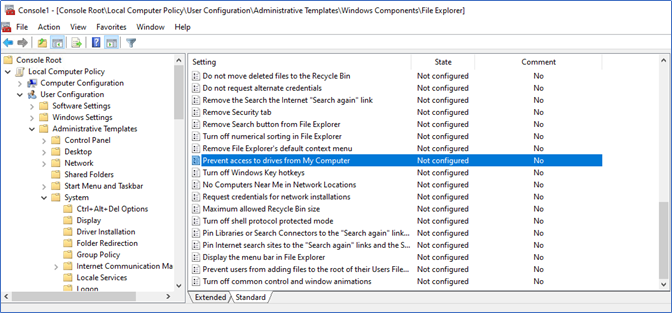
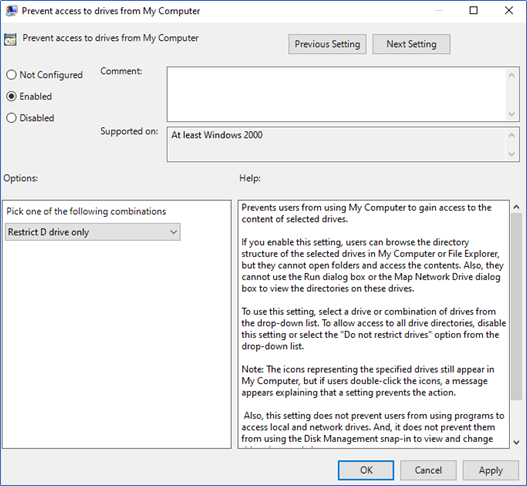
Restrict users accessing the temporary drive
All Azure VM’s have a temporary drive as D: drive, and if you save anything, it will auto wiped after a reboot. So, it is better to prevent users from accessing it. Use the following registry key.
Local computer policy - User configurations - Administrative Templates - Windows components - File Explorer - Prevent access to drivers from My Computer
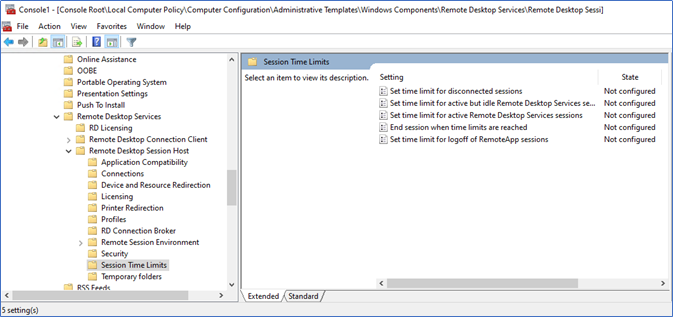
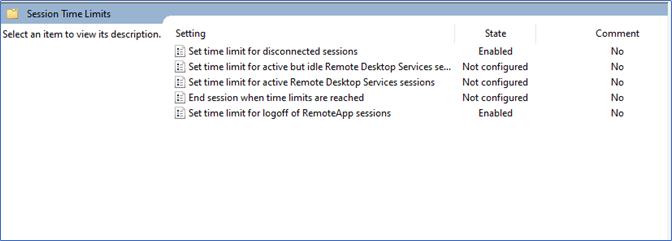
Configure RD Session settings
You can configure RDS settings from Local computer policy – computer configurations – Administrative templates – Windows components – Remote desktop services – Remote desktop session host.
Set limit for disconnect sessions – enabling this setting will log off disconnected sessions after a specified time.
The set time limit for logoff remote app sessions – this setting will log off when a remote app session is disconnected.
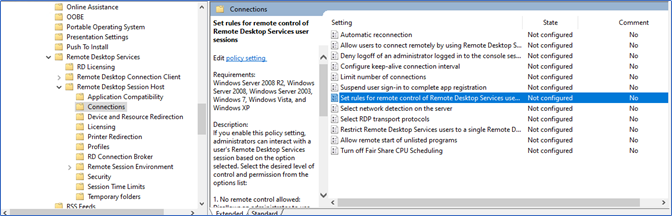
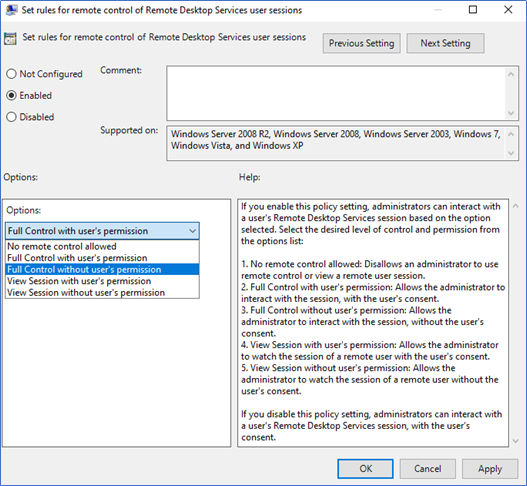
Configurations for session shadowing
Shadow Session is a great feature where the Administrator can view and take control of the remote desktop session, which is the user connected to. This is a free built-in feature that can compete with solutions such as any desk or Teamviewer. With session shadow, the admin can view the session, take full control, or view and take full control with the user's consent. These settings can be configured centrally with Group Policy or Registry. Below settings can be configured through group policy.
SysPrep and Capture
After installing all the applications, software’s and implementing relevant configurations on the VM, you can generalize the image and capture it from the Azure portal to use in WVD images.
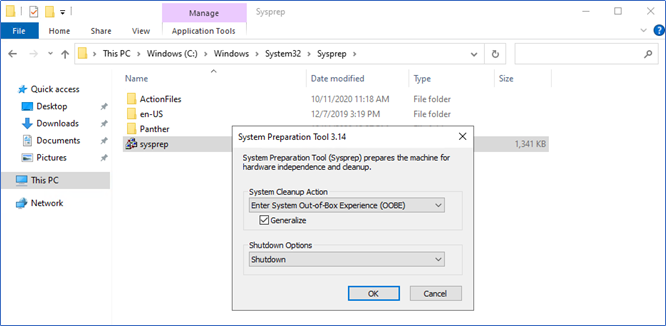
- Before SysPrep take a snapshot for additional safety
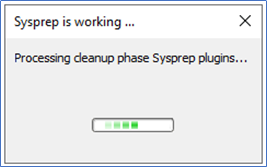
- Next, you need to run SysPrep to make the image generalized. Navigate to C:\Windows\System32\Sysprep through windows 10 VM to run the exe. Select OOBE, Generalize, and Shutdown.
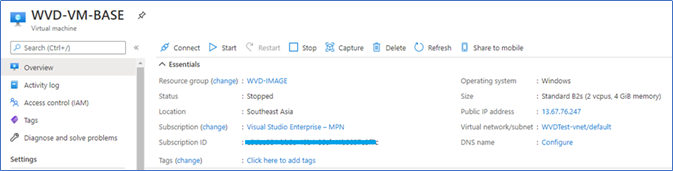
- Next, go to the Overview of the VM from the Azure portal and click Capture.
- Give a name to the image and click Create

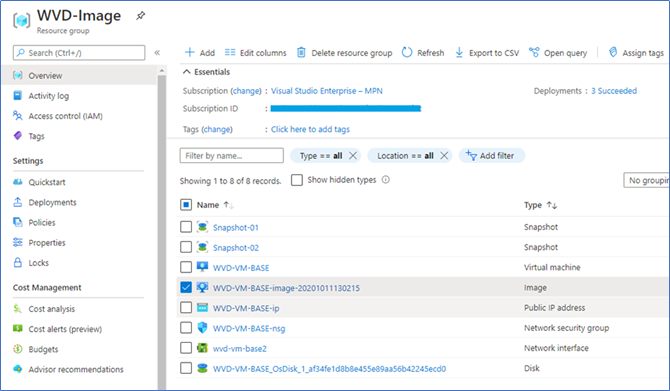
- After the completion, you can see the image is created in the relevant Resource group.
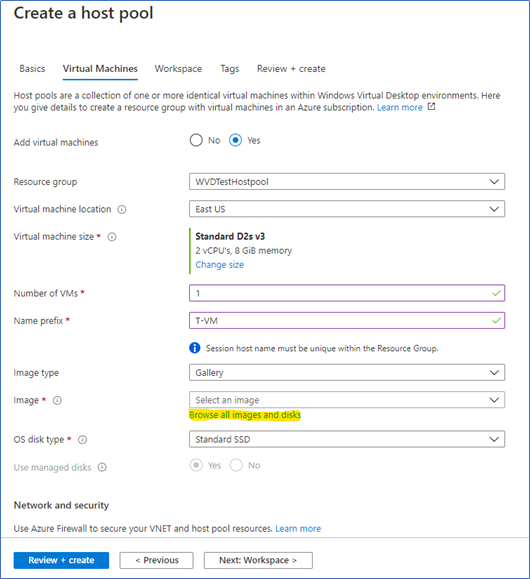
Create a WVD Host pool using a golden image
Now you can start creating the WVD host pools using the golden image captured.
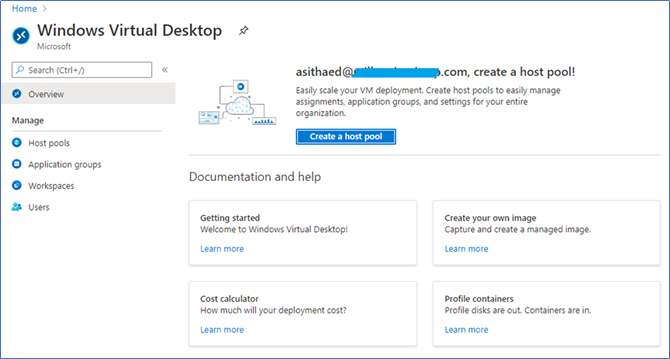
- Log in to the Azure portal, Windows Virtual Desktop blade, click Create a host pool.
- Fill in all the relevant details.

- From the Virtual Machine windows, click browse all images and disks on Image.
- Select the captured image from My Items
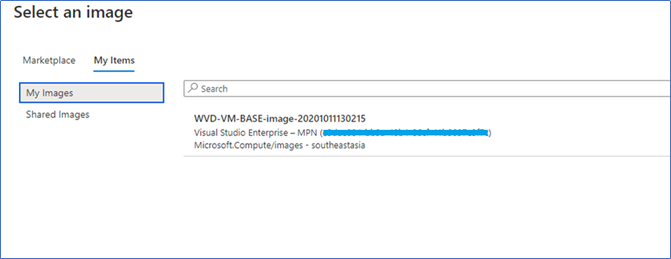
- Fill in the rest of the information according to your WVD configurations and create the host pool.
In this way, you can have a base image with all the software, application, and latest updates to implement WVD host pools. In the next posts, I will discuss managing windows updates on these images and optimizing the operating system and Teams for Windows virtual desktop. Stay tuned.
Other WVD related posts
01 – Working remotely and efficiently with Microsoft technologies
02 - Windows Virtual Desktop | Configuring Prerequisites and WVD Tenant Creation
03 - Windows Virtual Desktop | Create Host Pool and Access through Web, Client App, and Mobile Devices
04 - Windows Virtual Desktop | Configure FSLogix User Profiles using Azure Files and AD Authentication.
05 - Windows Virtual Desktop | Manage App groups and Publish Applications
06 - Windows Virtual Desktop | 2020 ARM Version | Deployment with Domain Services
07 - Windows Virtual Desktop | Extra security with Multi-Factor Authentication
08- Windows Virtual Desktop | Shadow sessions
Hope this post is useful
Cheers
Asitha De Silva
