
In my previous post on AVD | Custom Image Management, we discussed configuring the Custom Image Management Portal feature, which simplifies and automates the creation of golden images. In this post, I will explain how to use your own scripts to install your LOB apps and other applications through the image builder process zero touch.
Custom image management allows you to add a custom URI for application deployment and configuration using your own script. This allows you to call publicly available GitHub URIs. However, in this post, I would like to go beyond that and call applications from a storage account. You need to copy your LOB apps to the storage account and generate a script to deploy them through Azure Image Builder.
Follow my previous blog post to implement Custom image templates. (here)
Create a custom image template with a publicly accessible custom script
In this scenario, we are accessing scripts that are published to the public; these are apps available in public repositories. For example, applications such as Google Chrome and VS code.
- Login to Azure portal – AVD – Custom image template
- Provide a template name, subscription, resource group, and manage identity

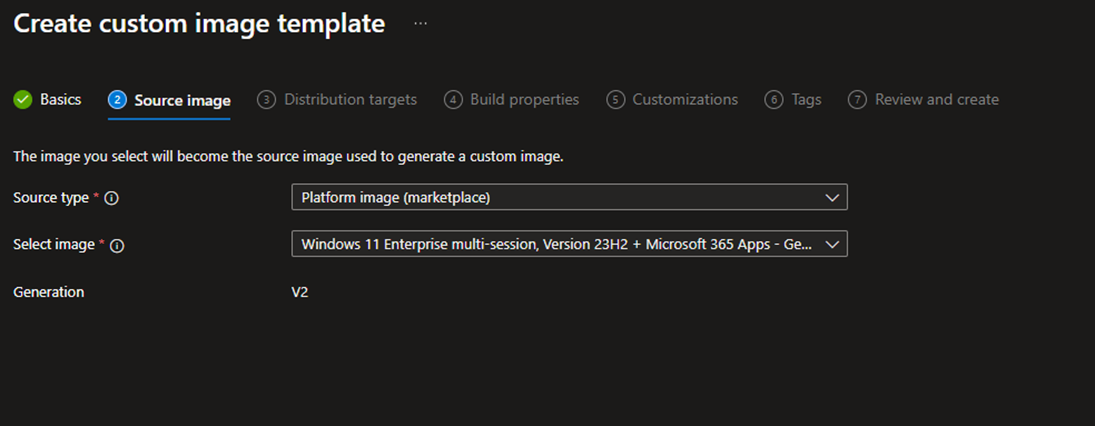
- Select the latest source image
- Select your destination Compute gallery

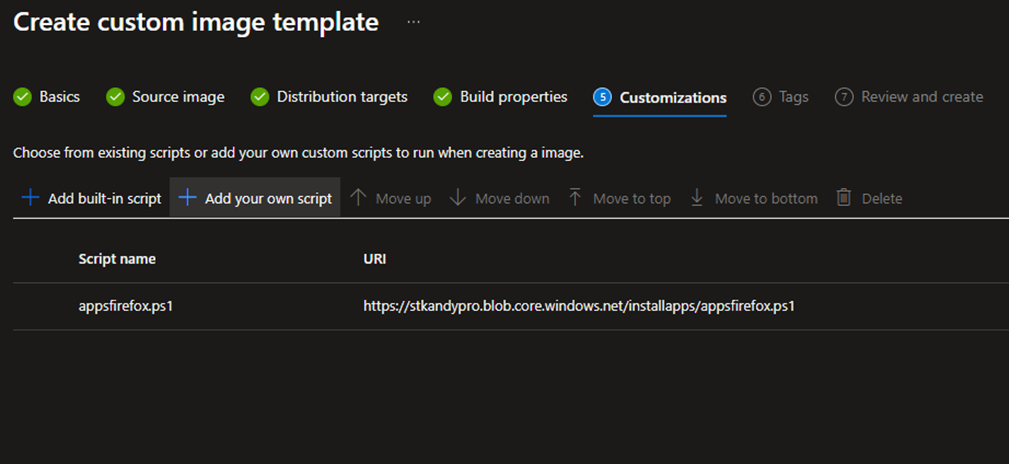
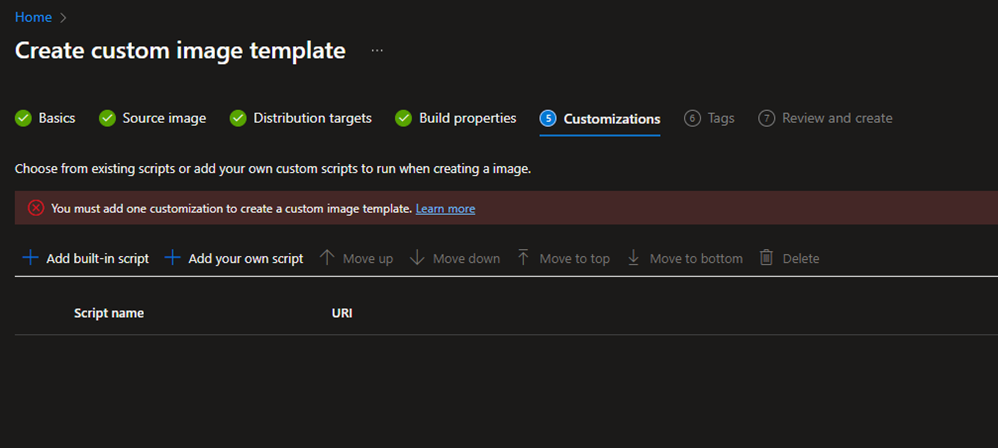
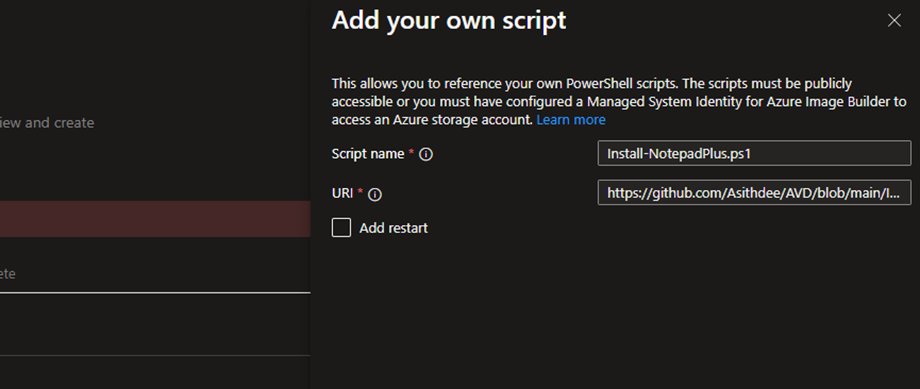
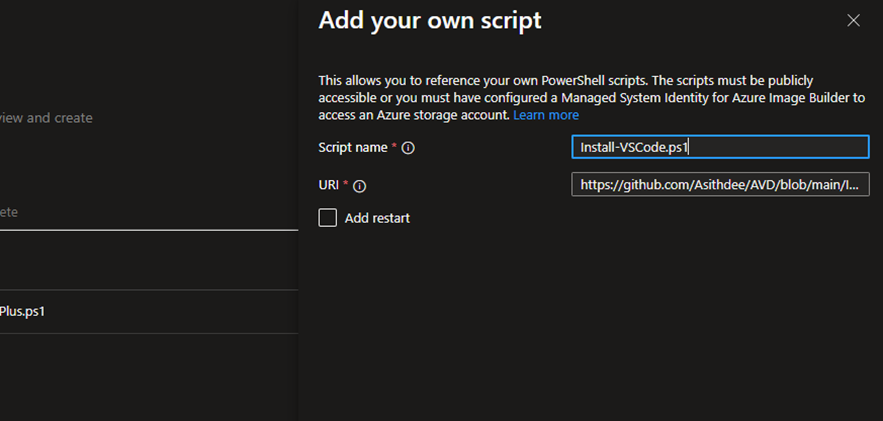
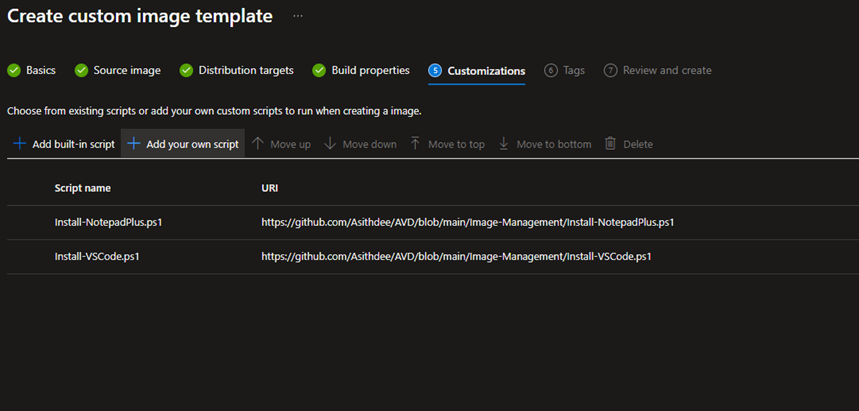
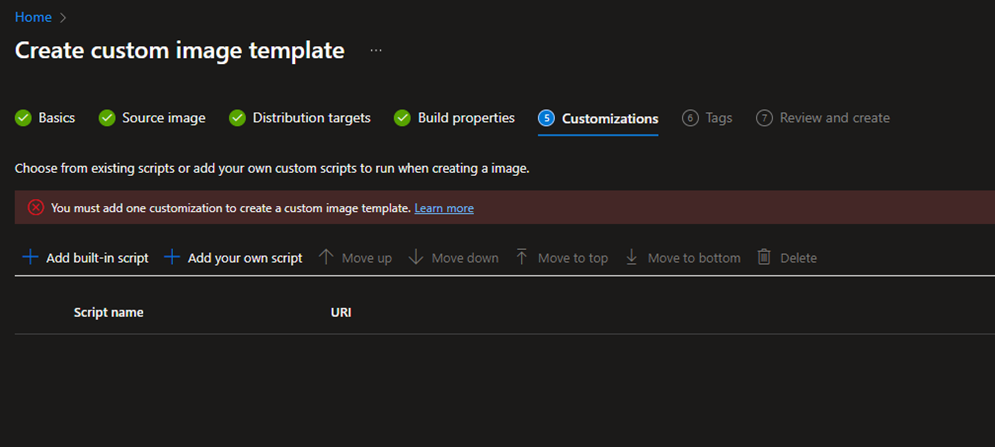
- In customizations, select Add your own script
This allows you to reference your own PowerShell scripts. The scripts must be publicly accessible.
Now, let's see how to create your own script to deploy applications.
Create the installation script in Github for a publicly accessible application
You can create custom scripts to install and host applications in your GitHub repository, which must be public. Here is an example script.
- Login to your Github account – repository – create a new file – and name the file extension .PS1
- Here is an example code that can be used to deploy Notepad++
# Download Notepad++ Sources
Write-Host "Downloading Notepad++ sources..."
Invoke-WebRequest -Uri 'https://github.com/notepad-plus-plus/notepad-plus-plus/releases/download/v8.5.6/npp.8.5.6.Installer.x64.exe' -OutFile 'c:\windows\temp\npp.8.5.6.Installer.x64.exe'
# Wait 10s
Start-Sleep -Seconds 10
# Install VSCode silently
Write-Host "Installing Notepad++ now..."
Start-Process -FilePath' c:\windows\temp\npp.8.5.6.Installer.x64.exe' -Args'/S' -Wait -PassThru
Write-Host "Successfully installed Notepad++..."
} catch {
Write-Error -Message $_.Exception
throw $_.Exception}
- you can use this type of script to call publicly available applications
AVD/Image-Management/Install-NotepadPlus.ps1 at main · Asithdee/AVD (github.com)
AVD/Image-Management/Install-VSCode.ps1 at main · Asithdee/AVD (github.com)
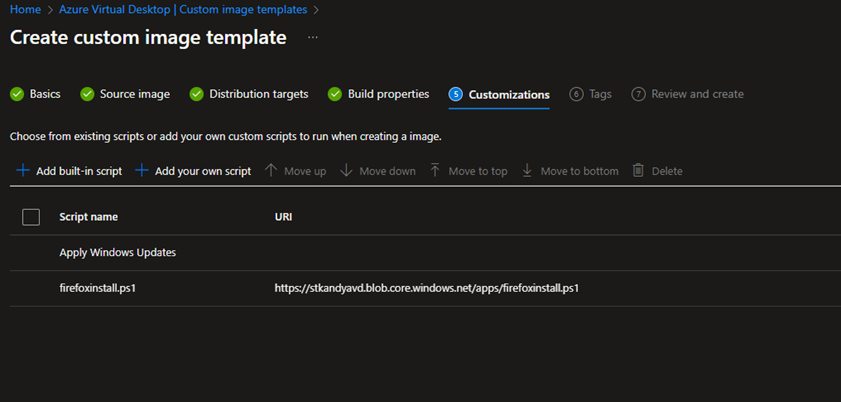
- now you can call this custom script from your custom image management template
– click Add your own script
- Add your script, provide the script name, and copy-paste the URI from your GitHub repository
- Review and create the image.
Install applications from blob storage using private endpoints
If you have custom-built applications or an internal application repository, you can save these applications to a storage account blob and call it to the Image builder process. If you want to restrict public access to this blob storage, use private endpoints.
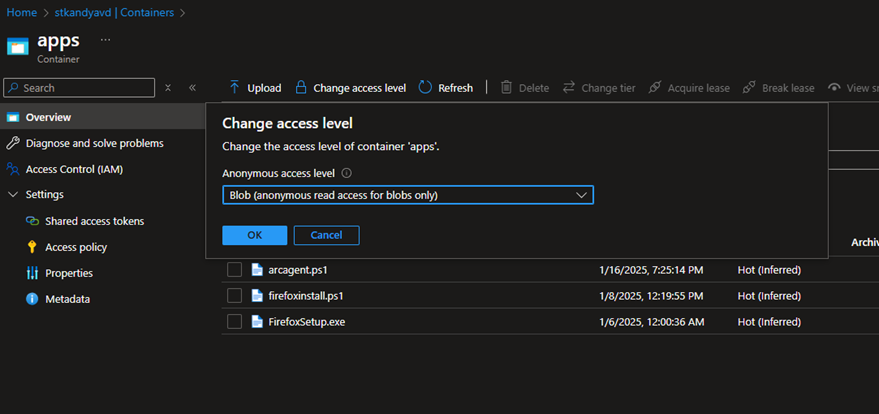
- Create a Blob storage with anonymous read access.
- If you want, you can enable private endpoints in the storage account.
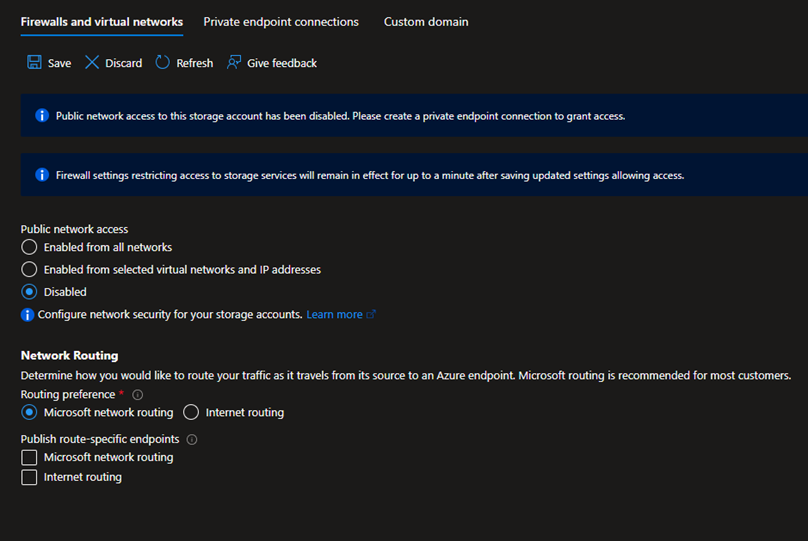
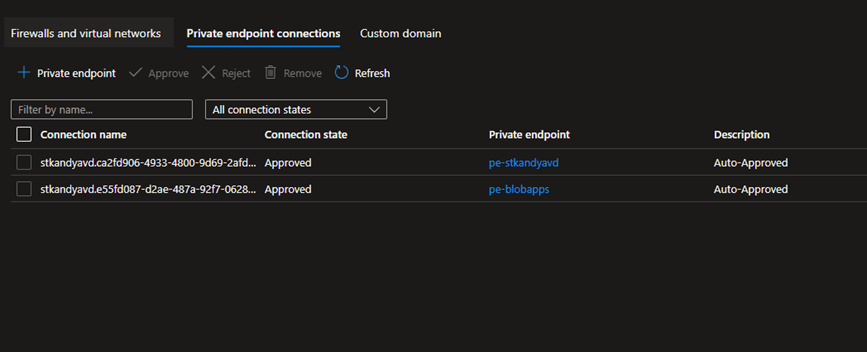
If you enable Private endpoints, make sure you run Azure image builder in a VNET with network connectivity to the private endpoint IP range.
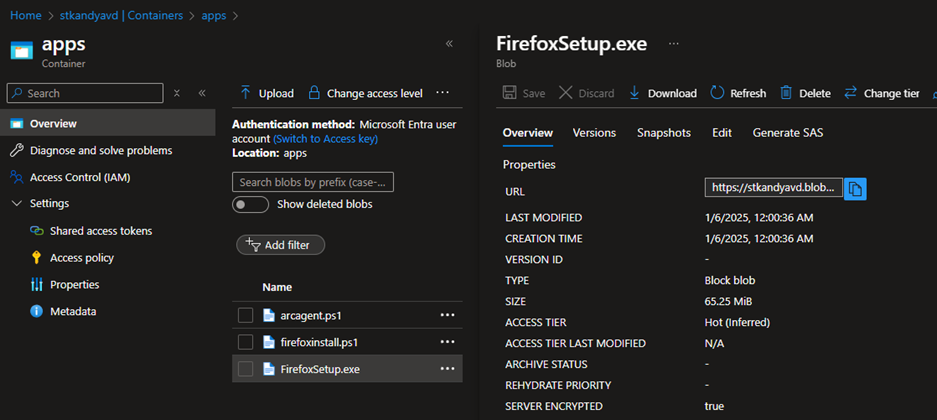
- Upload the app installations to the blob
- In the application, copy the URL
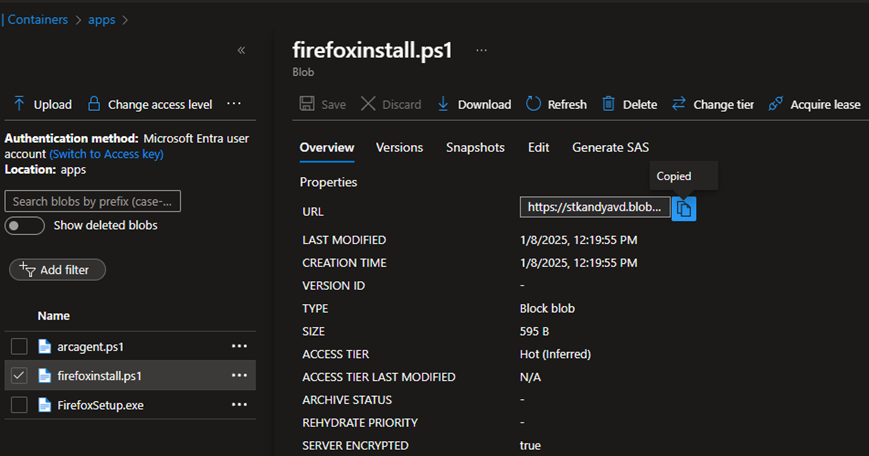
- Create a PowerShell script like this and add the copied URL
githubusercontent.com/Asithdee/AVD/refs/heads/main/Image-Management/InstallFromBlob-Firefox.ps1
Try {
# Download Notepad++ Sources
Write-Host "Downloading Firefox..."
Invoke-WebRequest -Uri 'https://stkandyavd.blob.core.windows.net/apps/FirefoxSetup.exe' -OutFile 'c:\windows\temp\firefoxsetup.exe'
# Wait 10s
Start-Sleep -Seconds 10
# Install VSCode silently
Write-Host "Installing Firefox now..."
Start-Process -FilePath 'c:\windows\temp\firefoxsetup.exe' -Args '/S /PreventRebootRequired=true' -Wait -PassThru
Write-Host "Successfully installed Firefox"
} catch {
Write-Error -Message $_.Exception
throw $_.Exception
}
- Save the script to the blob storage and copy the URL.
Now you can call this custom script from your custom image management template – click Add your own script, Paste the copied URL
Review and create the template. The application will be installed during the build process when you run the template.
I hope this post is helpful.
