
Most customers still rely heavily on on-premises data center environments for various reasons. Hybrid cloud scenarios are more popular for connecting Azure and on-premises environments. Here are the main options for enabling hybrid connectivity:
- Site-to-Site VPN: A secure, cost-effective way to connect your on-prem network to Azure over the internet using IPsec tunnels.
- Point-to-Site VPN: Ideal for remote users, it enables individual devices to access Azure resources securely.
- Azure ExpressRoute: Offers a private, high-speed connection to Azure via a dedicated circuit—perfect for mission-critical workloads.
- Azure Virtual WAN: A scalable solution for global connectivity, integrating VPN, ExpressRoute, and SD-WAN into a centralized architecture.
Each option balances cost, performance, and complexity—choose based on your organization's needs. In this post, I'm discussing Site-to-Site VPN and providing step-by-step configuration instructions for both Azure and on-premises sites. For on-prem, I'm using an RAS server, but the concept is very similar if you use an enterprise firewall solution such as Palo Alto or Fortinet.
What is Site-to-Site VPN in Azure?
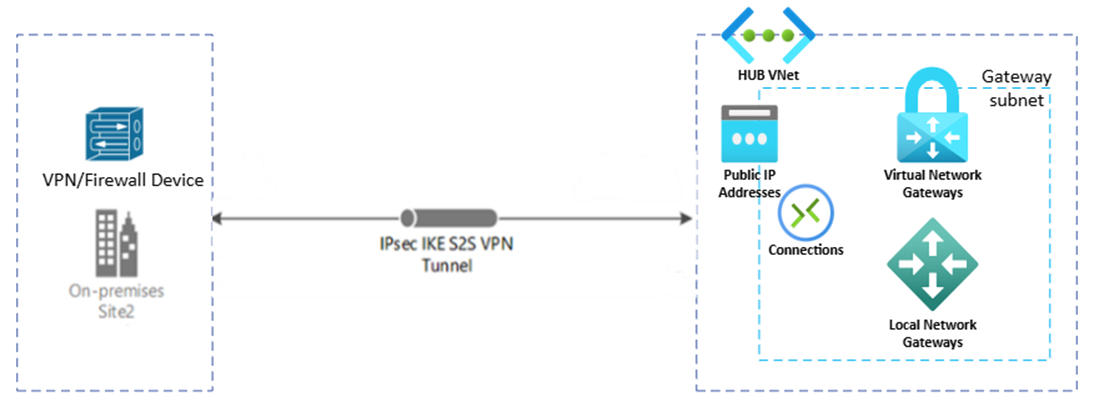
Site-to-Site VPN is a secure way to connect your on-premises network to an Azure Virtual Network (VNet) over the public internet. It uses IPsec/IKE protocols to establish an encrypted tunnel between your local VPN device and Azure's VPN Gateway.
- Best for: Extending your datacenter to Azure for hybrid cloud scenarios.
- Benefits: Quick setup, secure communication, and cost-effective.
- Limitations: Internet-dependent, lower bandwidth compared to private options like ExpressRoute.
Configurations from the Azure side to implement Site-to-Site VPN
To establish a Site-to-Site VPN between your on-premises network and Azure, you'll need a few key resources. Start with a Virtual Network (VNet), which hosts your Azure workloads. Inside the VNet, create a GatewaySubnet—a dedicated subnet reserved for the VPN Gateway. Next, deploy the VPN Gateway, which is the Azure endpoint for the encrypted tunnel; this requires a Public IP address for communication. To represent your on-premises environment in Azure, configure a Local Network Gateway and specify your on-premises public IP and address space (e.g., 192.168.1.0/24). Finally, create a Connection resource to link the VPN Gateway and Local Network Gateway, and set the shared key and connection type to Site-to-Site. These components work together to provide secure, reliable connectivity for hybrid cloud scenarios.
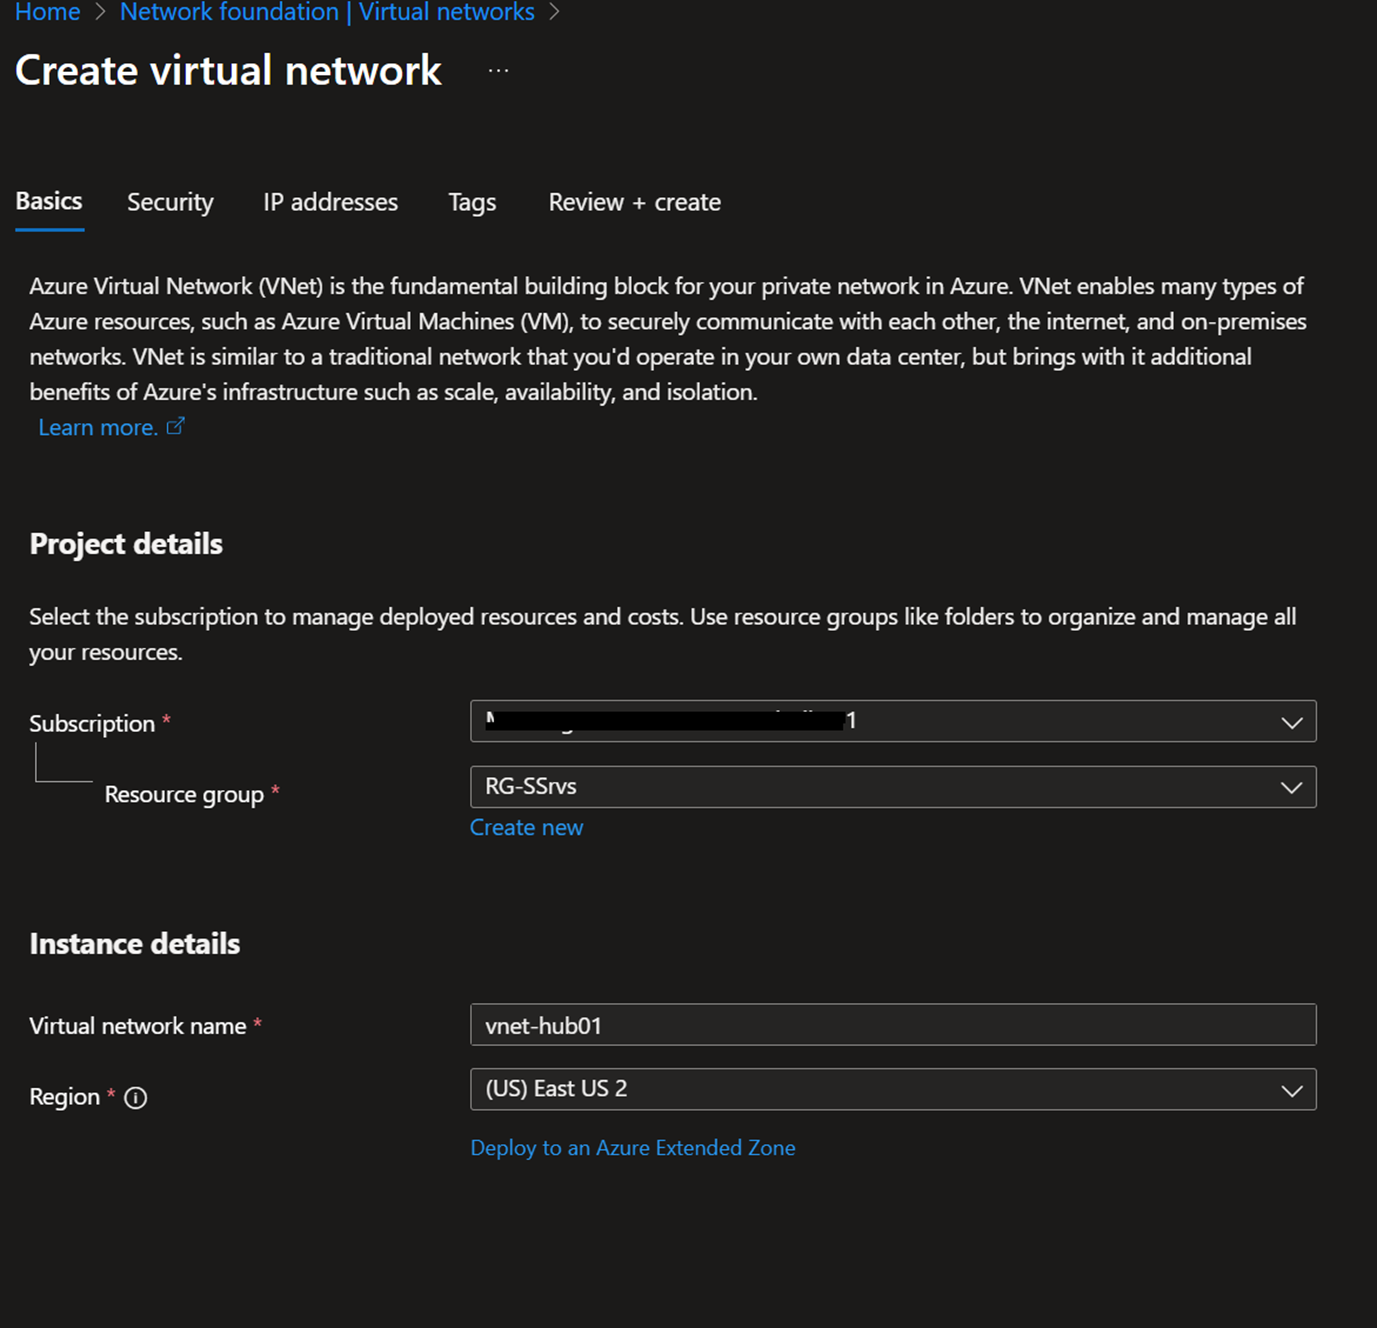
Setting up Virtual Network
Create a Virtual Network or use an existing Virtual Network.
In the IP addresses, create a new subnet, select the subnet purpose as Virtual Network Gateway, and Add.

Configuring VPN Gateway, Local Gateway, and Connection
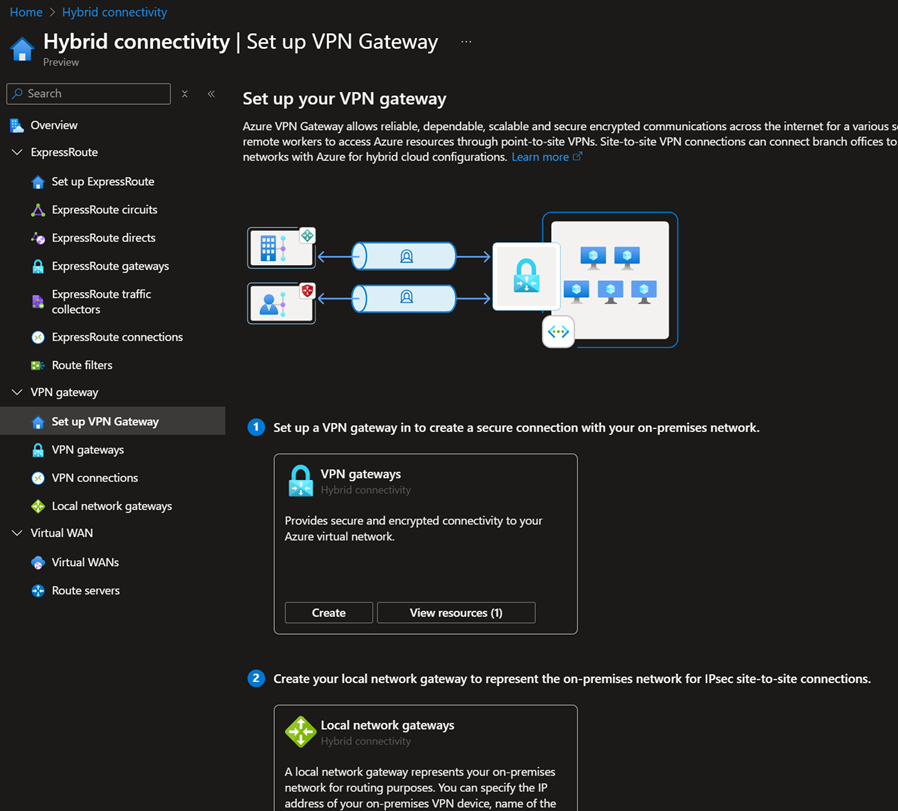
- Log in to the Azure portal – Hybrid connectivity – Setup your VPN Gateway. Select the Create VPN gateway option.
- Fill in the gateway Name, type, SKU, and BGP according to your requirements, then select the previously created VNET and gateway subnet.
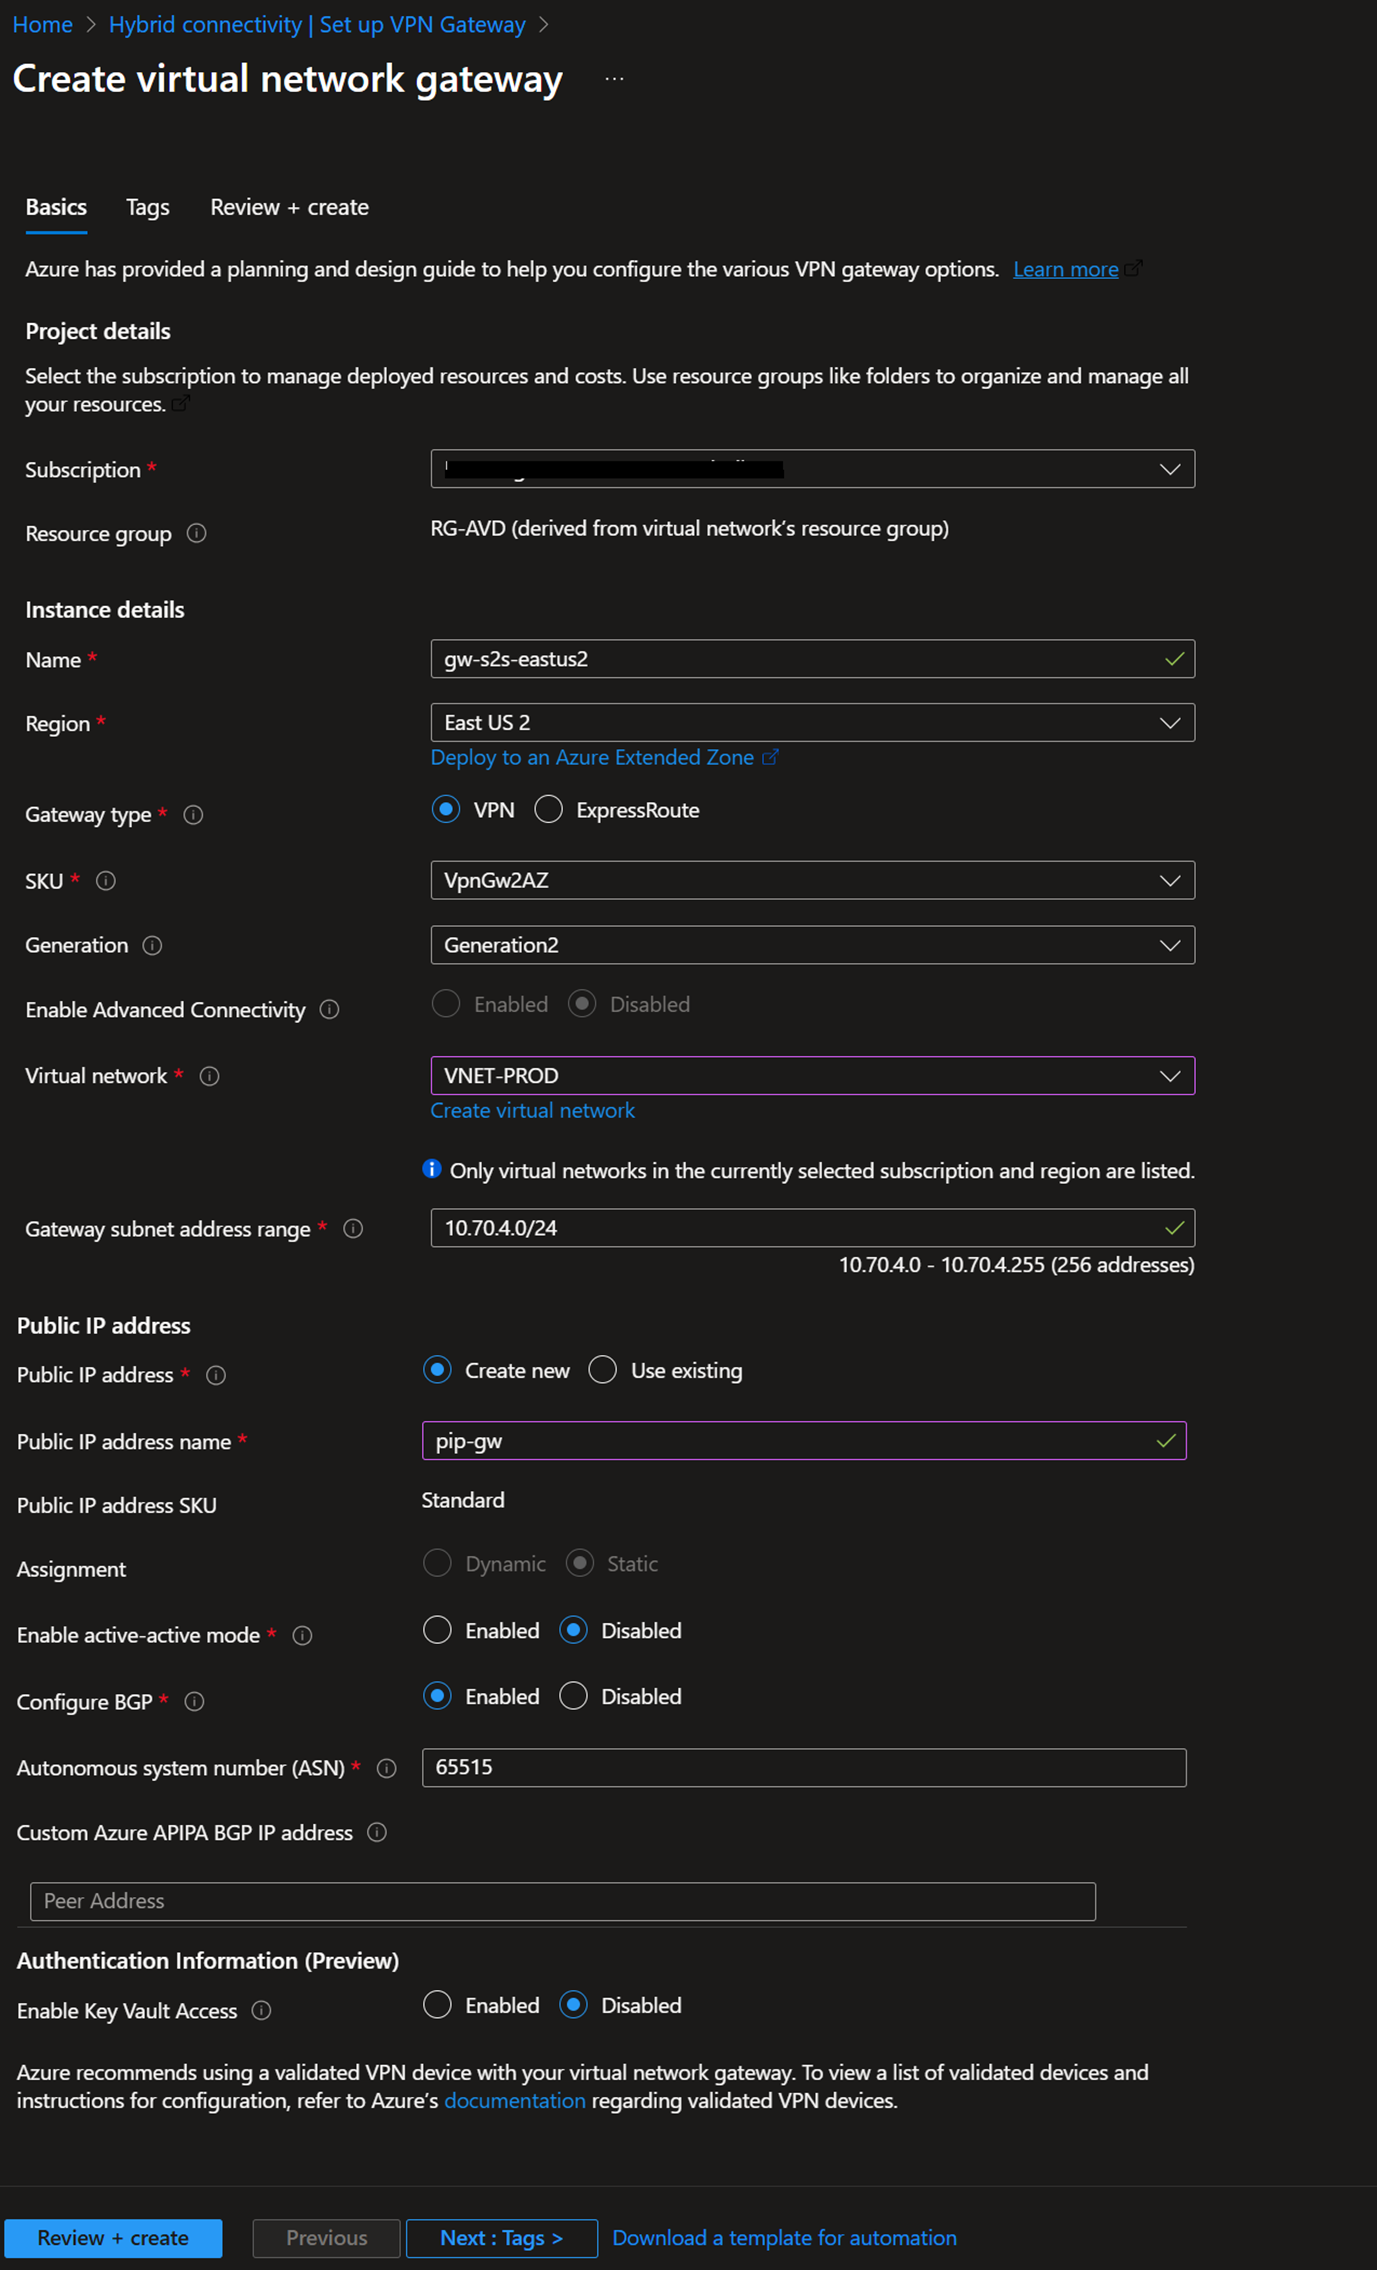
- Click Review and Create. This will take around 30 minutes.
- Goto Hybrid connectivity – Local network gateways – Create
- Local network gateway is your on-premises local network representation. In the IP address field, enter the Public IP address of your on-premises firewall/router. Address spaces represent your on-prem private IP address ranges.
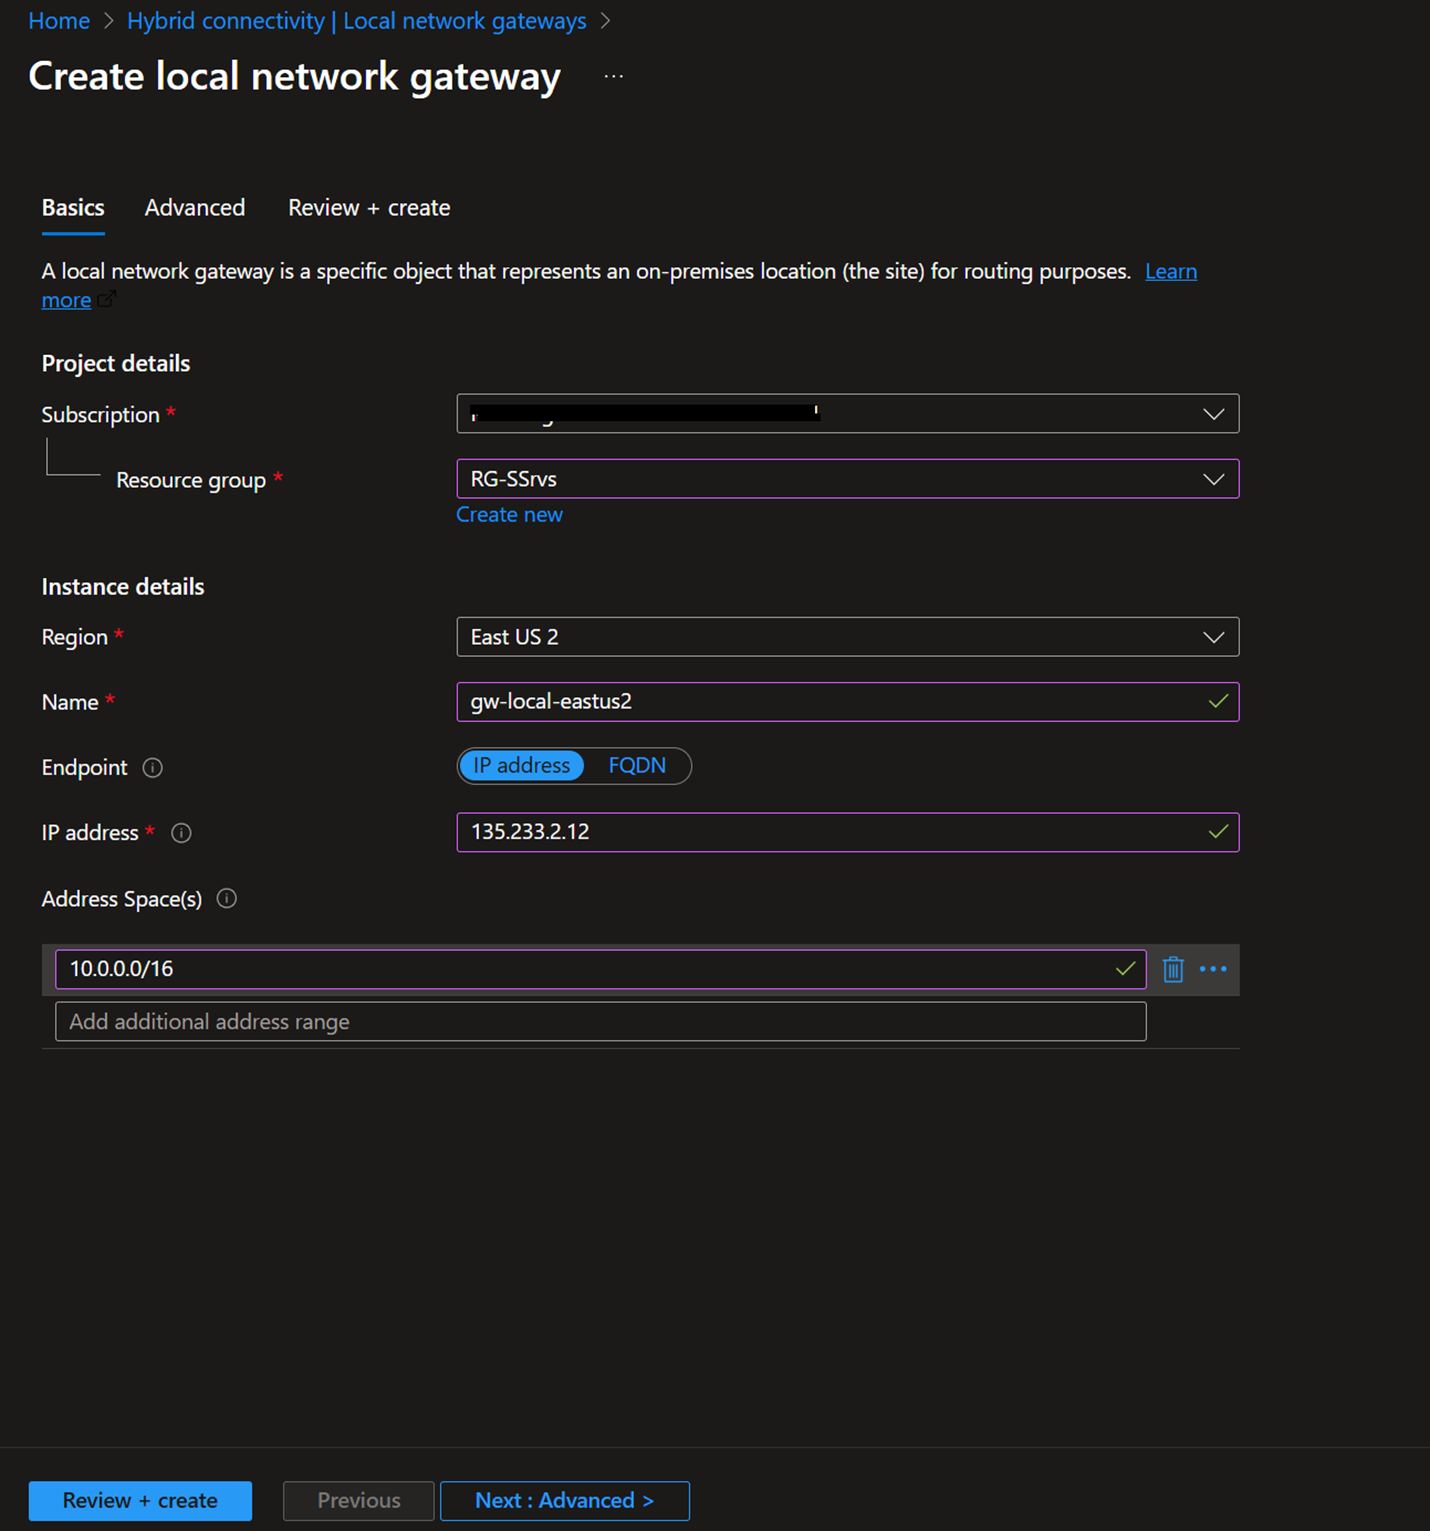
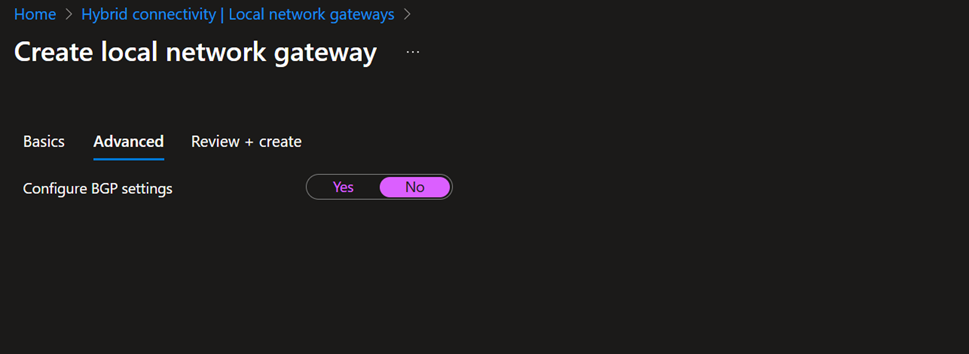
- If required, select BGP settings and Review + Create
Setting up the connection
- Goto Hybrid connectivity – VPN connections – Create
- Make sure to select Site-to-site
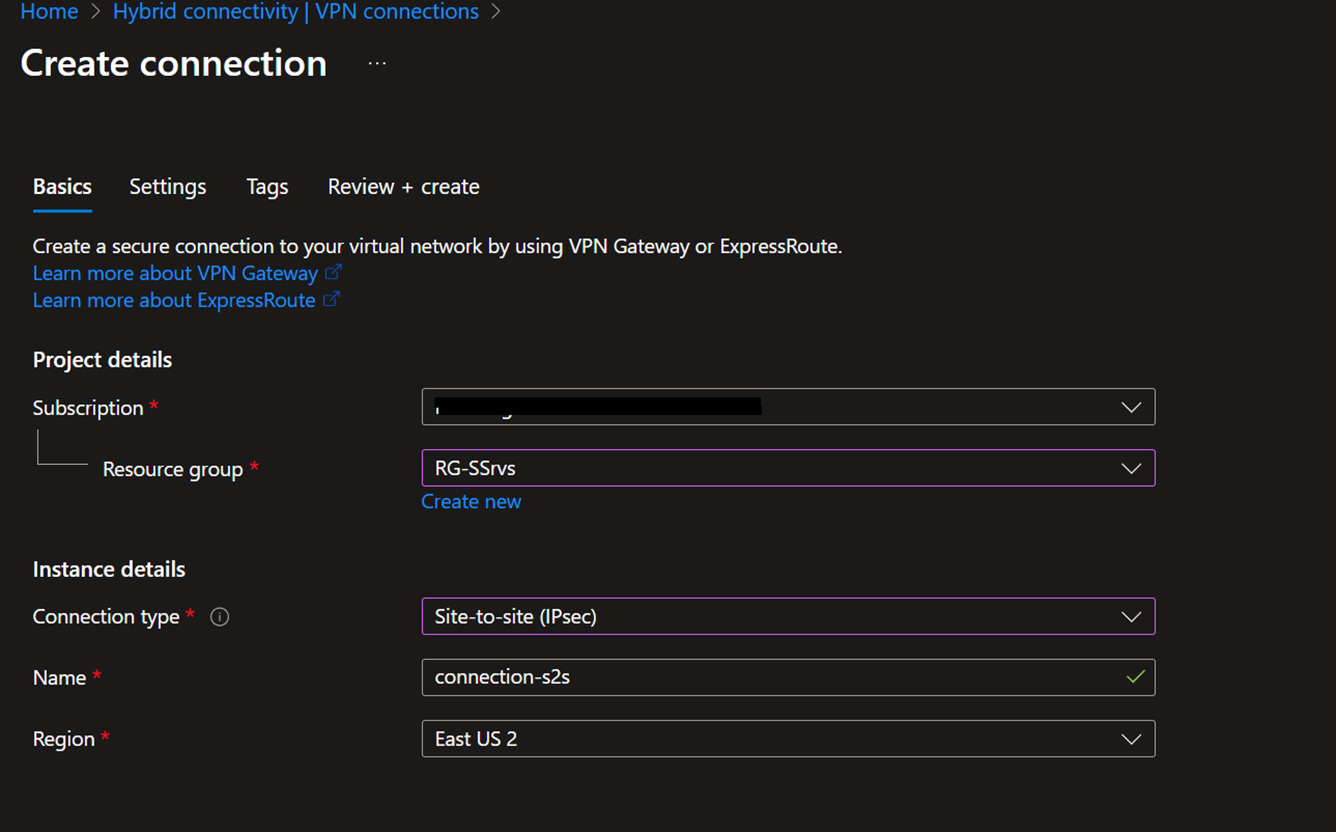
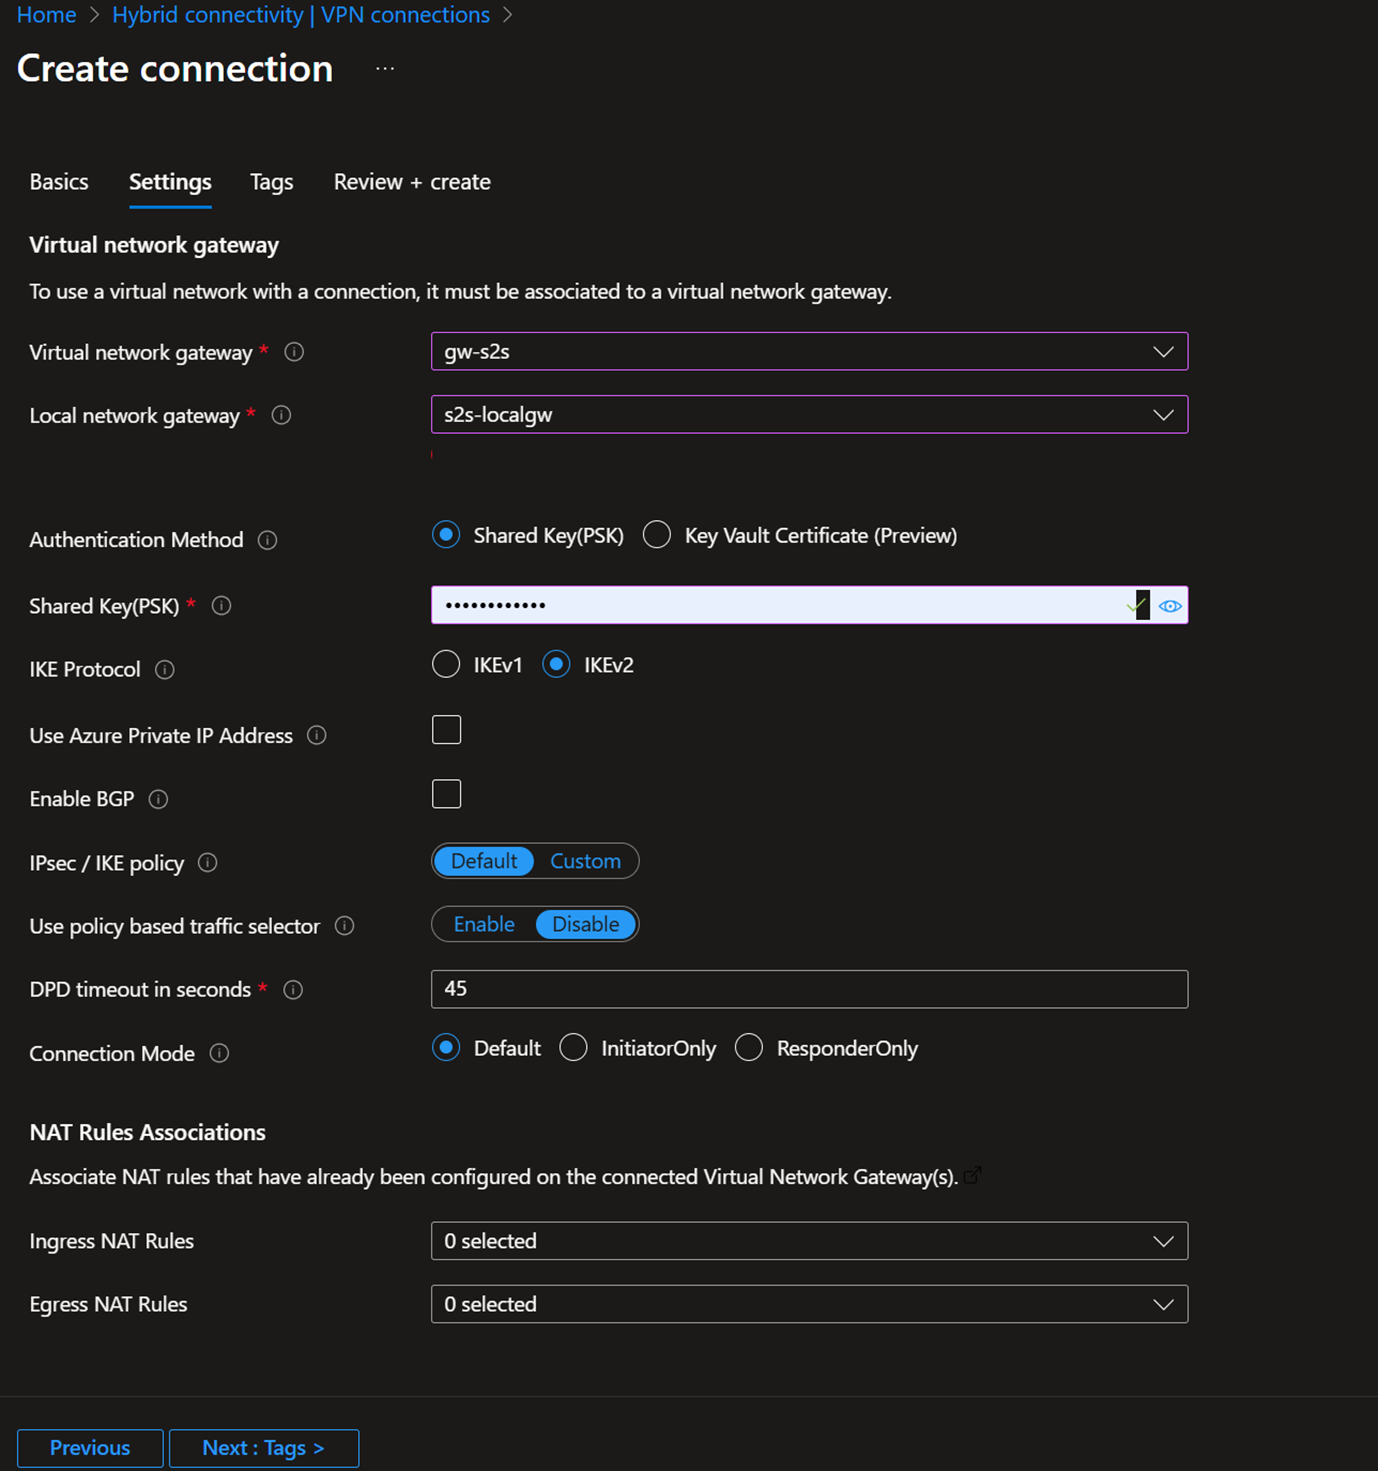
- In the settings, select the previously created Virtual network gateway, Local network gateway, and a shared key; you need to use the same shared key in the on-premise device configuration.
- Review and Create
On-Premises Configuration for Site-to-Site VPN
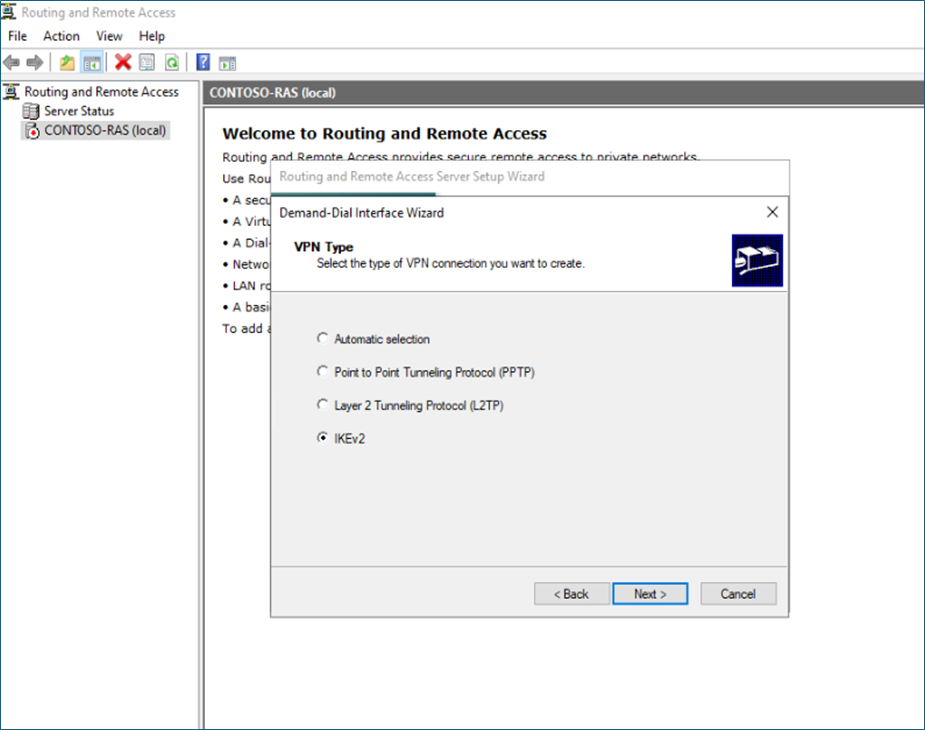
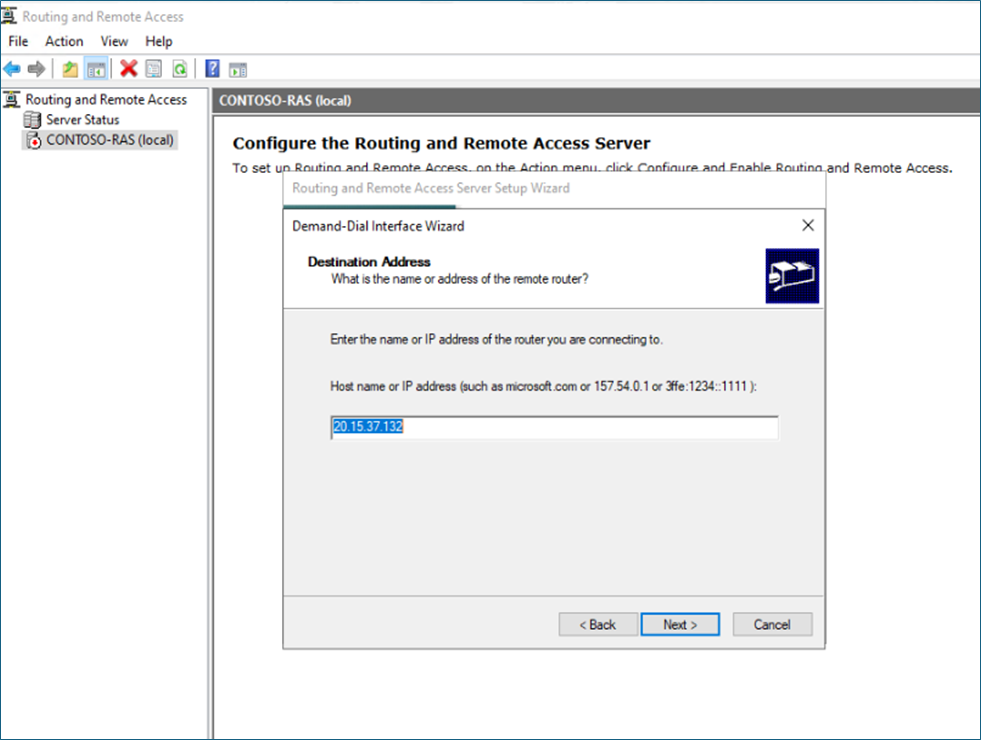
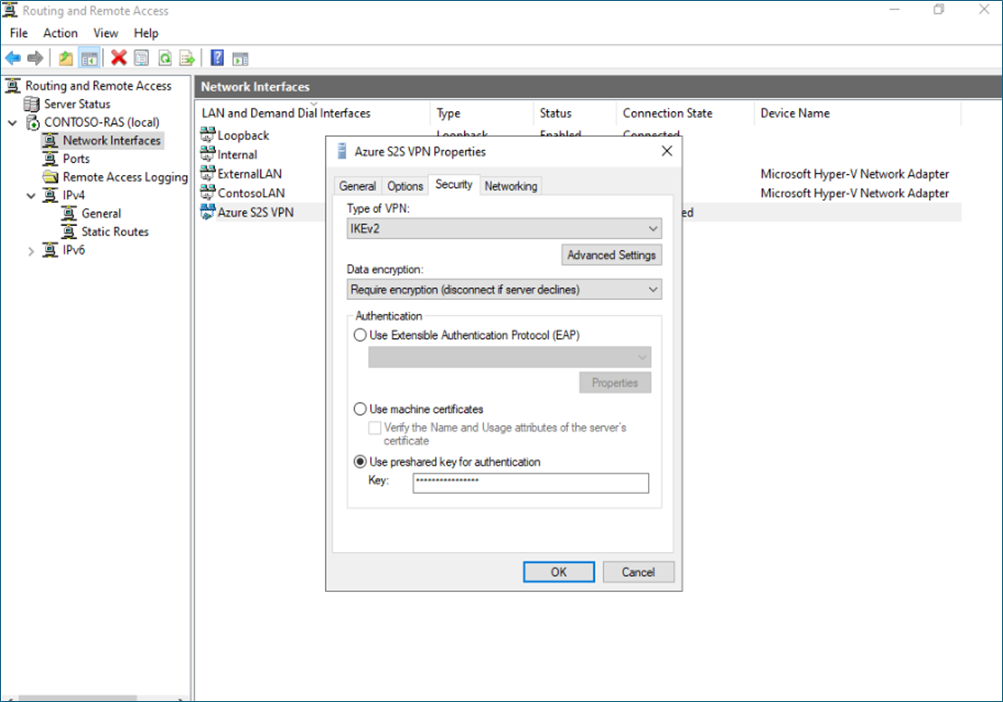
To connect your network to Azure, you need a VPN device with a static public IP and IPsec/IKE support. The VPN device must be configured with IPsec/IKE settings aligned with Azure's requirements: IKEv2, AES256 encryption, and SHA256 integrity. Also, you need to use the shared key, which is defined in the Azure connection.
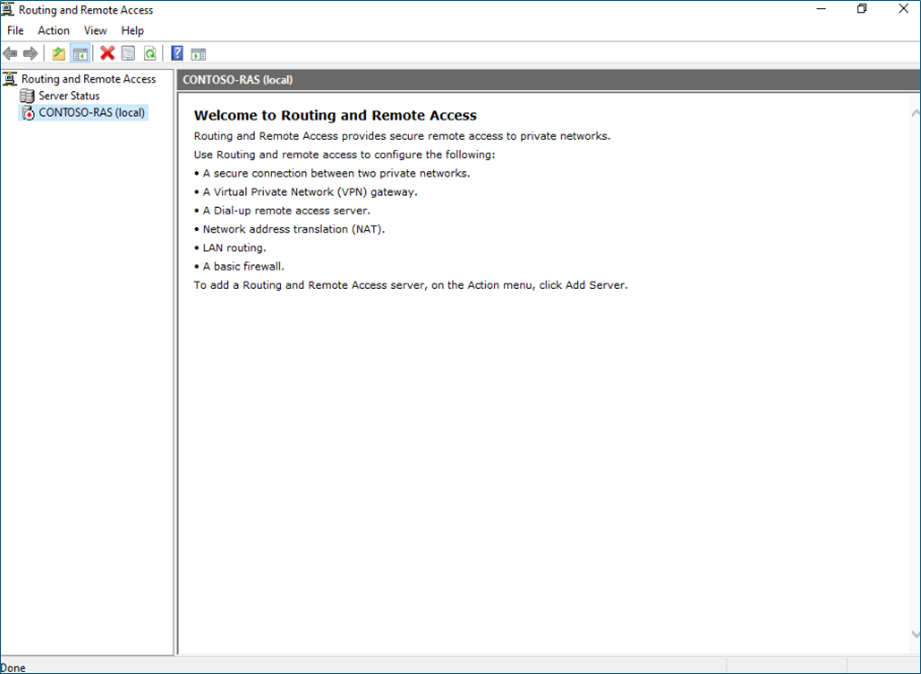
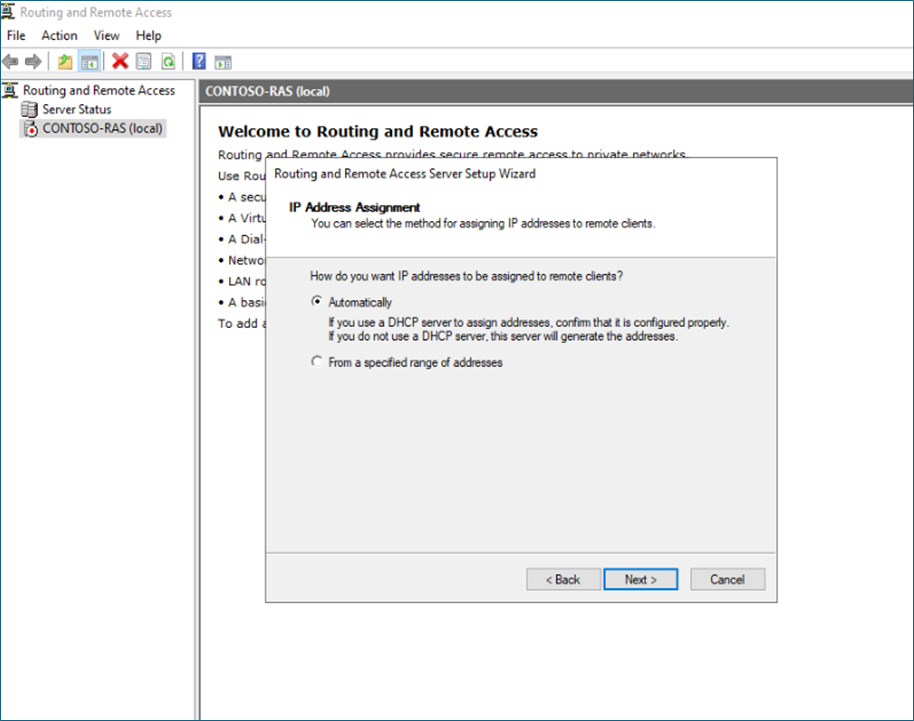
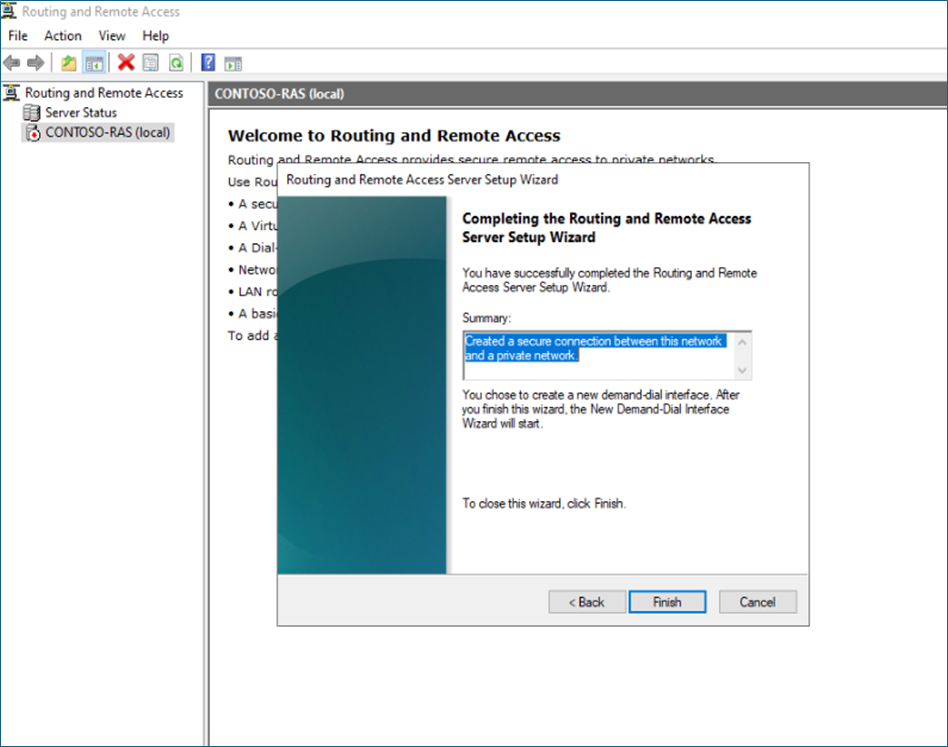
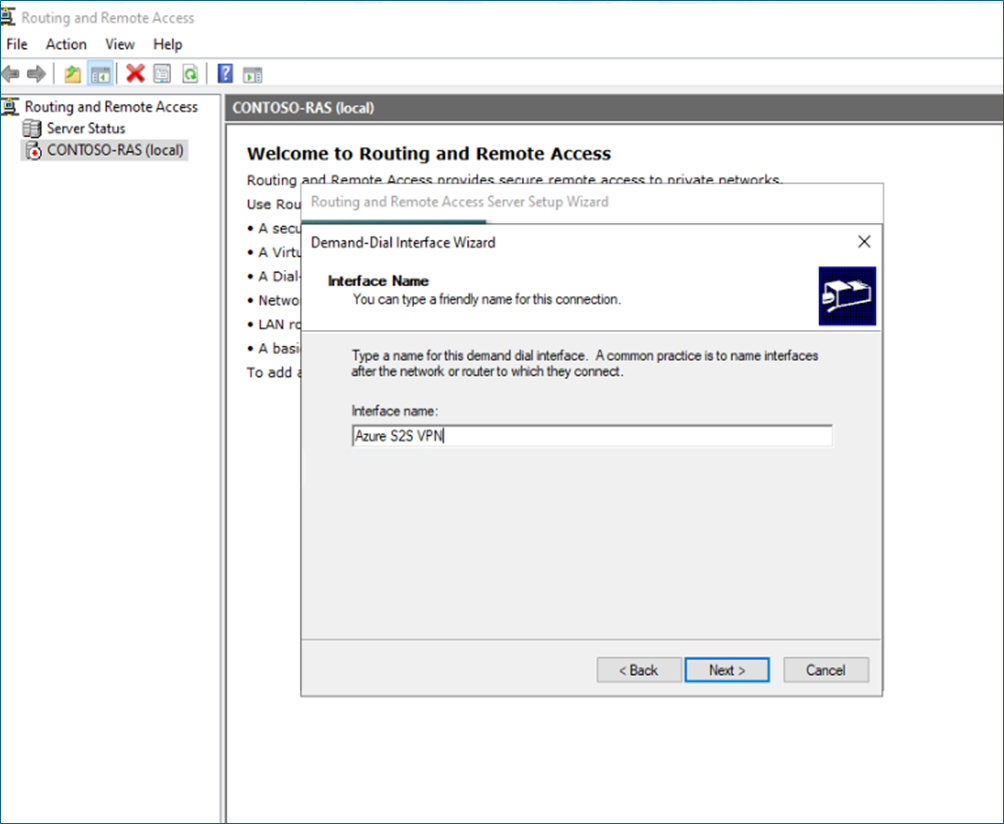
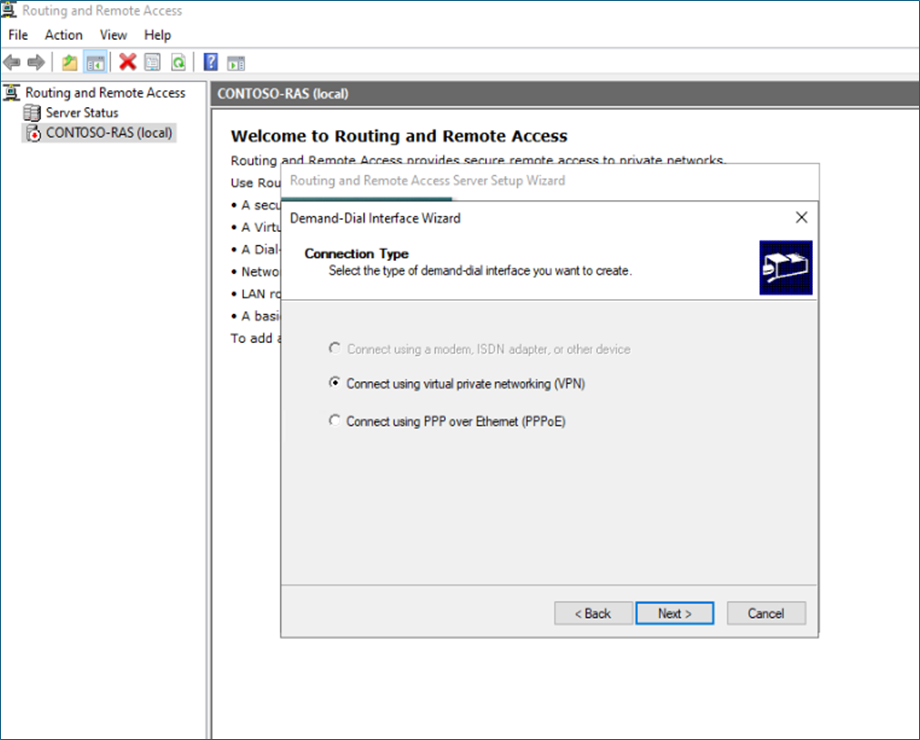
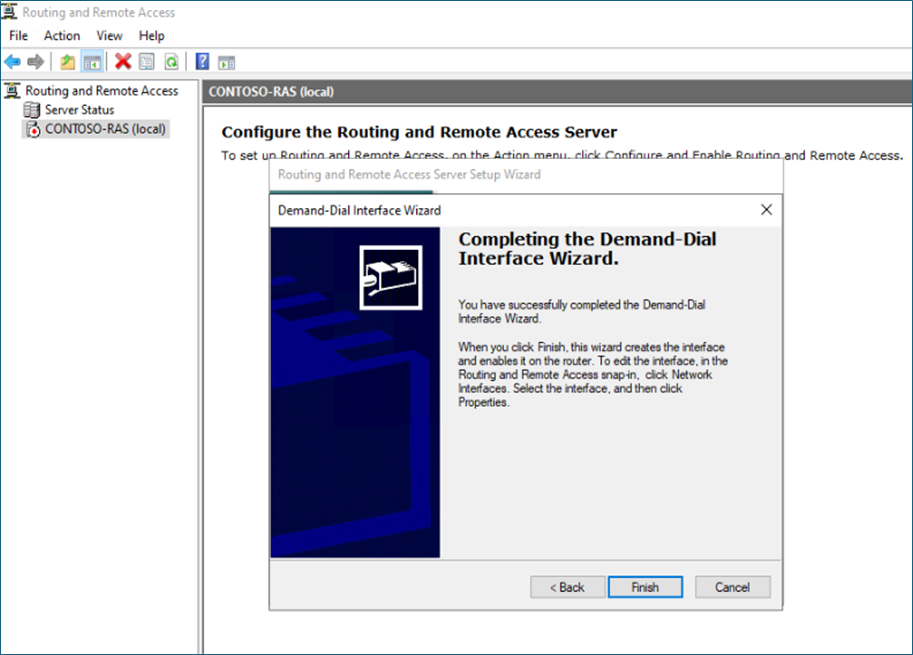
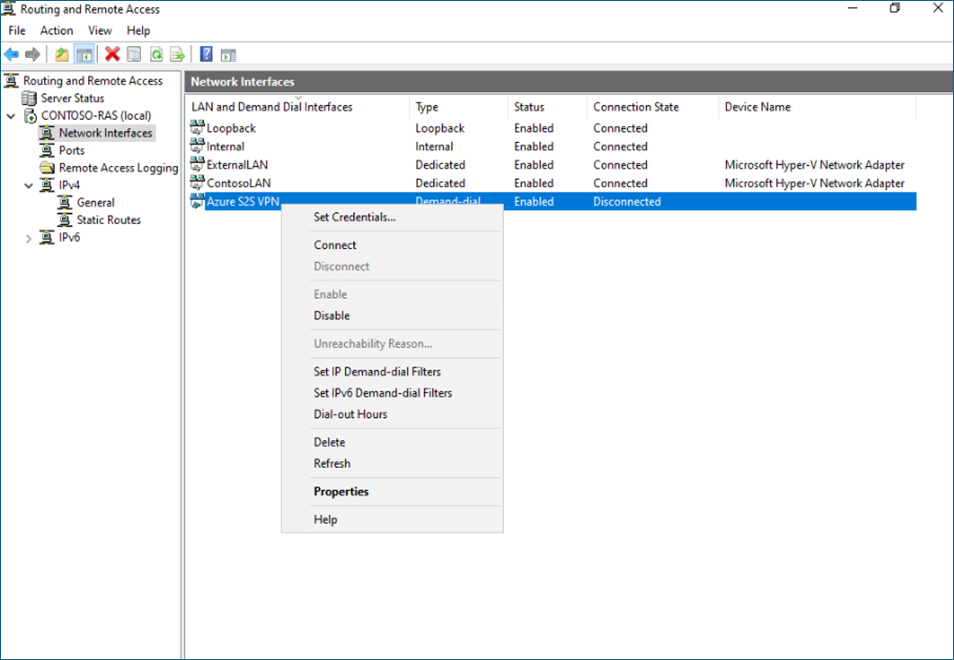
In my example, I'm using Windows RAS, Remote, and a routing server to establish the connection.
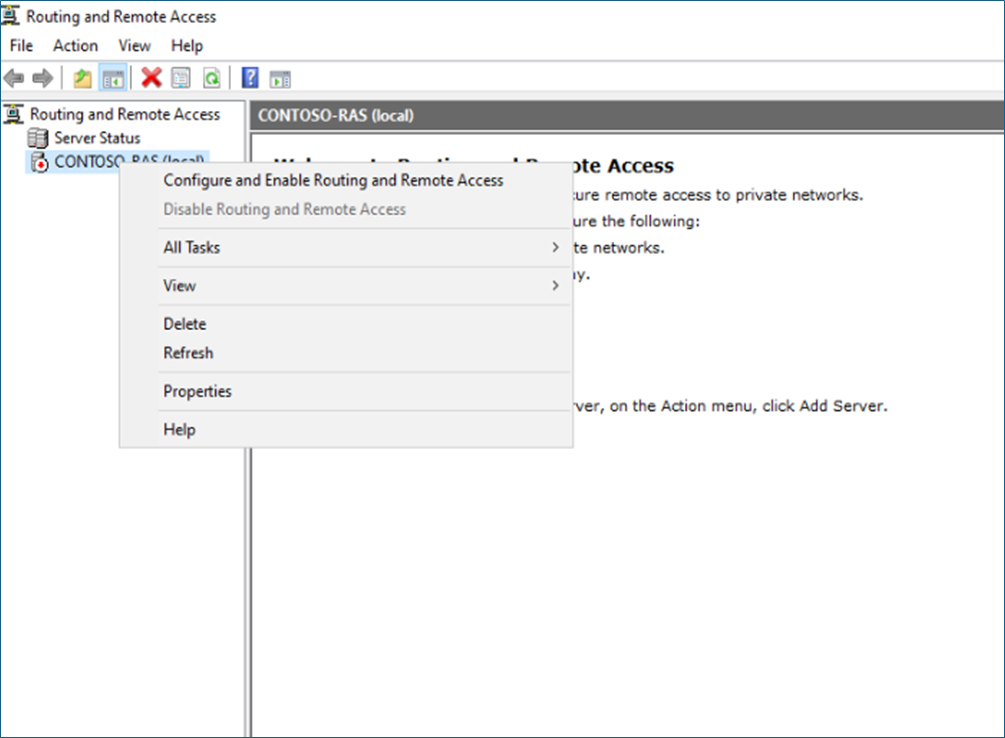
Log in to the RAS server,
Select Configure and enable RAS.
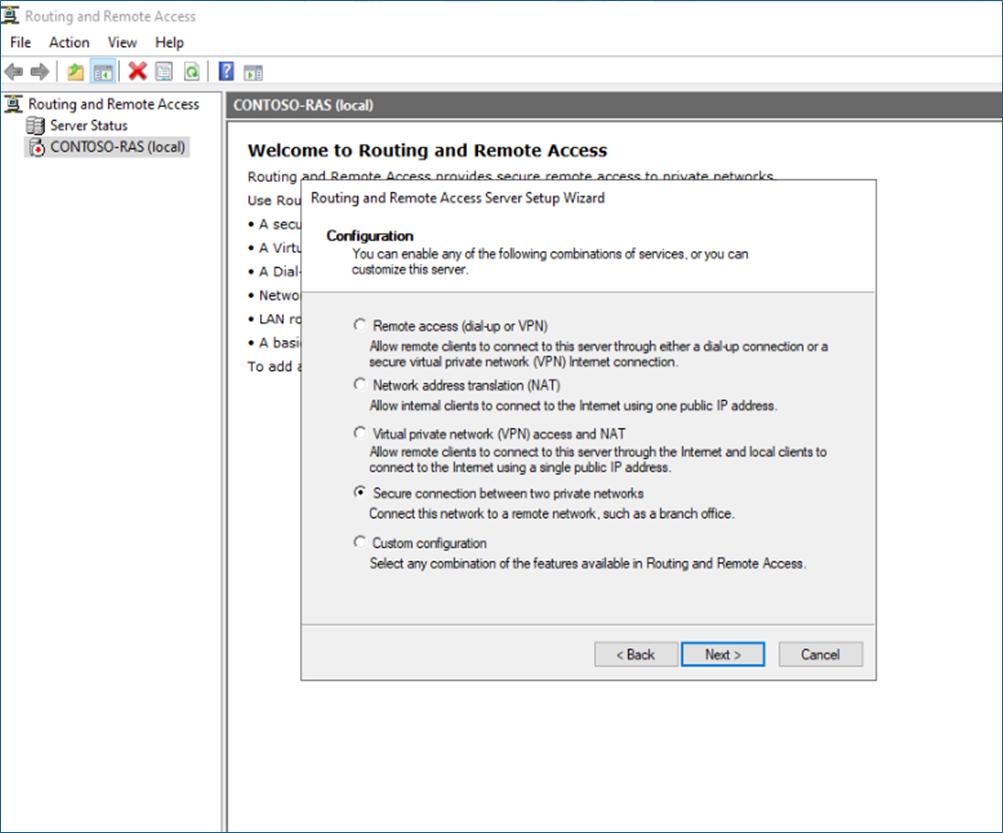
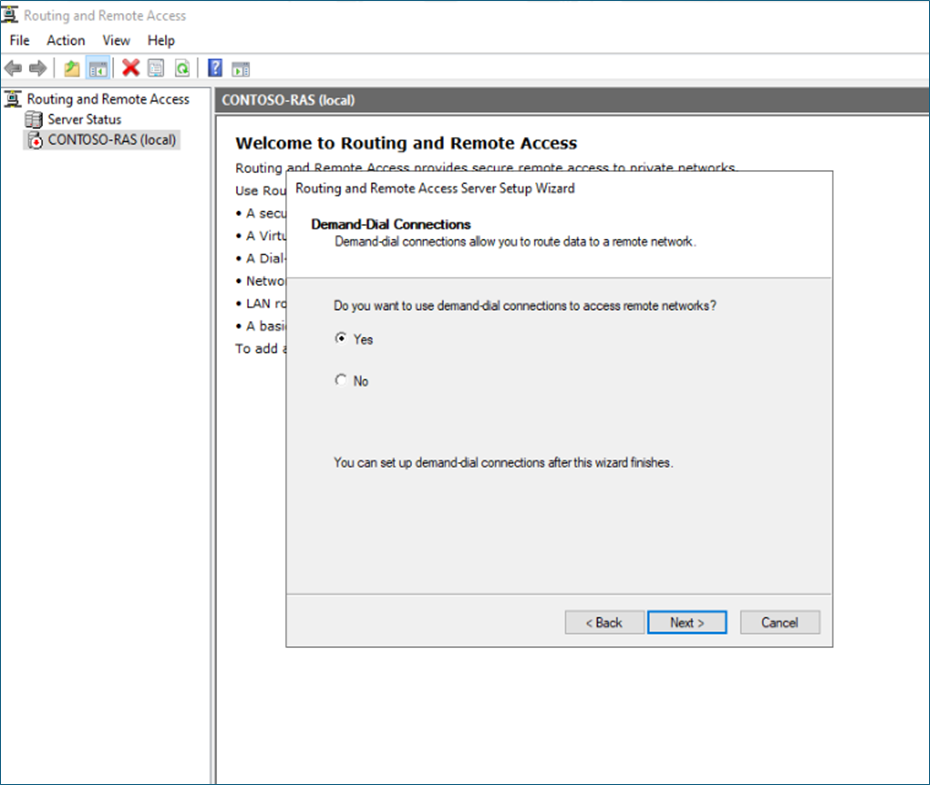
Select – Secure connection between two private networks.


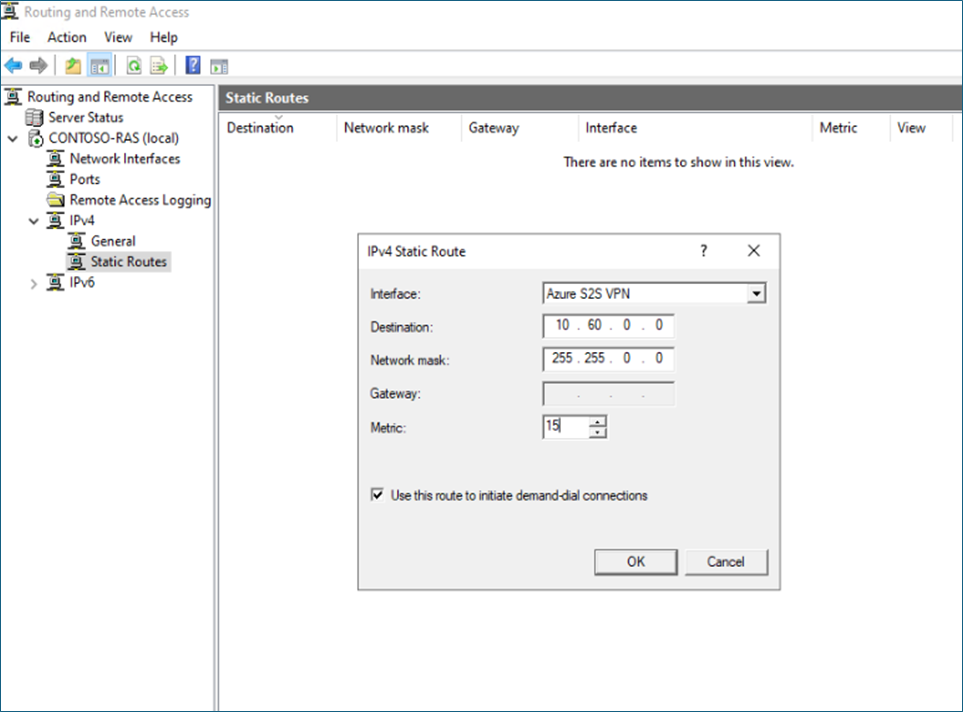
Right-click on the IPv4 static route – New static route, select the VPN interface, and Azure Private IP address range
In the Security tab, provide the shared key you defined in the Azure connection.
Now you can right-click and connect the connection.
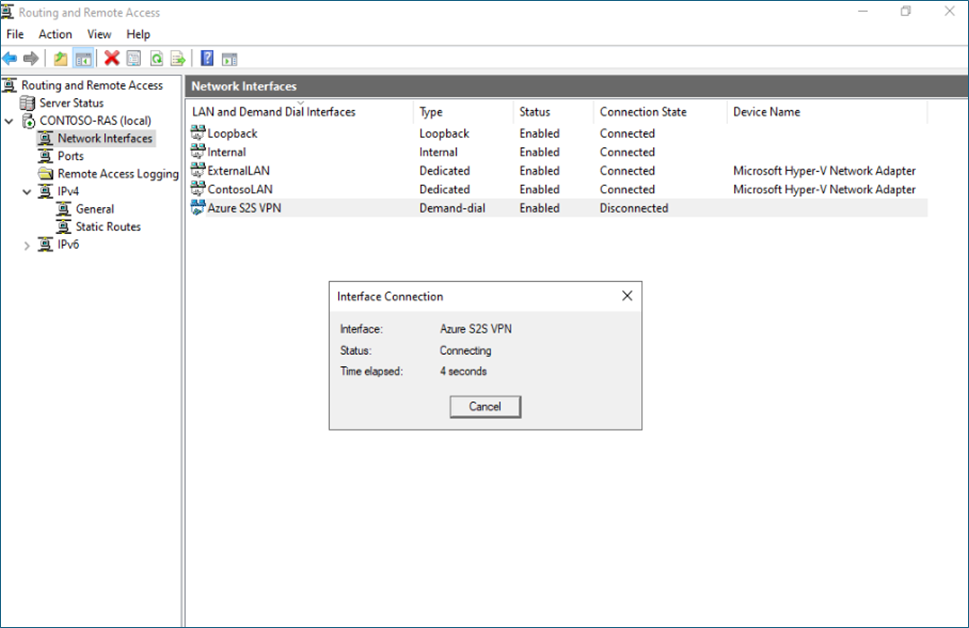
It should connect if all configurations are correct.
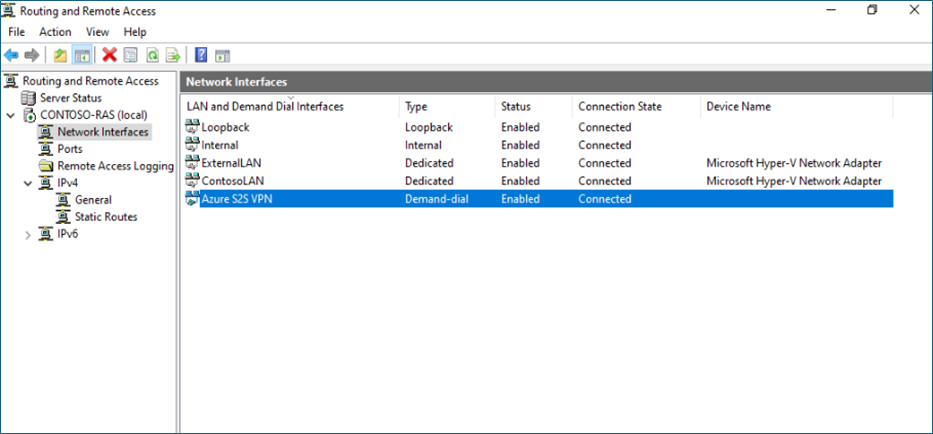
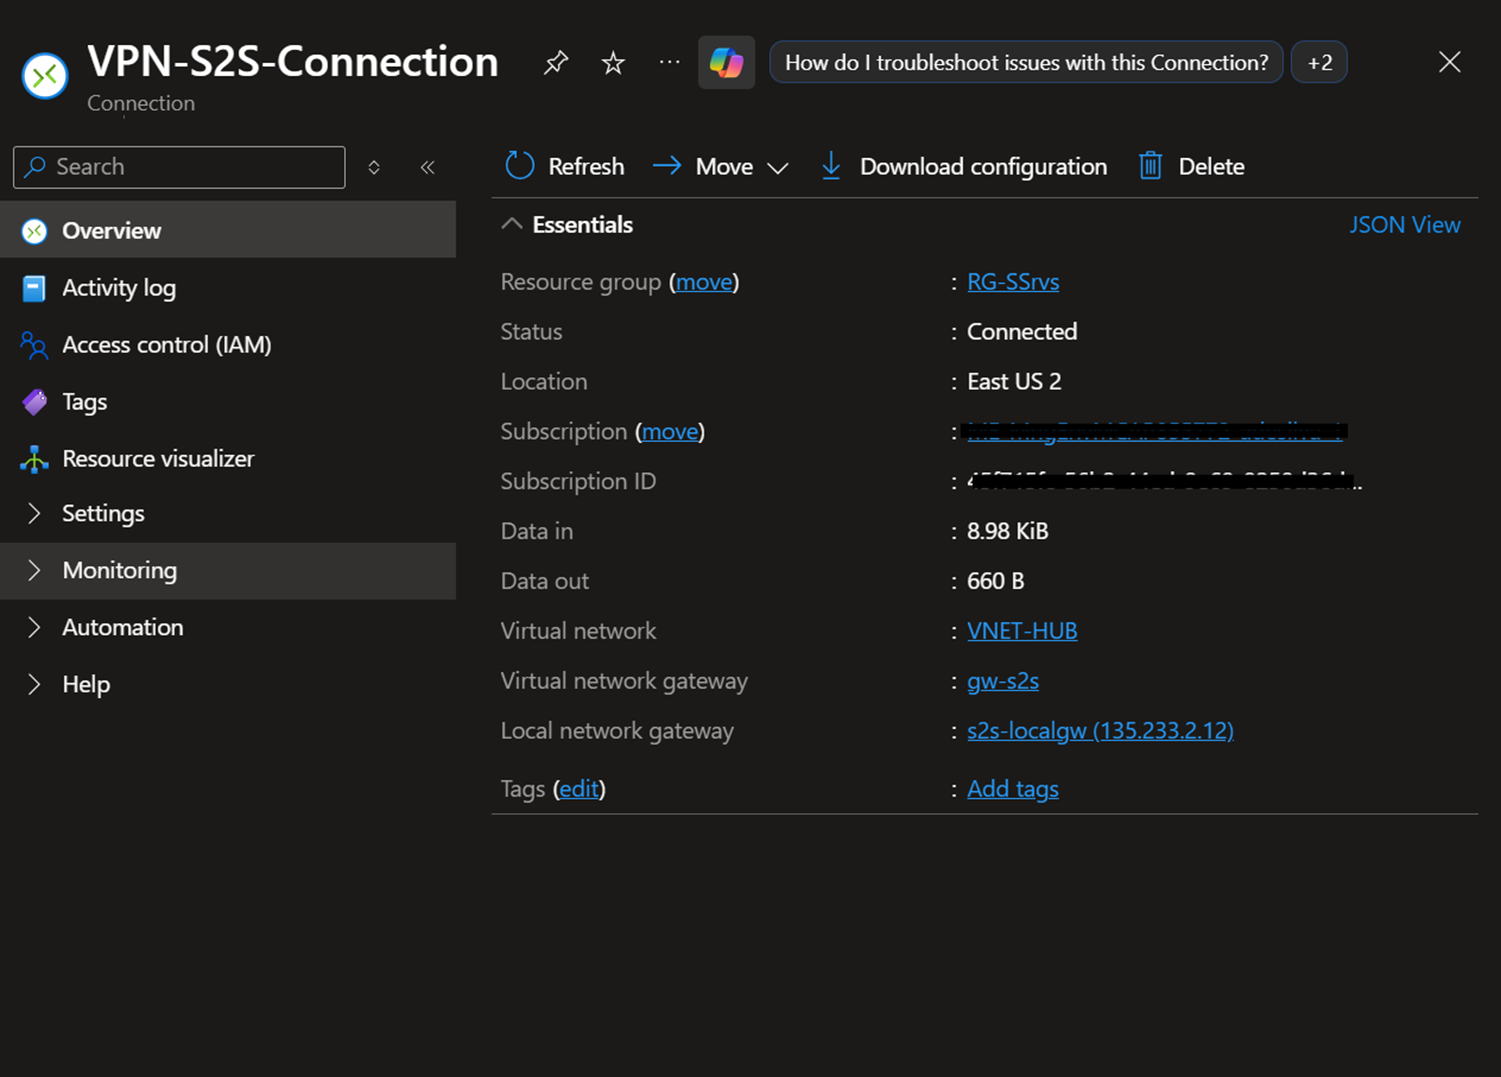
You can also verify from Azure Connection.
Hope this post is useful.
Thanks
